
Hello everyone,
I'd like to introduce you to my new playstation 2 portable that i've been cooking up for a while. I didn't even name it yet, but it'll probably be some generic one.
Anyways, Welcome!
With this playstation 2 project, it will have full compatibility, meaning any game that runs well with SMB connection, it'll be compatible. I'll be using a Raspberry pi 3B+ to host my server. And i will also be using the OFFICIAL PS2 CONTROLLER for full ps1/ps2 compatibility, actually, 70% of my motivation is coming from the fact that I'll be able to play the classical Crash Bandicoot on it .
.
So, Let me go over the things that'll be used in this project:
1.PS2 SCPH-79003(it was labeled 79001 on the cover but it had 79003 Motherboard for some reason but whatever), Advance trimmed.
2.4x NCR18650B paralleled lithium ion battery.
3.PS2PMS.
4.U-Amp for my audio solution with 2x 8Ohm speakers.
5.OFFICIAL PS2 CONTROLLER.
6. 5" 4:3 VGA LCD Display for the best quality.
7.Raspberry pi 3b+ for the SMB method(BEST WAY TO LOAD GAMES).
I'd like to extend my appreciation to @Matthew for his amazing work with the ps2+. i have a couple of boards with the ps2+ that'll hopefully be used in the future") .
.
First I'll go over the motherboard trim and then I'll show you guys the 3D models.
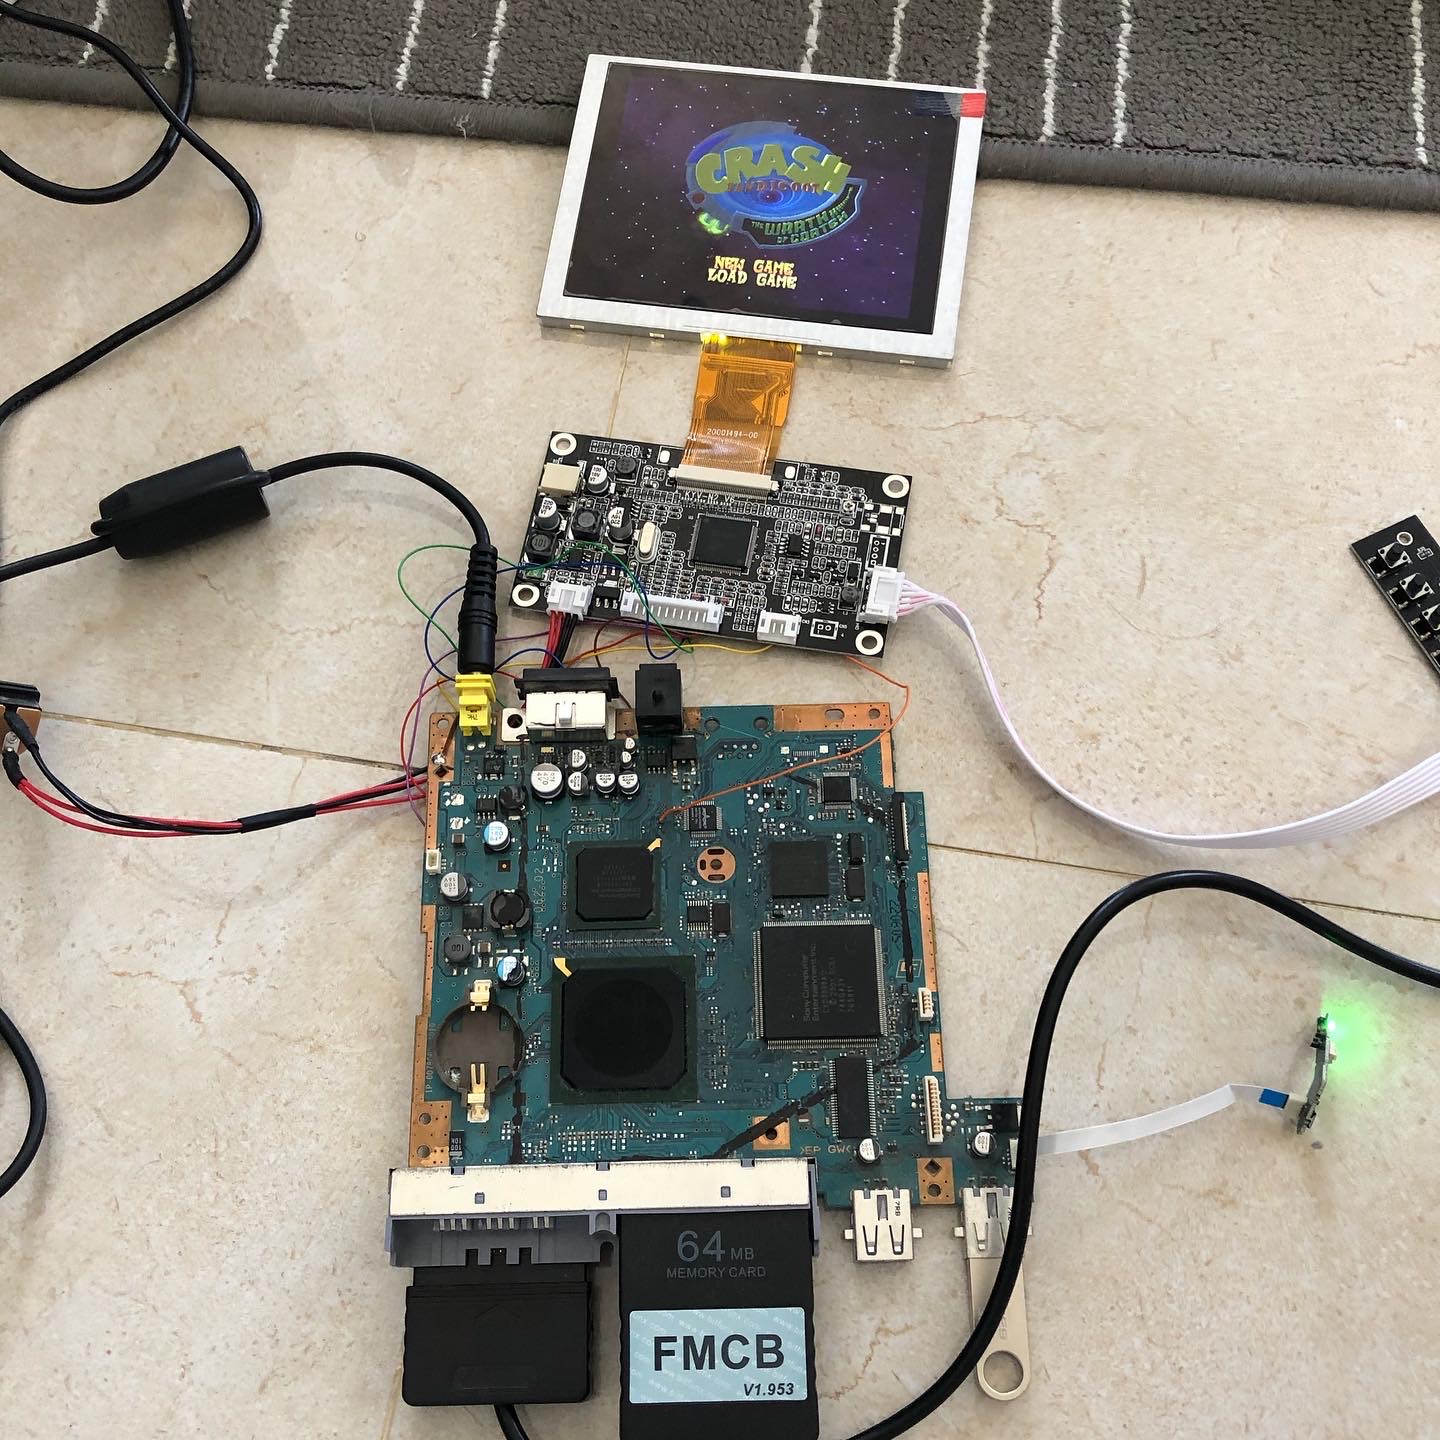
One thing to note is will be using composite for ps1 games, seems like they fail to show up when it's in VGA mode(White picture), so i will connect both VGA and Composite simultaneously and just switch to composite whenever i want to play PS1 games(please tell me if there's something wrong with this method).
Soon ill start the printing process and after that hopefully the assembly and the finished product, Stay Tuned!
I'd like to thank @Gman for his extensive help with the ps2 motherboard knowledge and his PCB's 3d models that he provided. @ABH for his continuous knowledge input since the start of the project!
I'd like to introduce you to my new playstation 2 portable that i've been cooking up for a while. I didn't even name it yet, but it'll probably be some generic one.
Anyways, Welcome!
With this playstation 2 project, it will have full compatibility, meaning any game that runs well with SMB connection, it'll be compatible. I'll be using a Raspberry pi 3B+ to host my server. And i will also be using the OFFICIAL PS2 CONTROLLER for full ps1/ps2 compatibility, actually, 70% of my motivation is coming from the fact that I'll be able to play the classical Crash Bandicoot on it
.So, Let me go over the things that'll be used in this project:
1.PS2 SCPH-79003(it was labeled 79001 on the cover but it had 79003 Motherboard for some reason but whatever), Advance trimmed.
2.4x NCR18650B paralleled lithium ion battery.
3.PS2PMS.
4.U-Amp for my audio solution with 2x 8Ohm speakers.
5.OFFICIAL PS2 CONTROLLER.
6. 5" 4:3 VGA LCD Display for the best quality.
7.Raspberry pi 3b+ for the SMB method(BEST WAY TO LOAD GAMES).
I'd like to extend my appreciation to @Matthew for his amazing work with the ps2+. i have a couple of boards with the ps2+ that'll hopefully be used in the future
.First I'll go over the motherboard trim and then I'll show you guys the 3D models.
One thing to note is will be using composite for ps1 games, seems like they fail to show up when it's in VGA mode(White picture), so i will connect both VGA and Composite simultaneously and just switch to composite whenever i want to play PS1 games(please tell me if there's something wrong with this method).
Before the trim, i tested the VGA and it's amazing!!
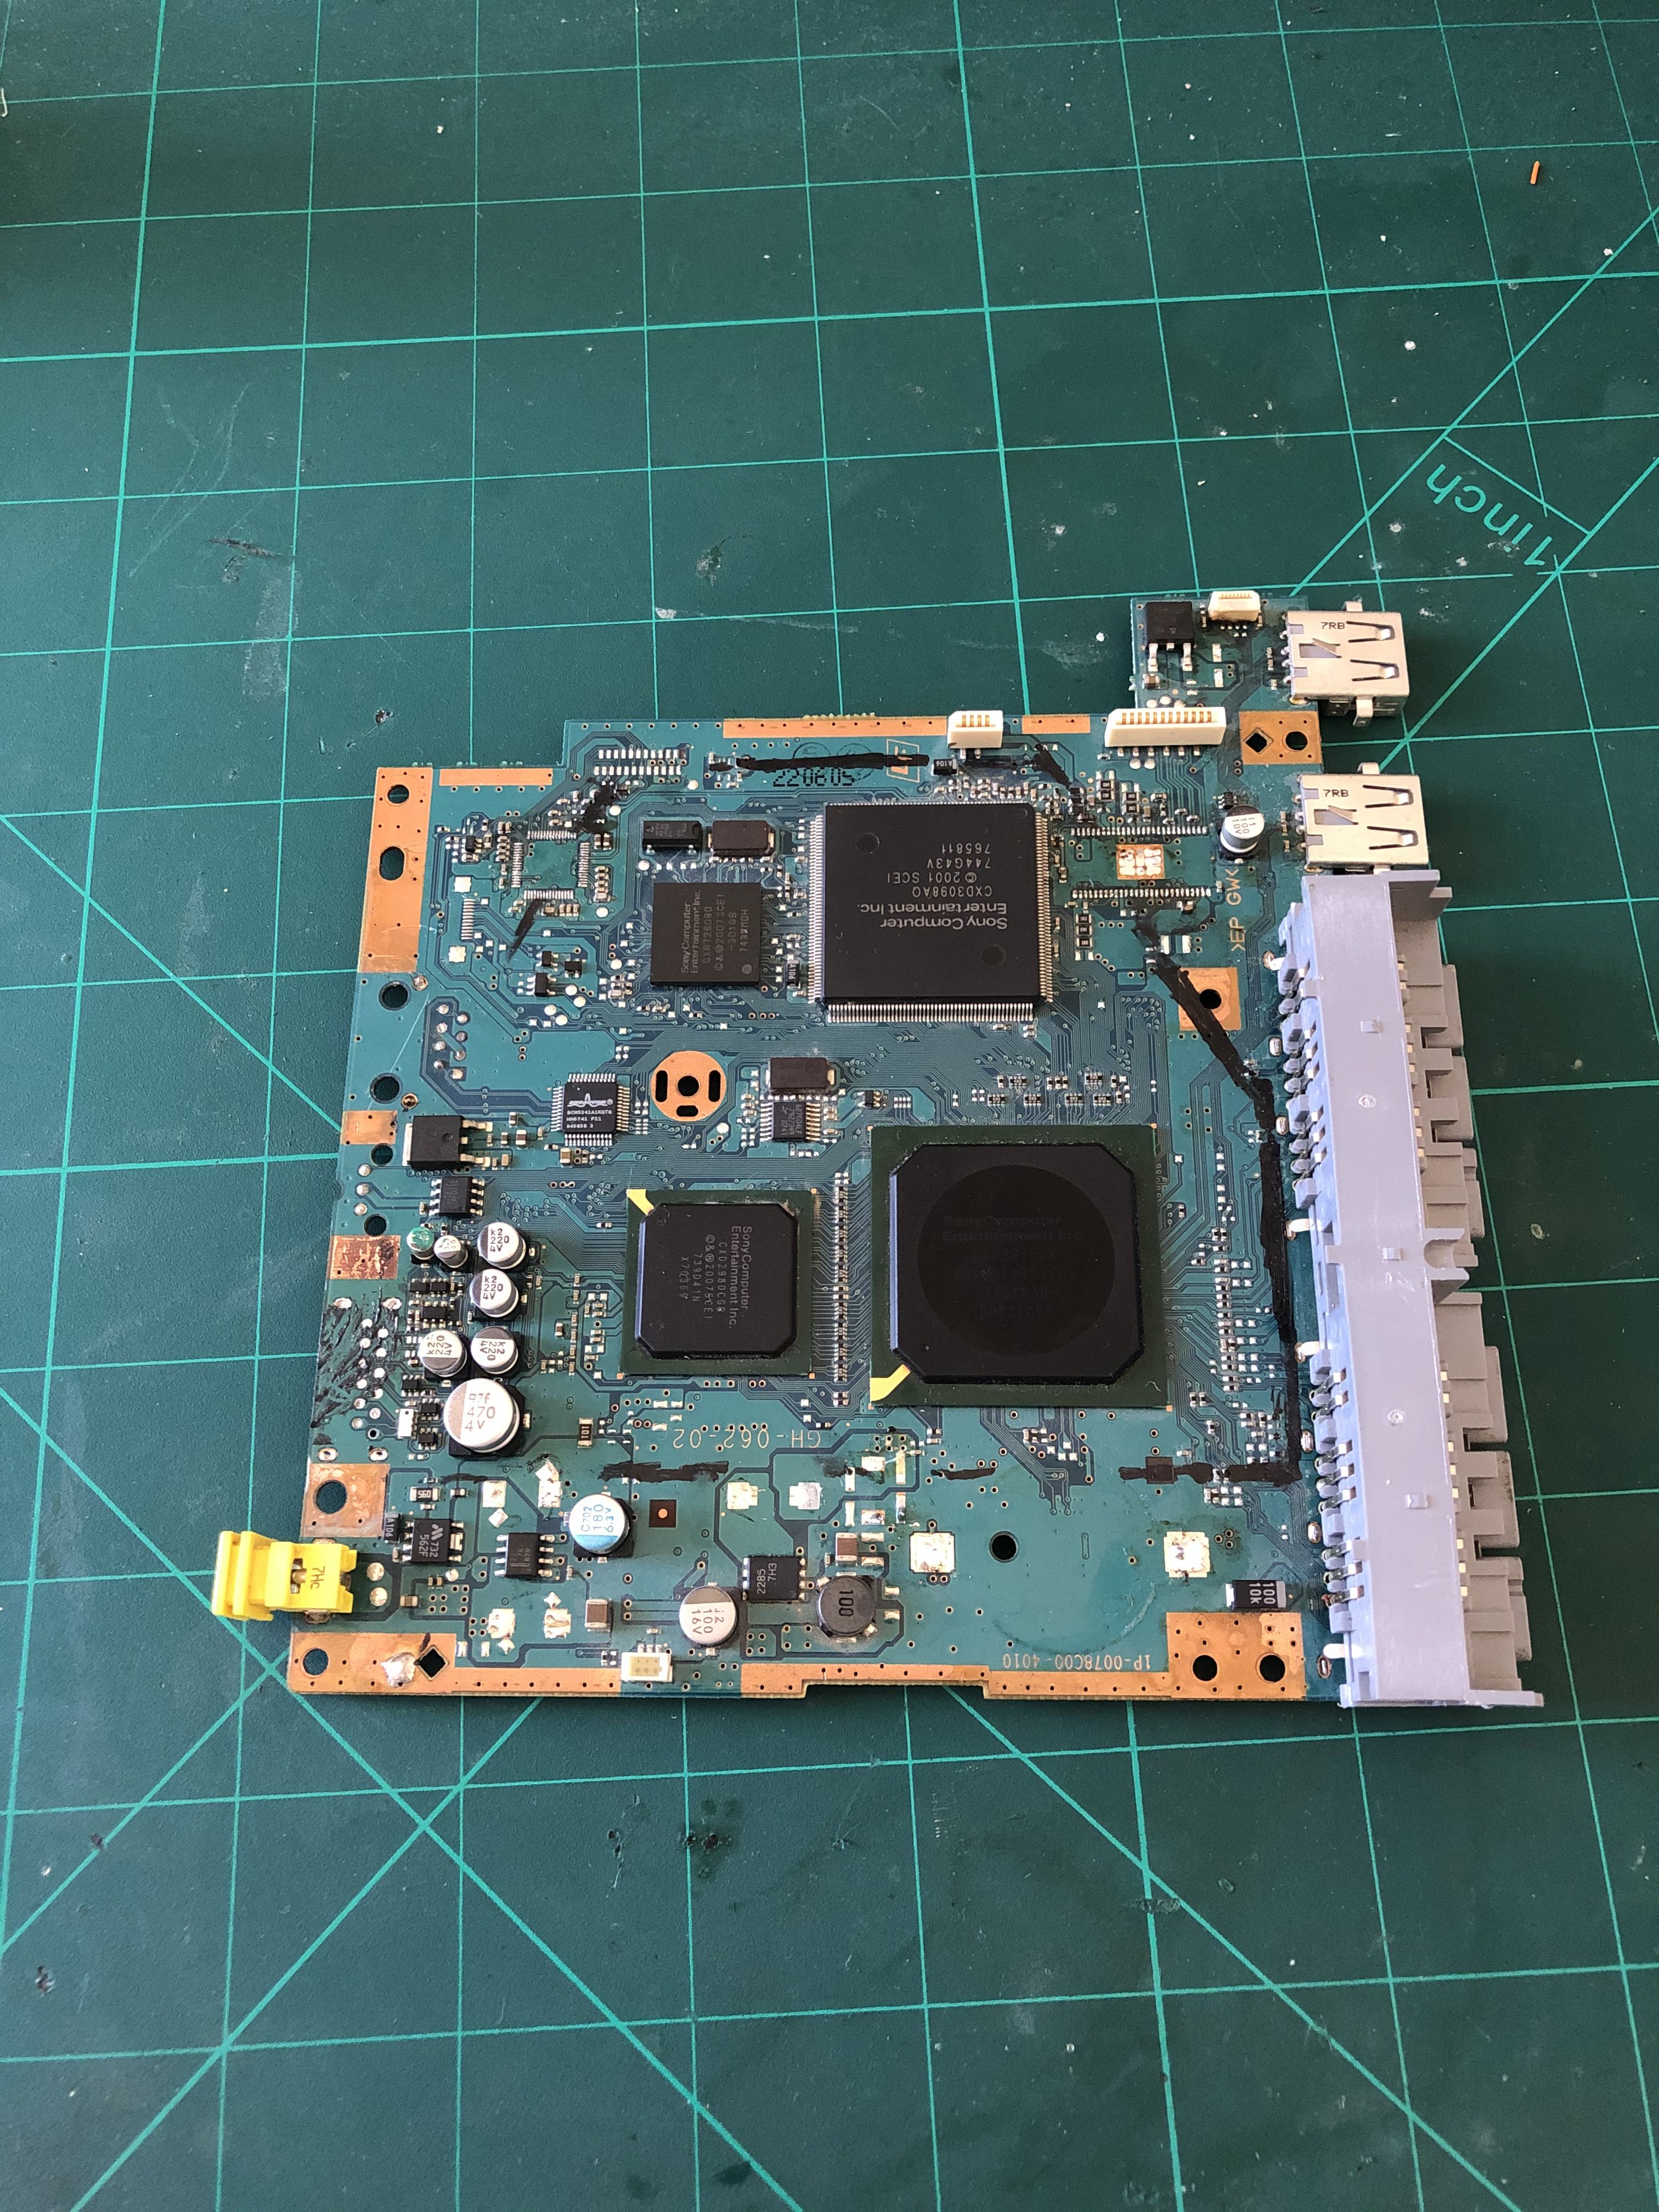
Here's my dirty work station + ps2 motherboard that has been marked up for the advanced trim.
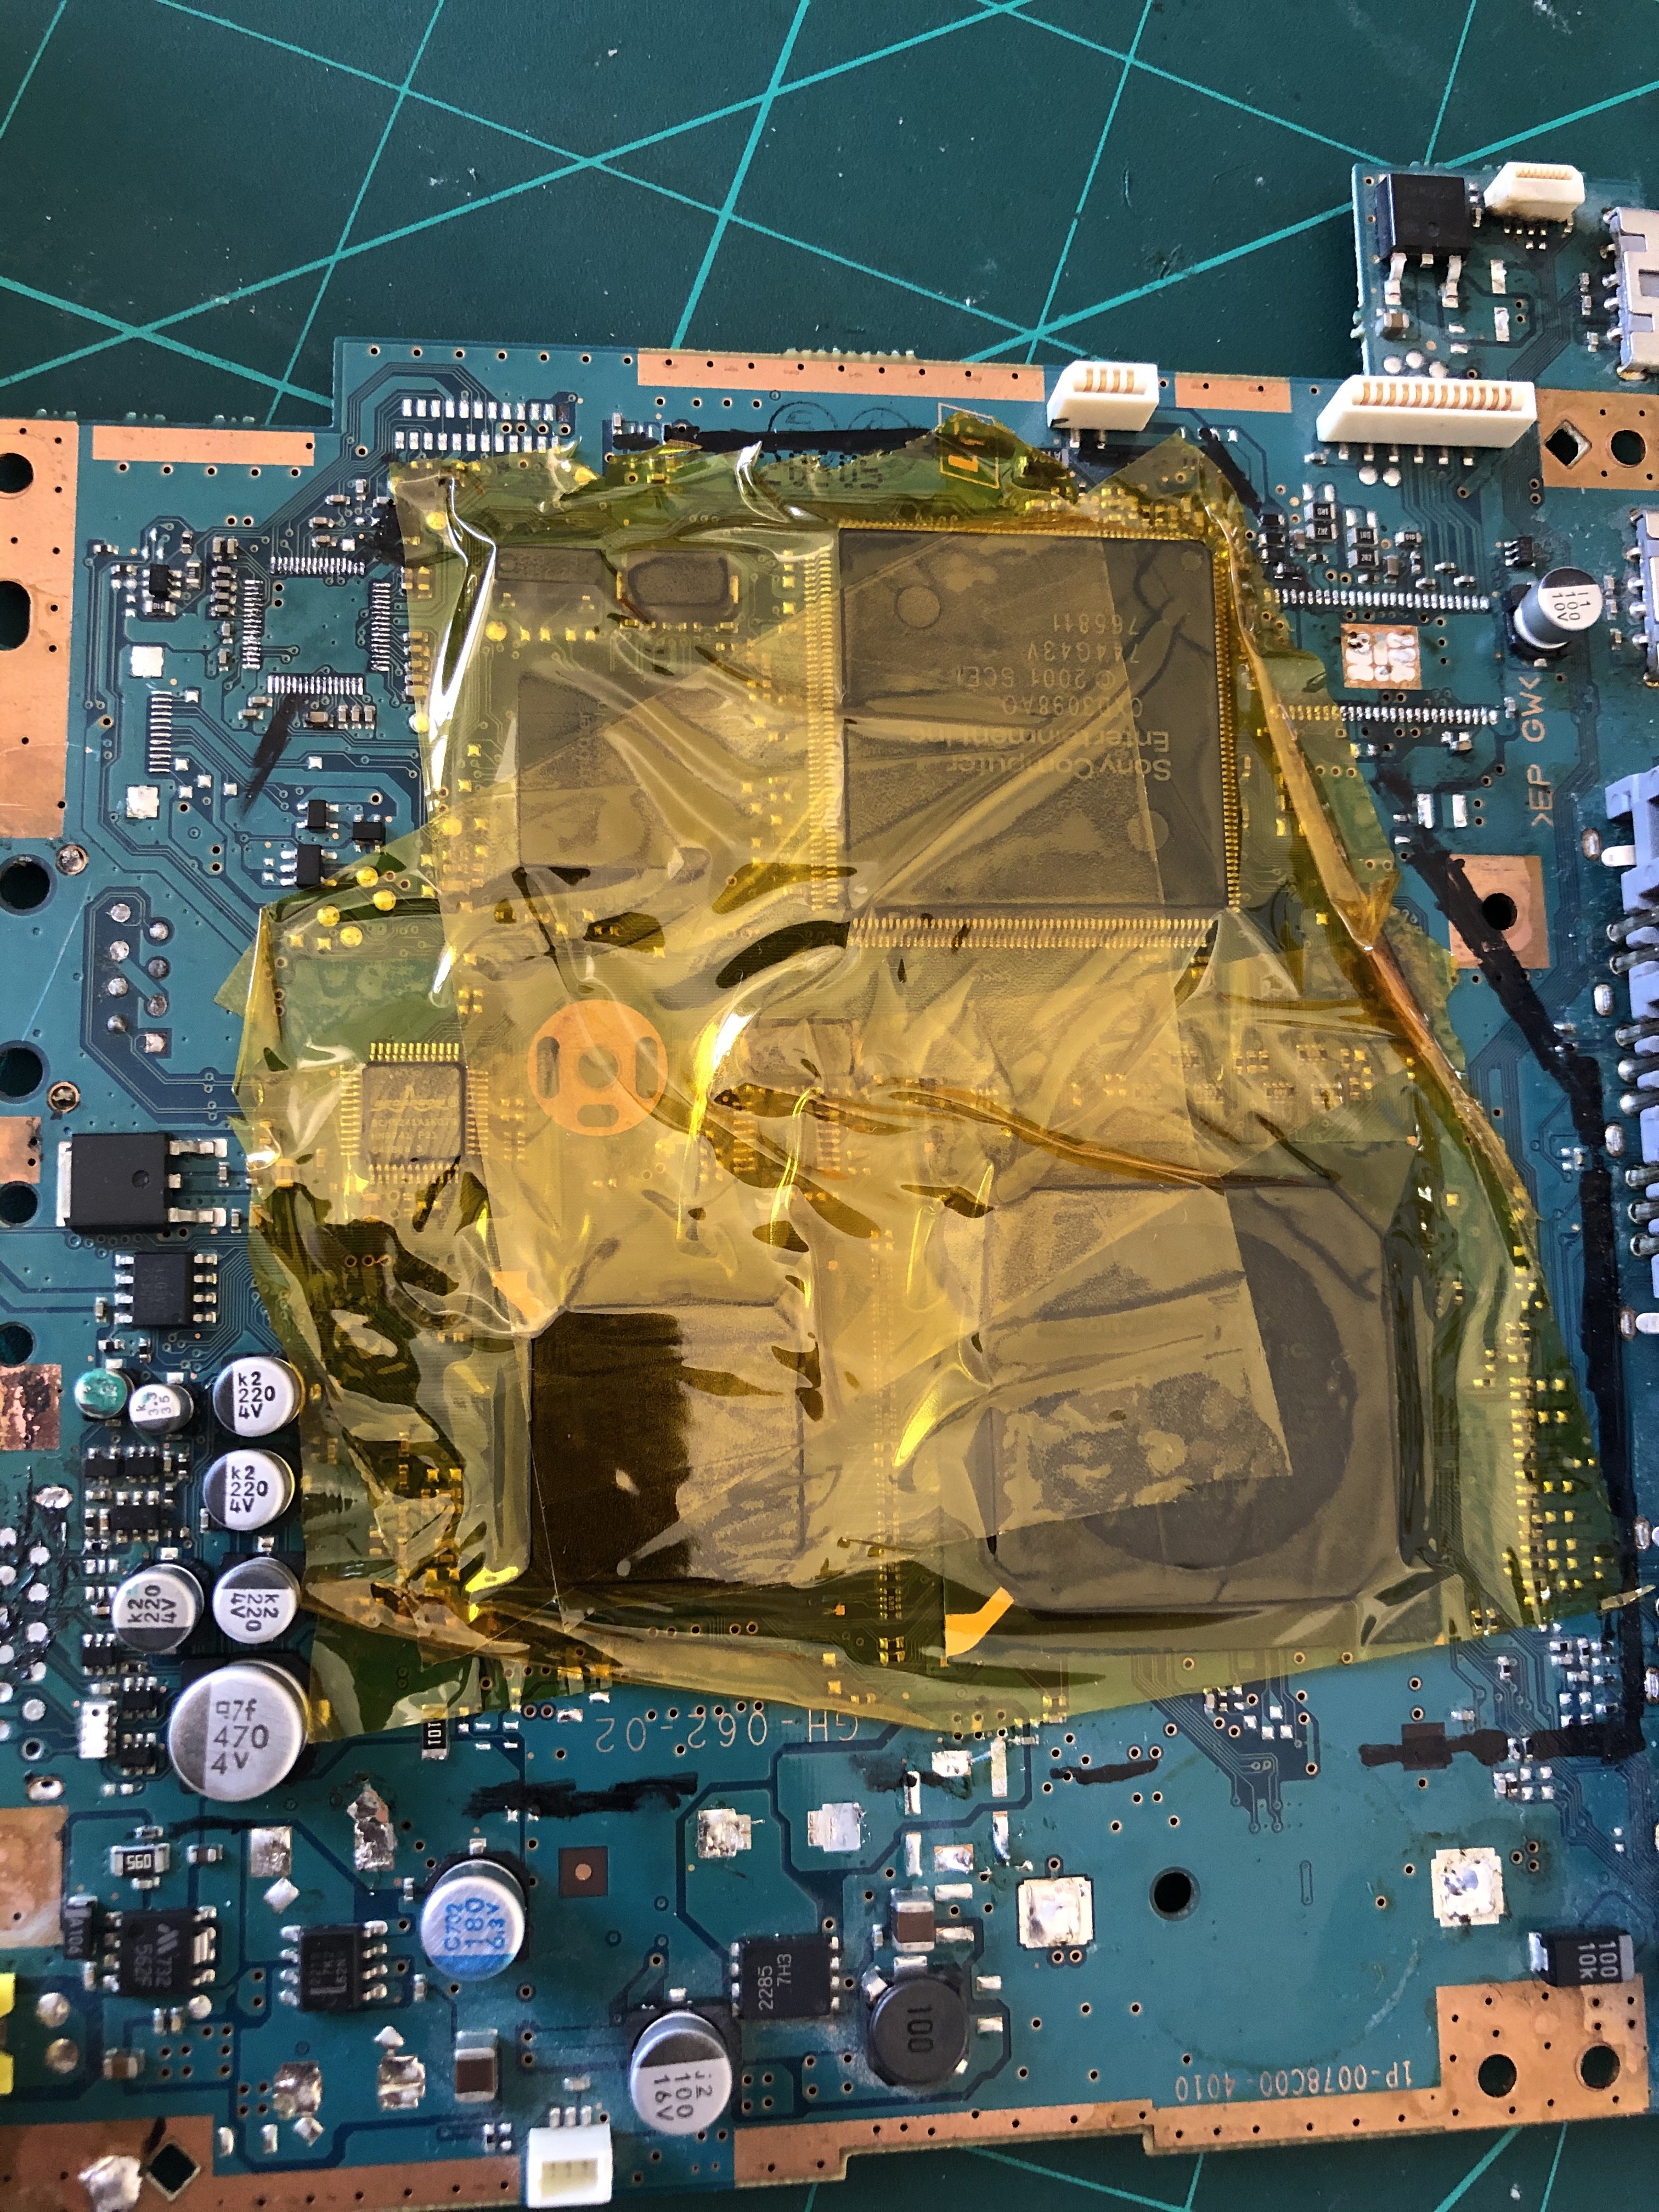
It was a fun experience since it's my first time trimming the ps2.
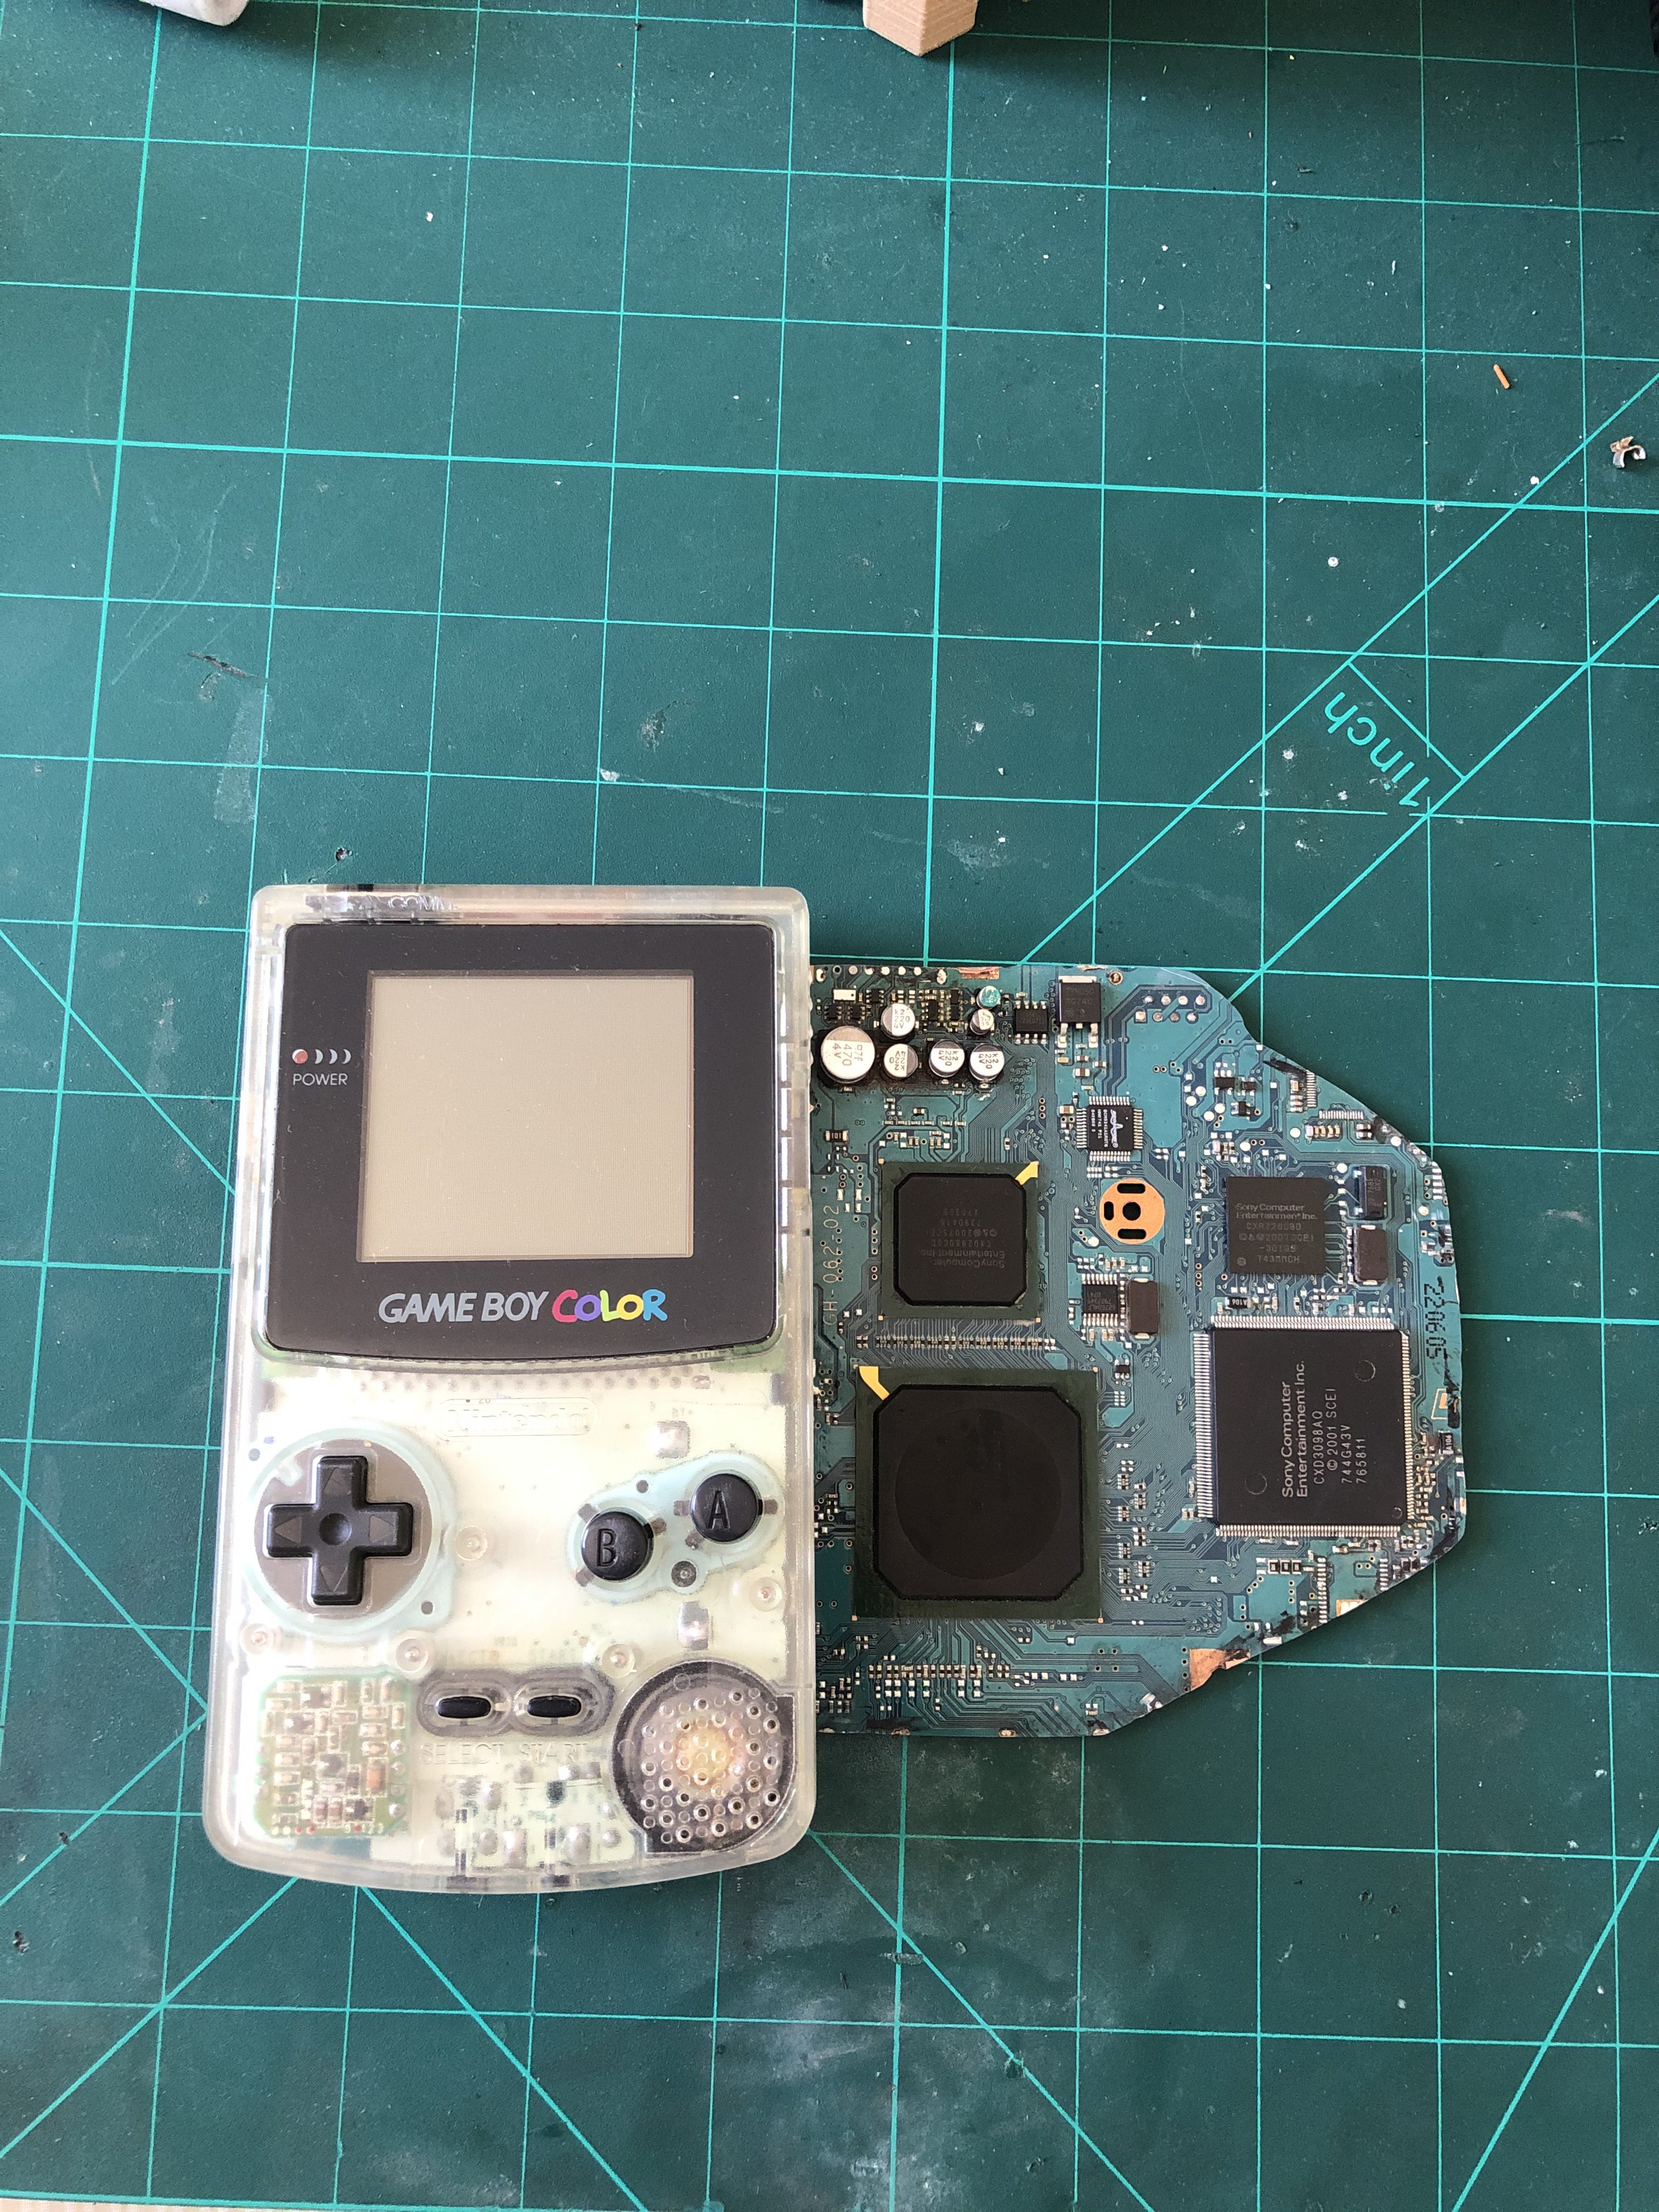
Size comparison With the GBC:
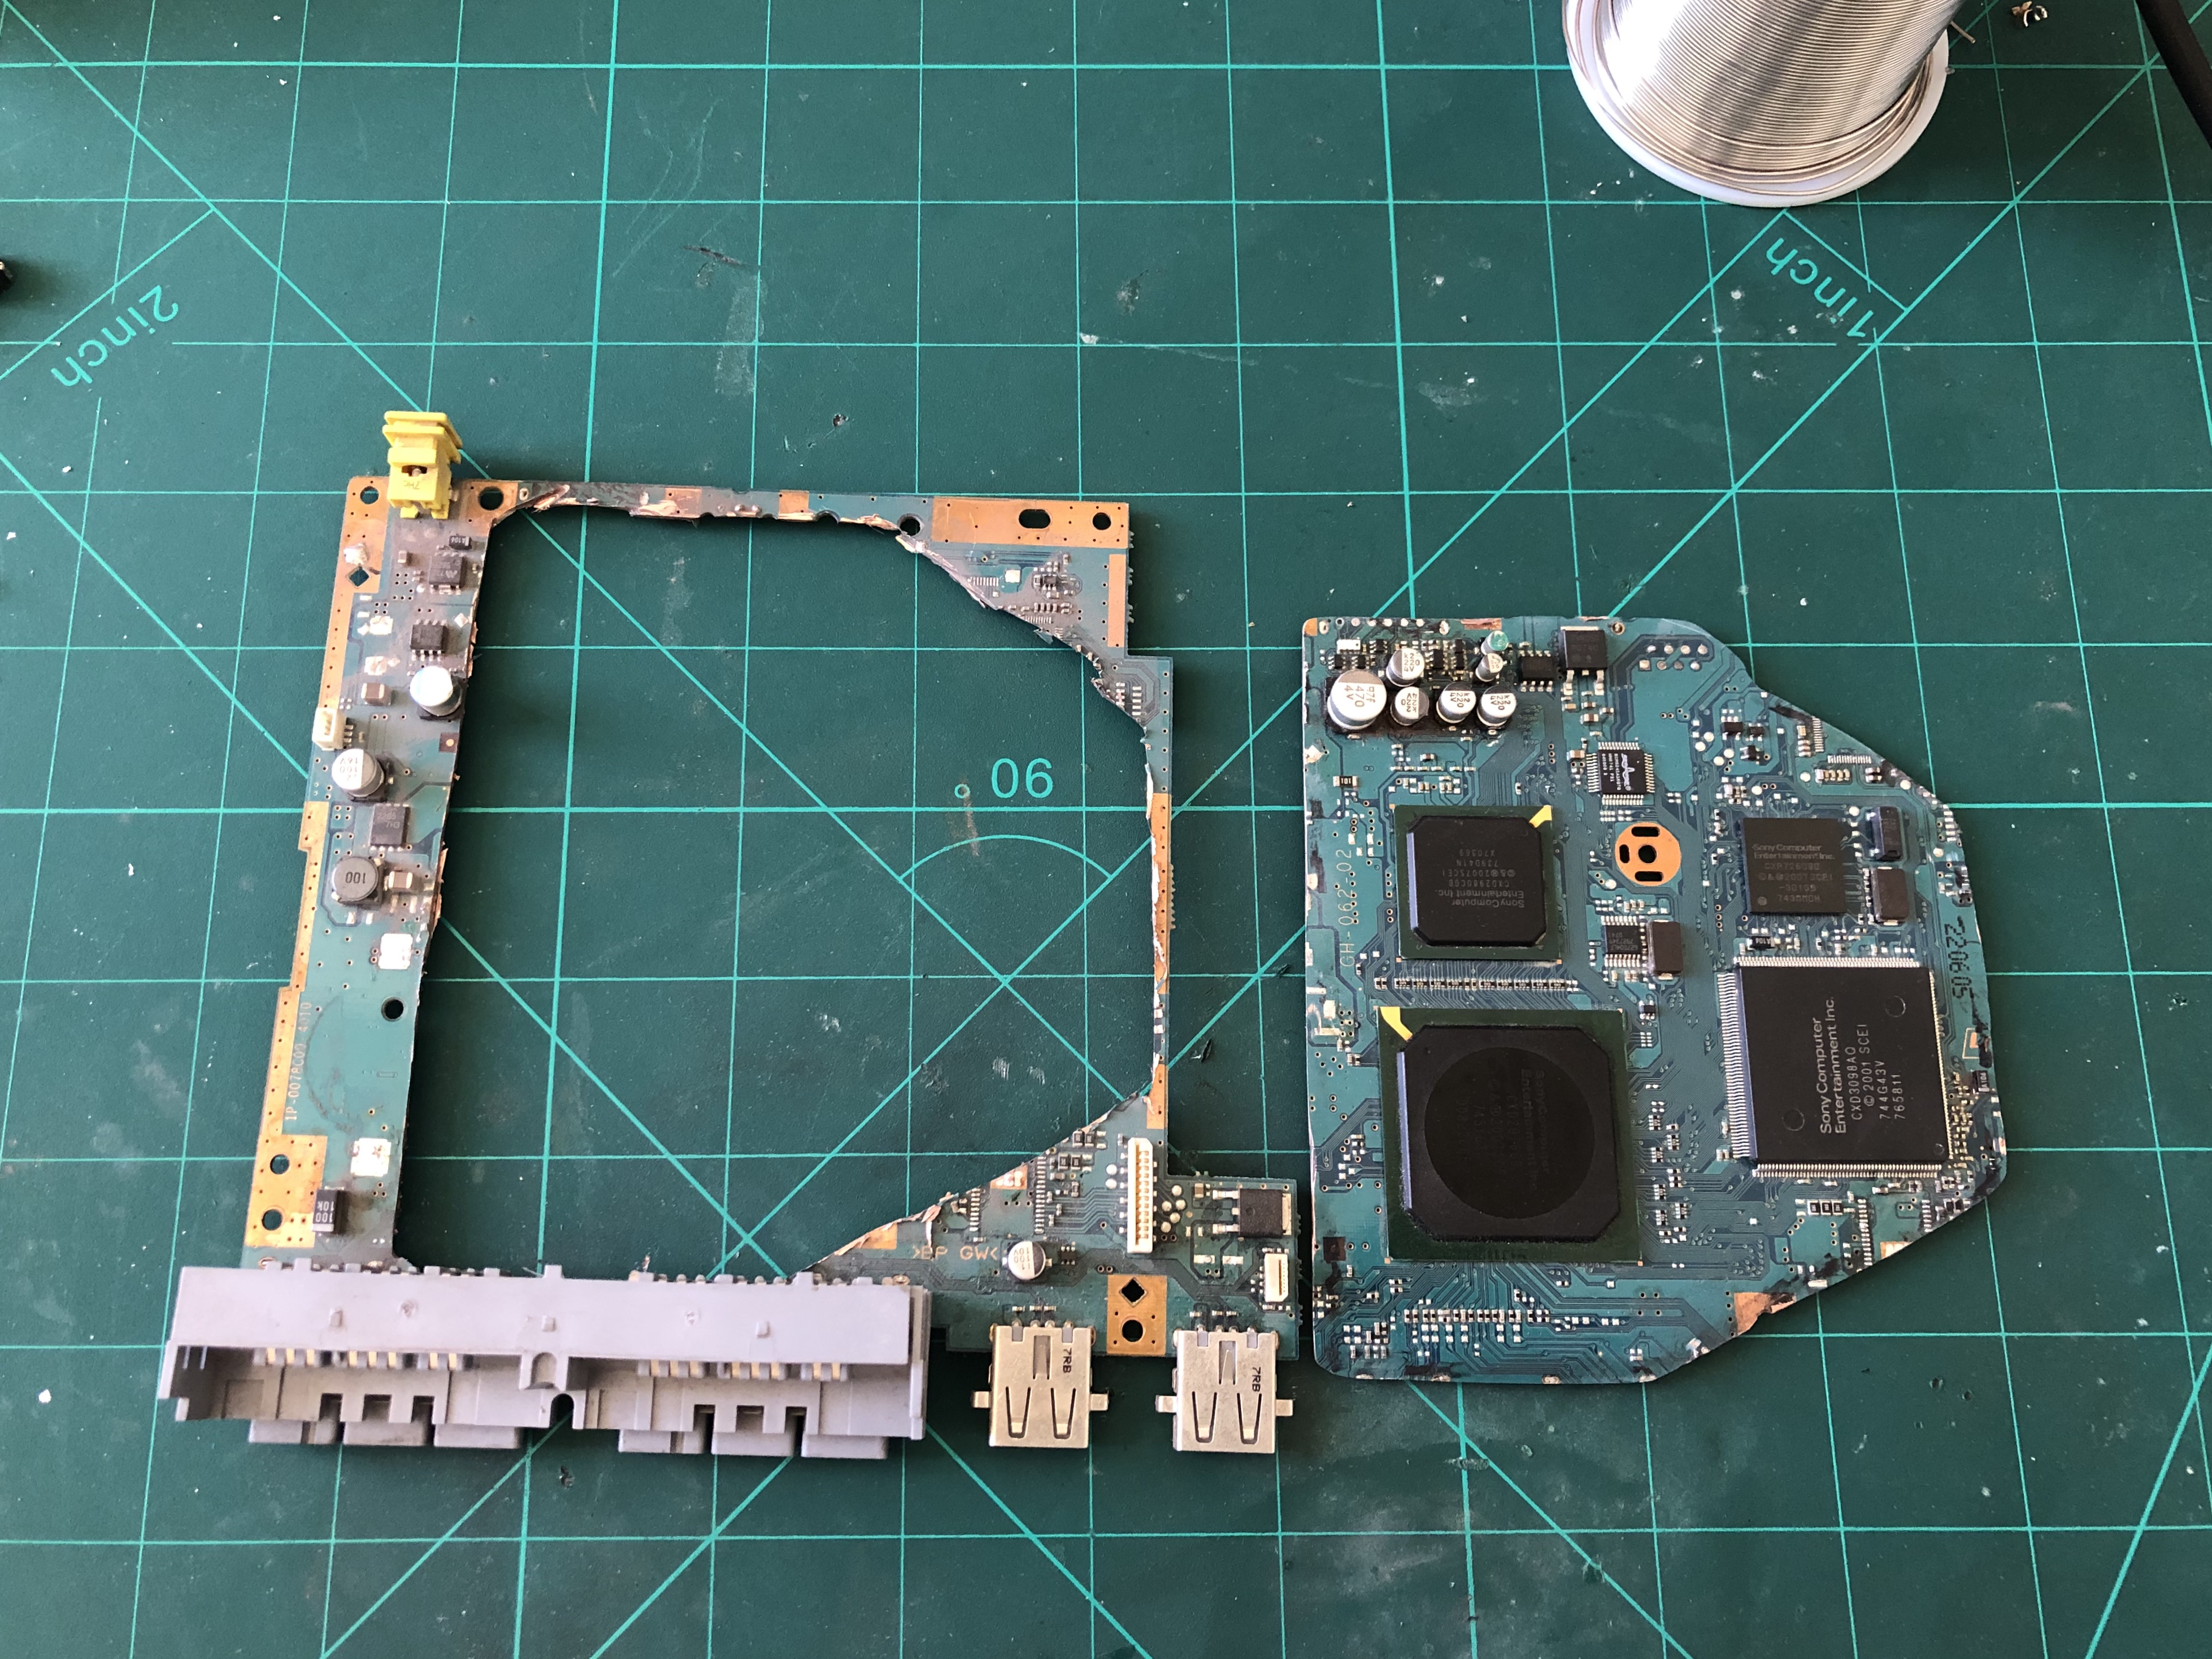
After that, i relocated the voltages to the required points and used VGA to test it:
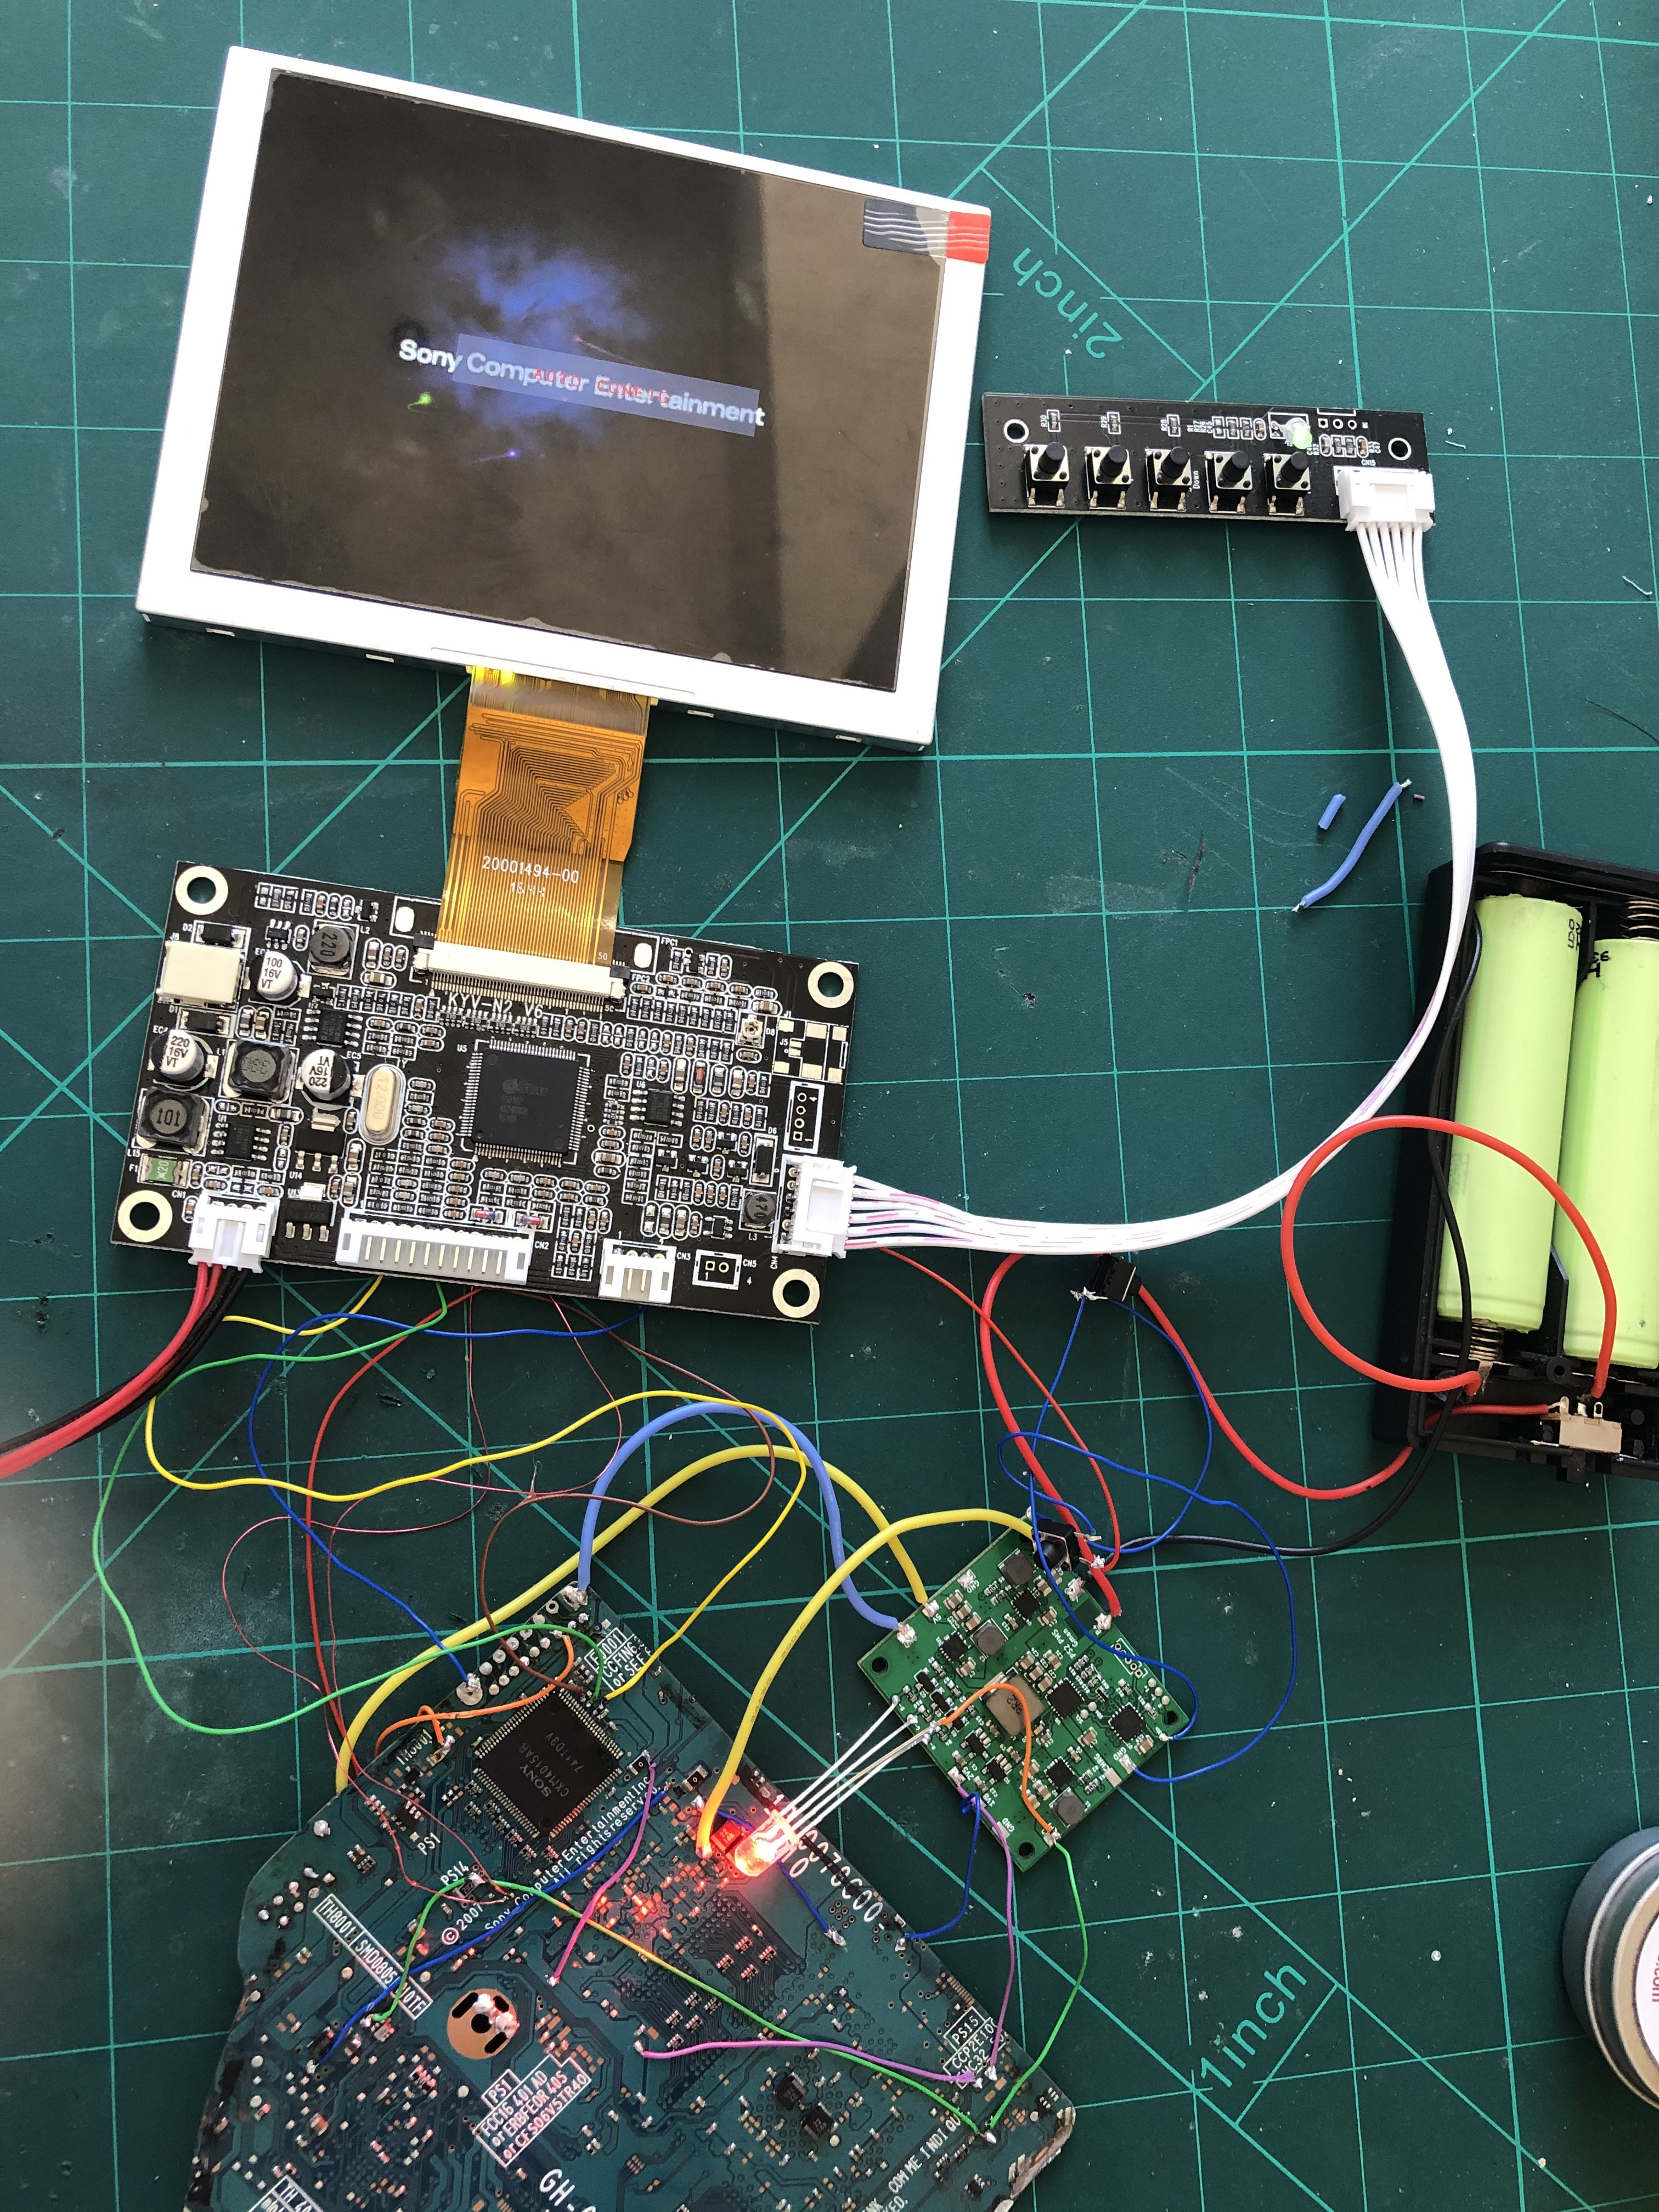
Those LED legs, i know, i've since desoldered them .
.
Anyways, that's a success, now to the 3D modeling part.
Here's my dirty work station + ps2 motherboard that has been marked up for the advanced trim.
It was a fun experience since it's my first time trimming the ps2.
Size comparison With the GBC:
After that, i relocated the voltages to the required points and used VGA to test it:
Those LED legs, i know, i've since desoldered them
.Anyways, that's a success, now to the 3D modeling part.
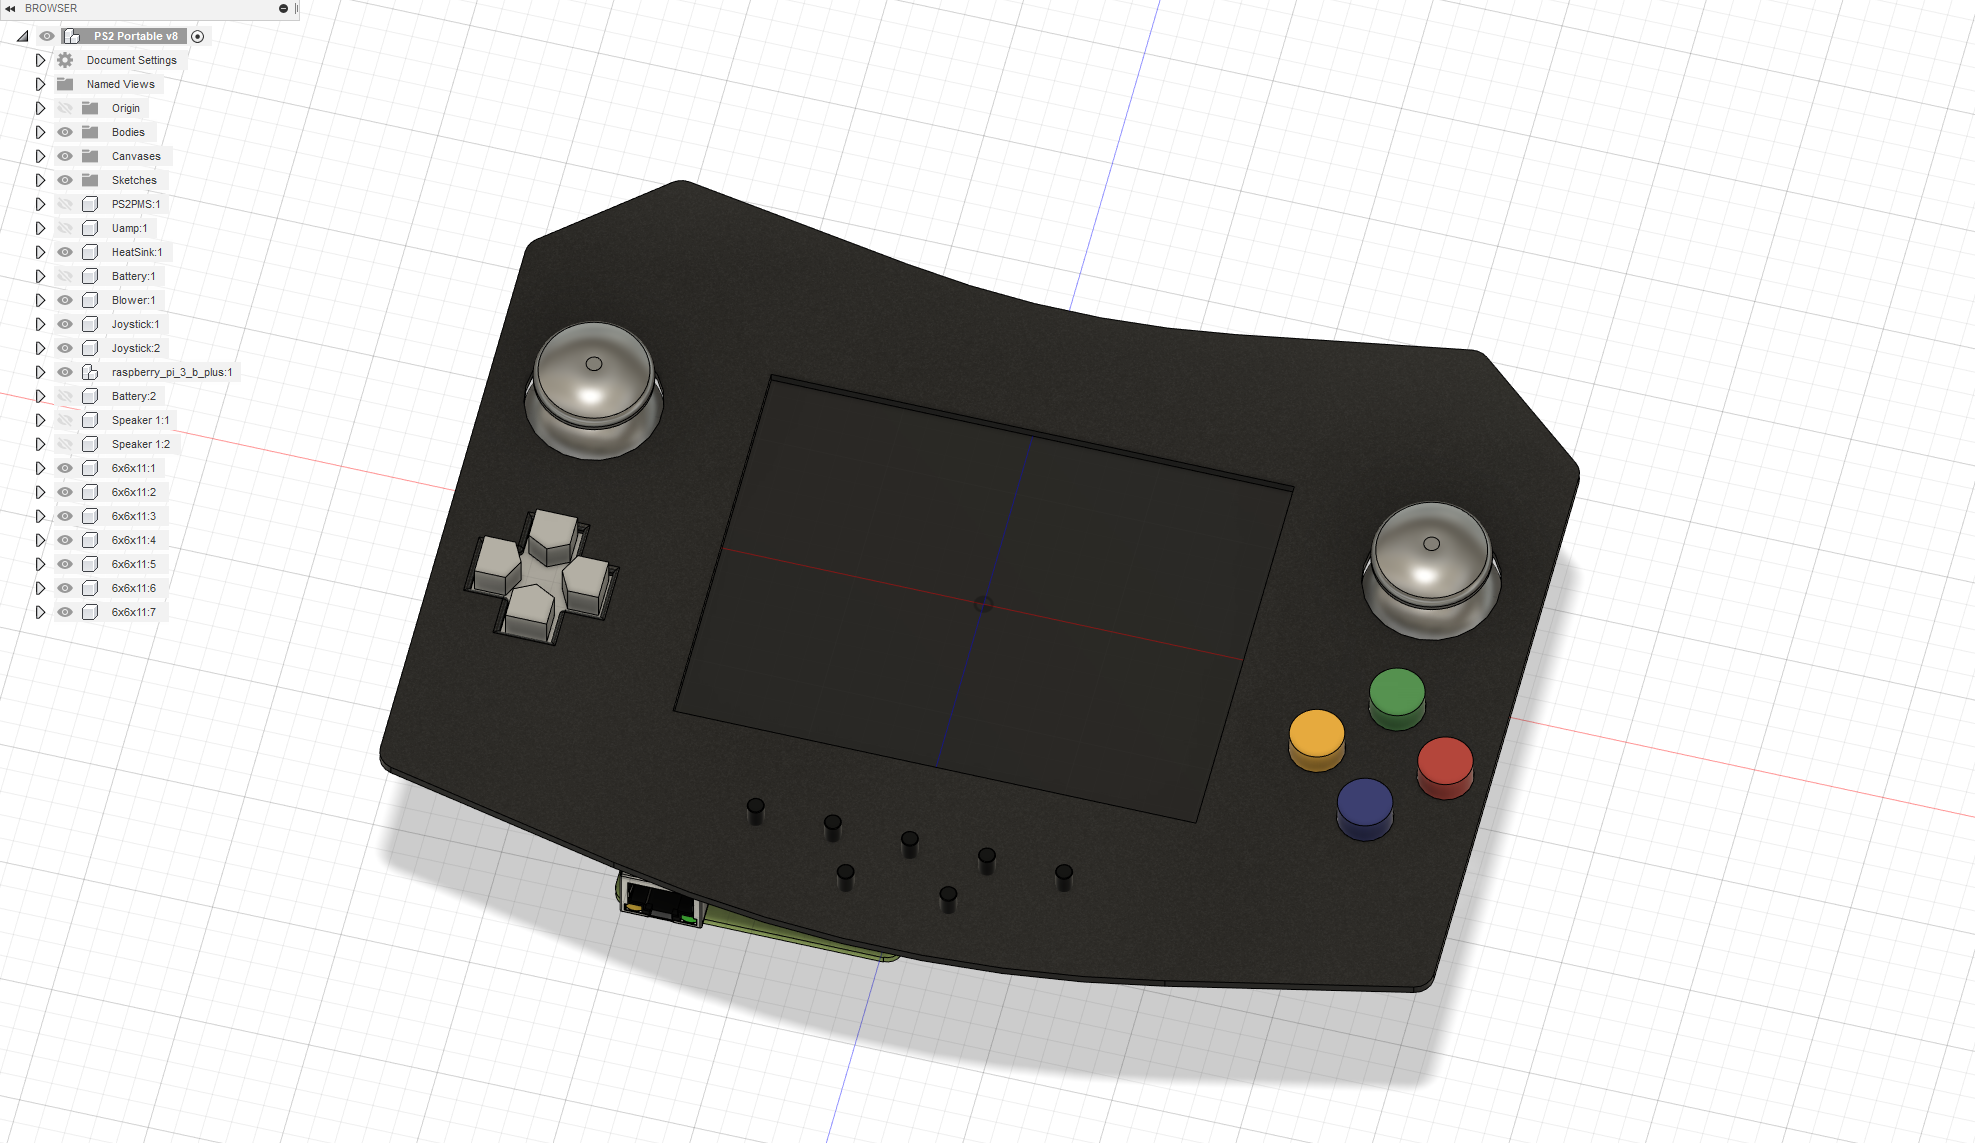
So Here's my INITIAL design which was changed afterwards because of the action buttons placement:
i Also Print tested it:
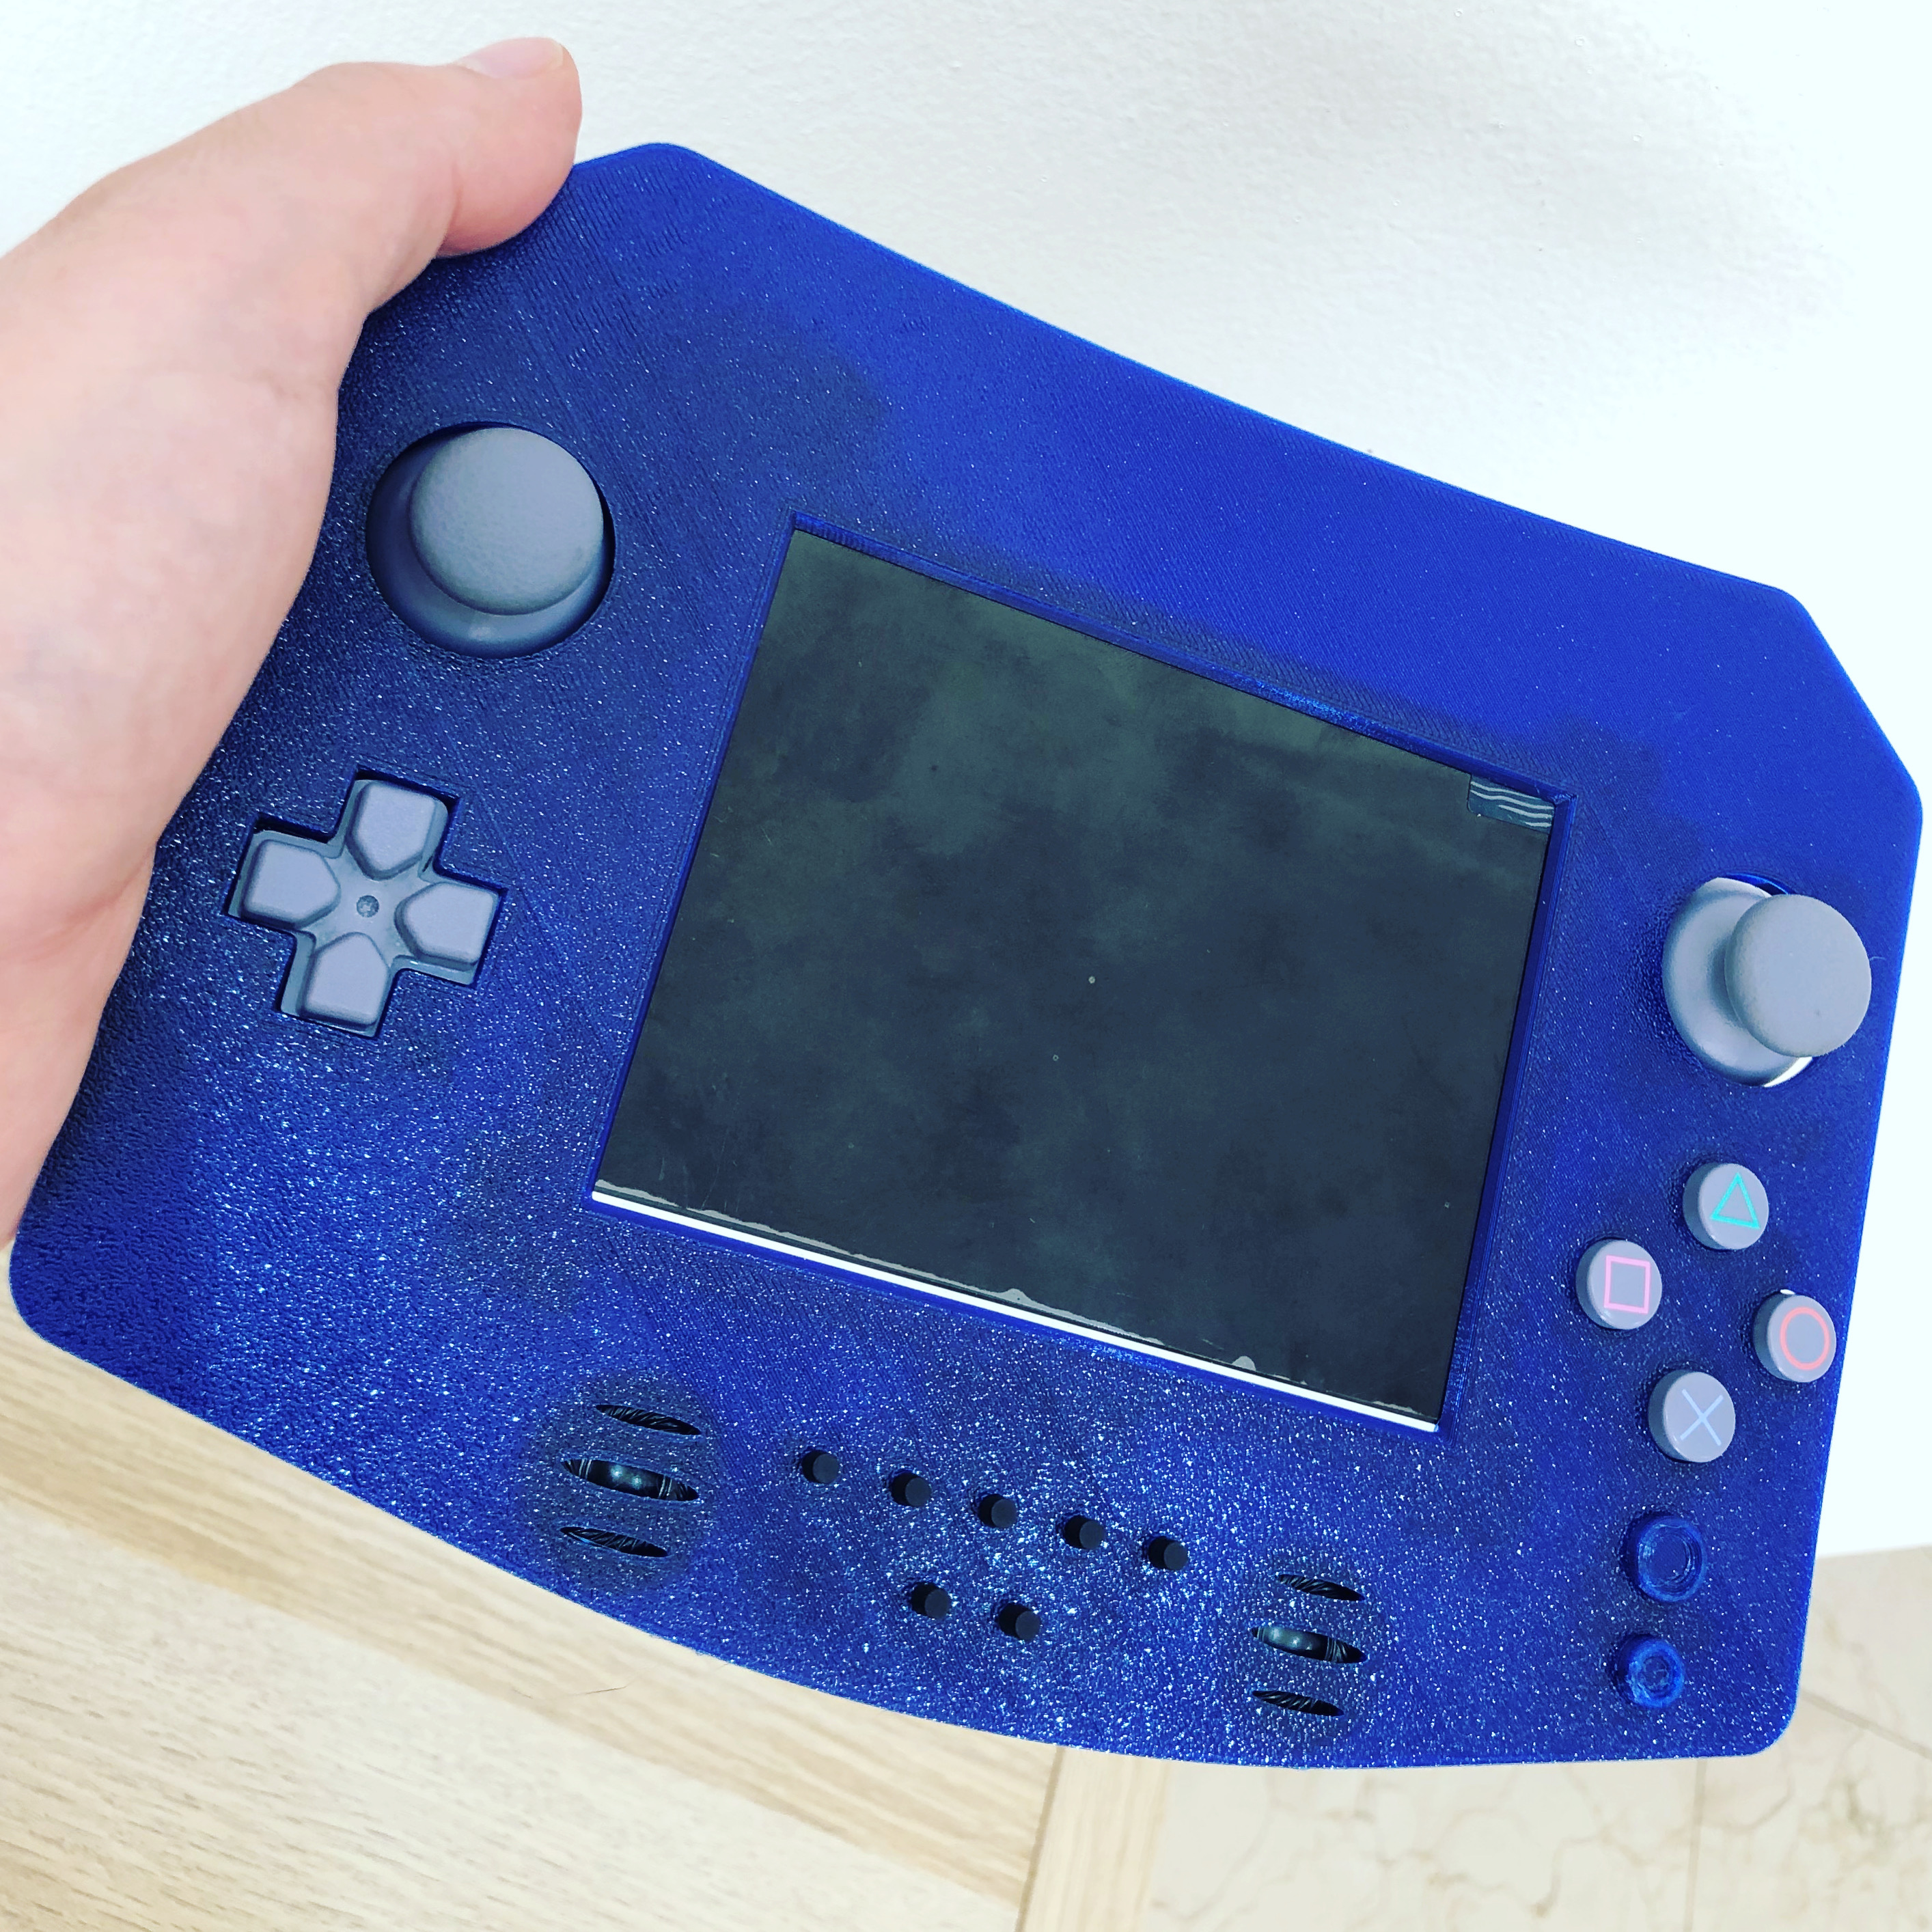
this is PETG material if anyone's interested. it kind of felt awkward to use the left analog as well as the action buttons so i settled with this:
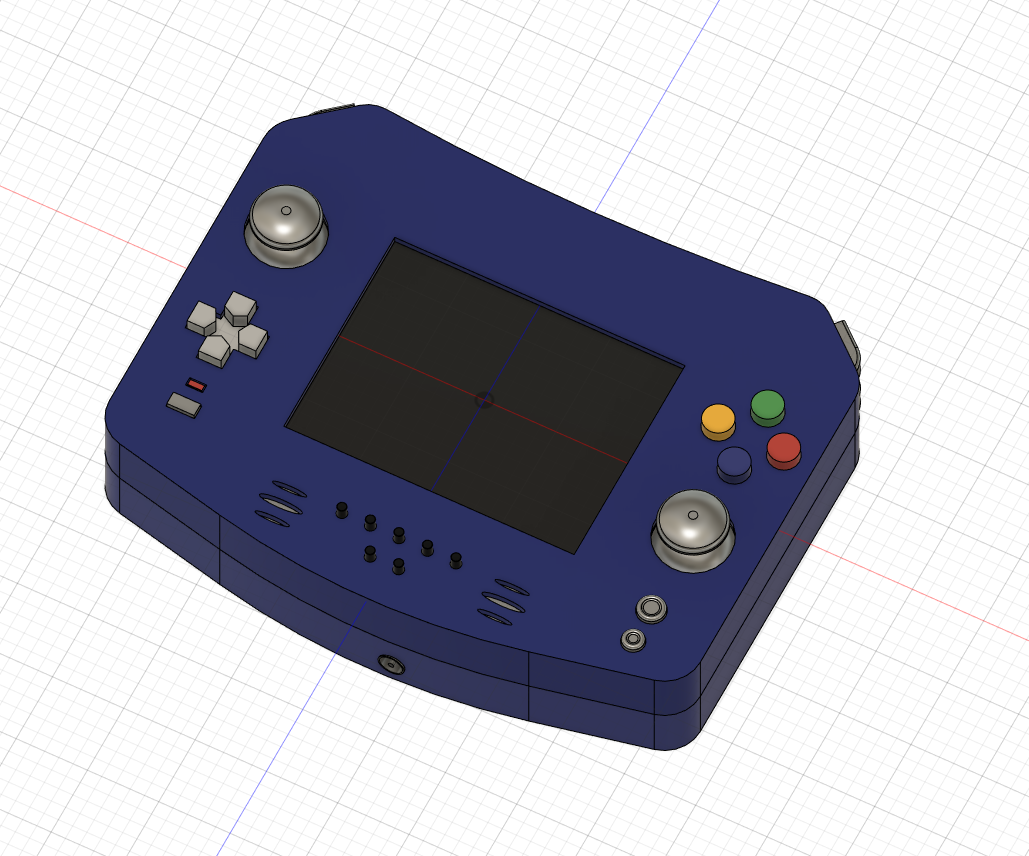
See that little red dot under the Dpad? that's the analog LED and under it is the button to indicate that the analog is ON or OFF(Some Ps1 games dont accept commands if the analog is ON like CRASH BANDICOOT 1).
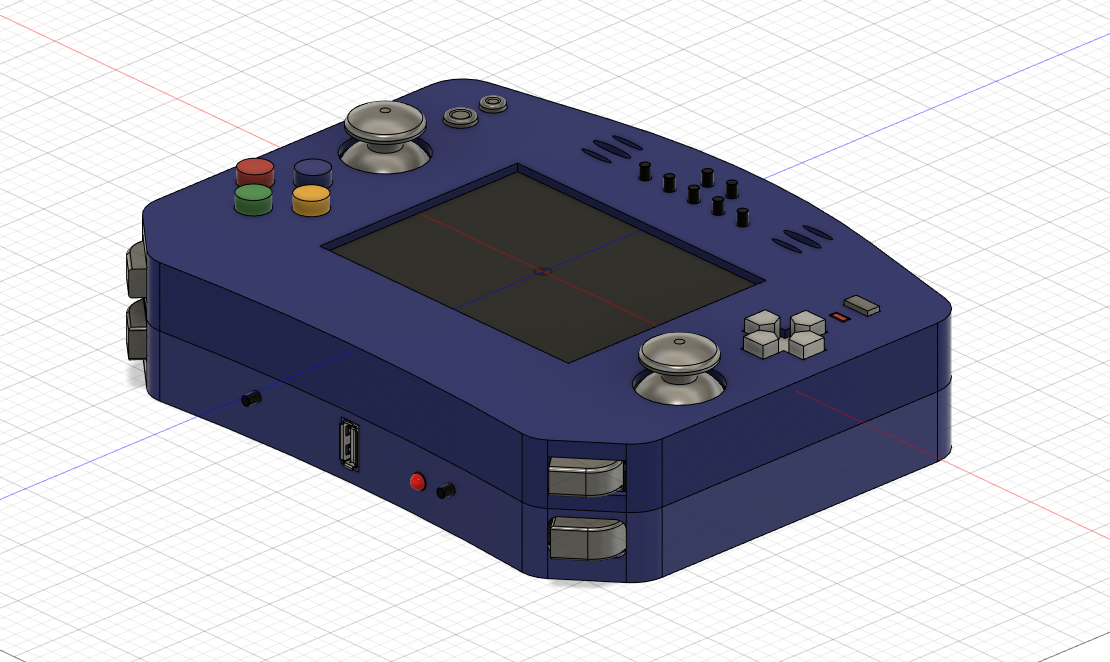
The button near the RGB LED will be the PMS power ON and the other button will be the RESET button of the PS2.
Here are the internals of the portable:
Without PS2:
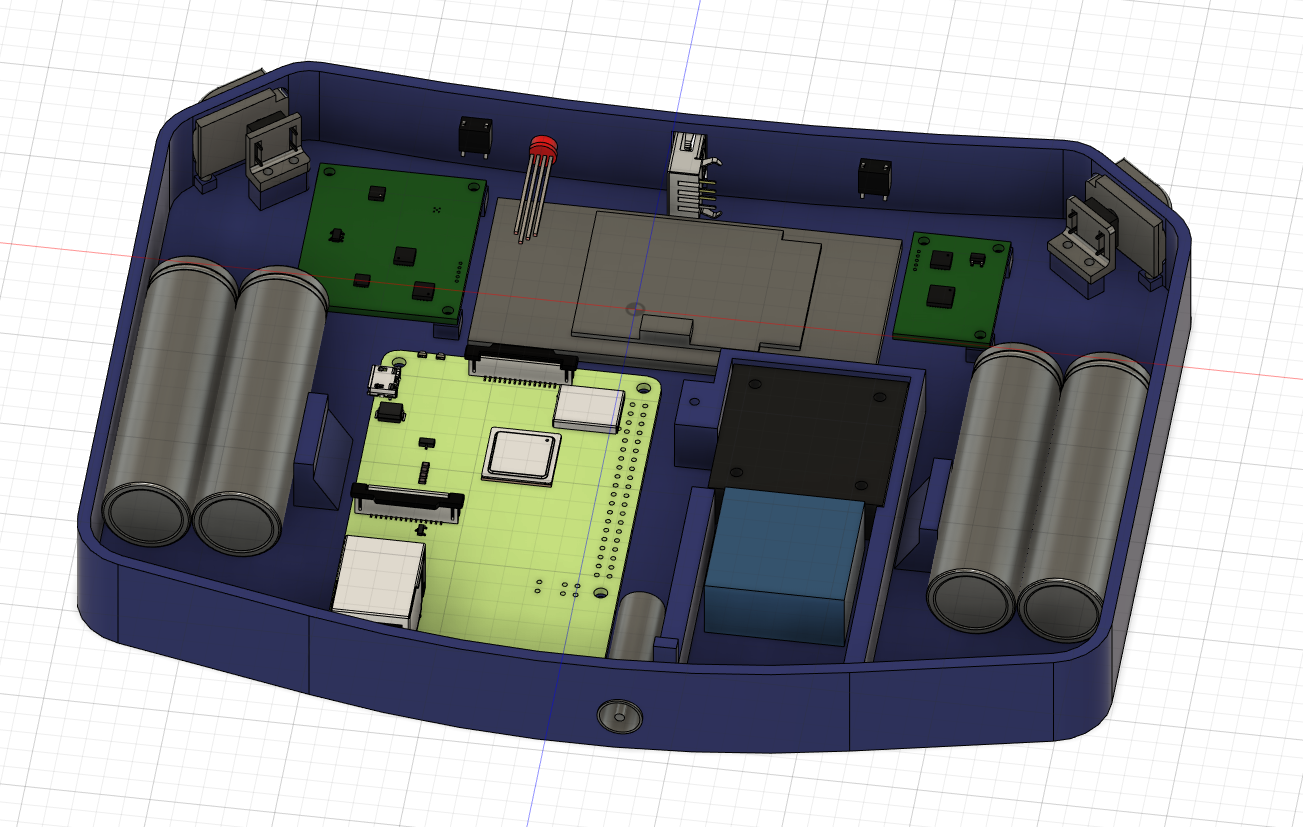
With PS2:

Near the charging port, there will be an opening for the Blower fan to blow out.
i Also Print tested it:
this is PETG material if anyone's interested. it kind of felt awkward to use the left analog as well as the action buttons so i settled with this:
See that little red dot under the Dpad? that's the analog LED and under it is the button to indicate that the analog is ON or OFF(Some Ps1 games dont accept commands if the analog is ON like CRASH BANDICOOT 1).
The button near the RGB LED will be the PMS power ON and the other button will be the RESET button of the PS2.
Here are the internals of the portable:
Without PS2:
With PS2:
Near the charging port, there will be an opening for the Blower fan to blow out.
Soon ill start the printing process and after that hopefully the assembly and the finished product, Stay Tuned!
I'd like to thank @Gman for his extensive help with the ps2 motherboard knowledge and his PCB's 3d models that he provided. @ABH for his continuous knowledge input since the start of the project!
Last edited:

