- Joined
- Apr 5, 2016
- Messages
- 132
- Likes
- 371
- Portables
- 35+
He everyone! Figured it was about time to start up a worklog over here for a commission that I took on for a customer in Australia.
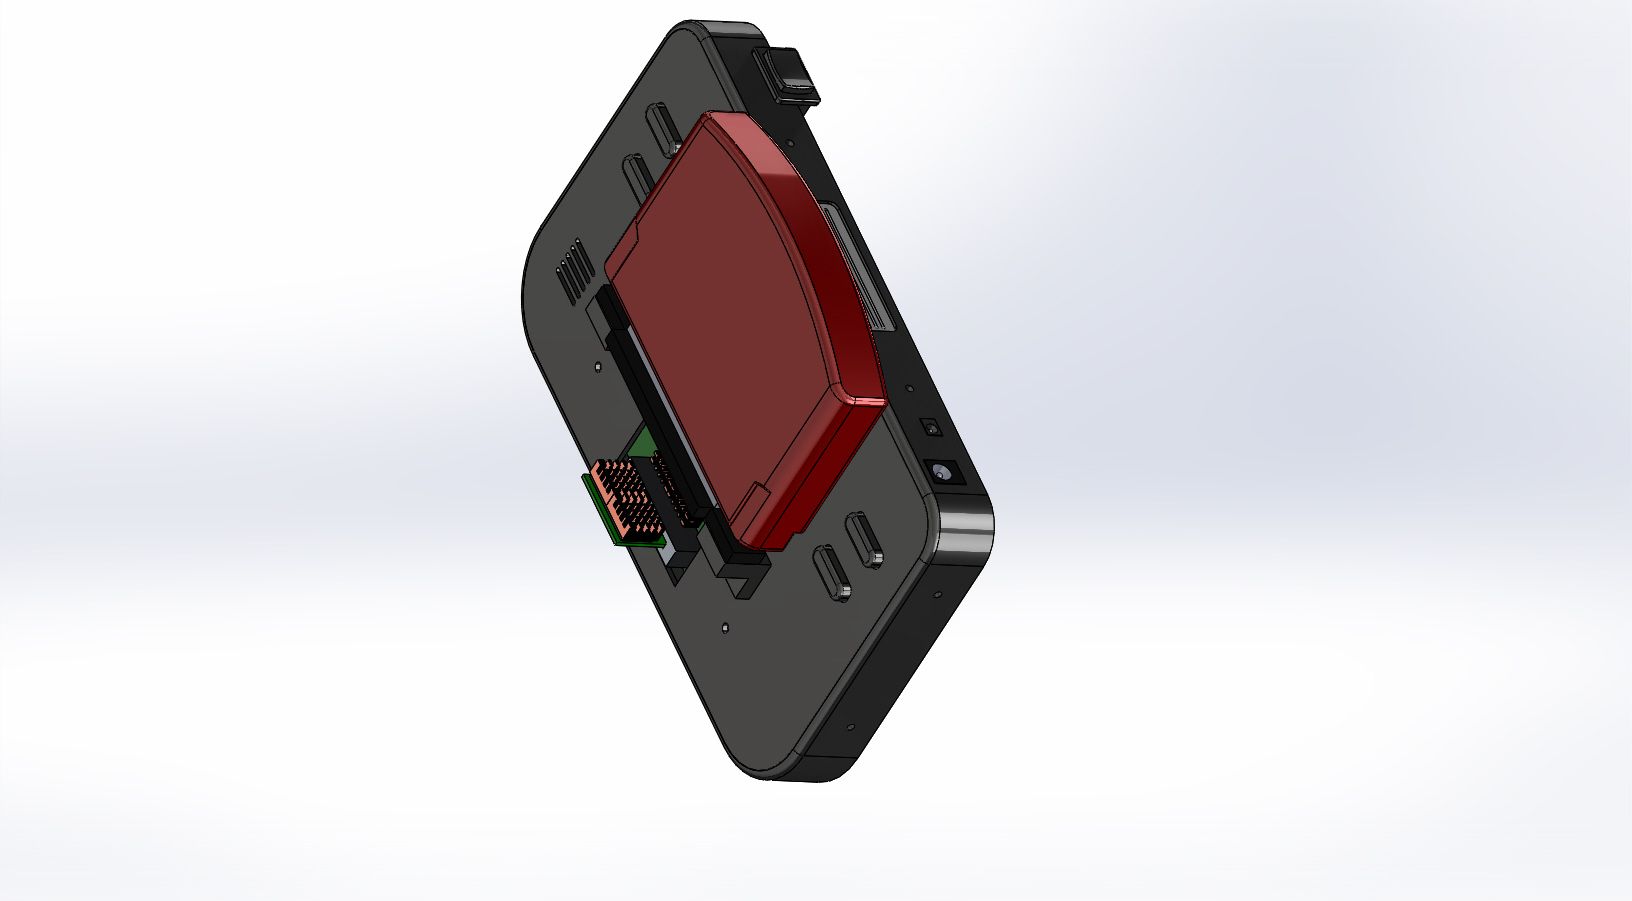
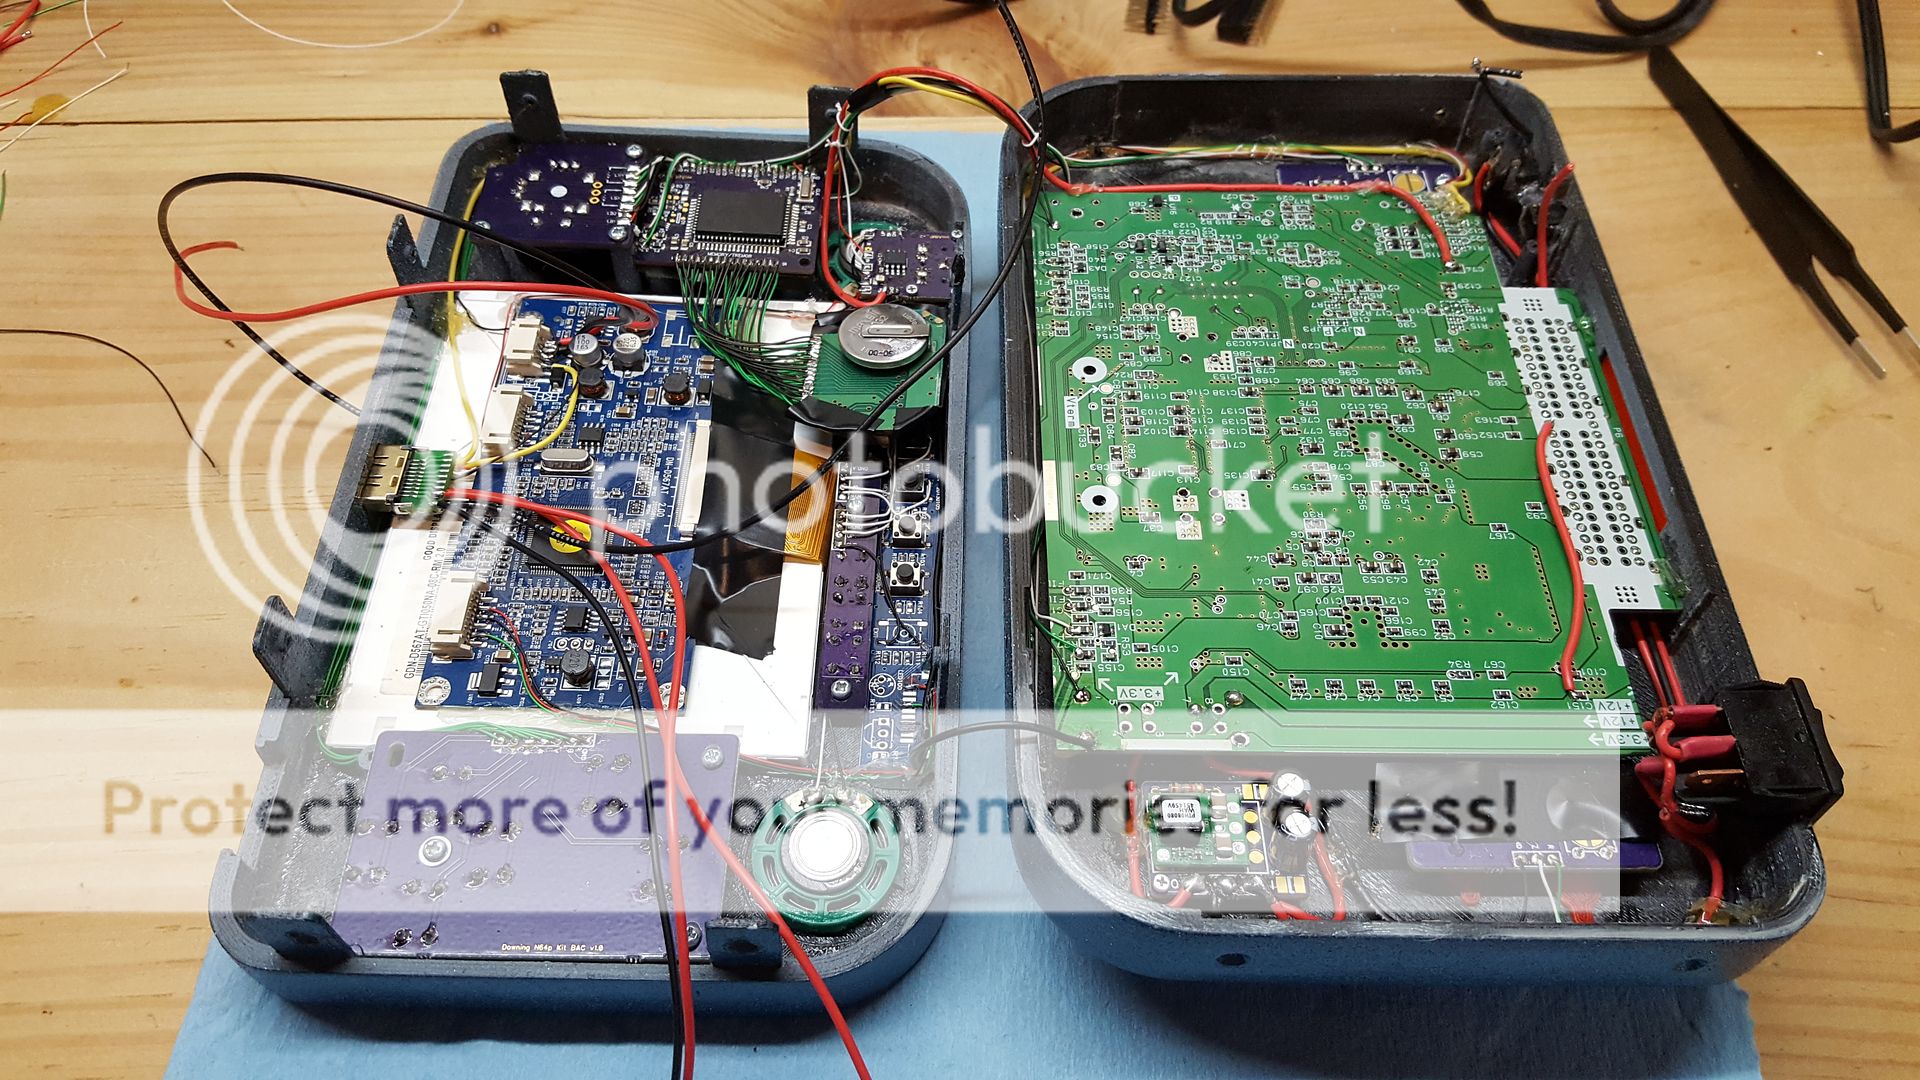
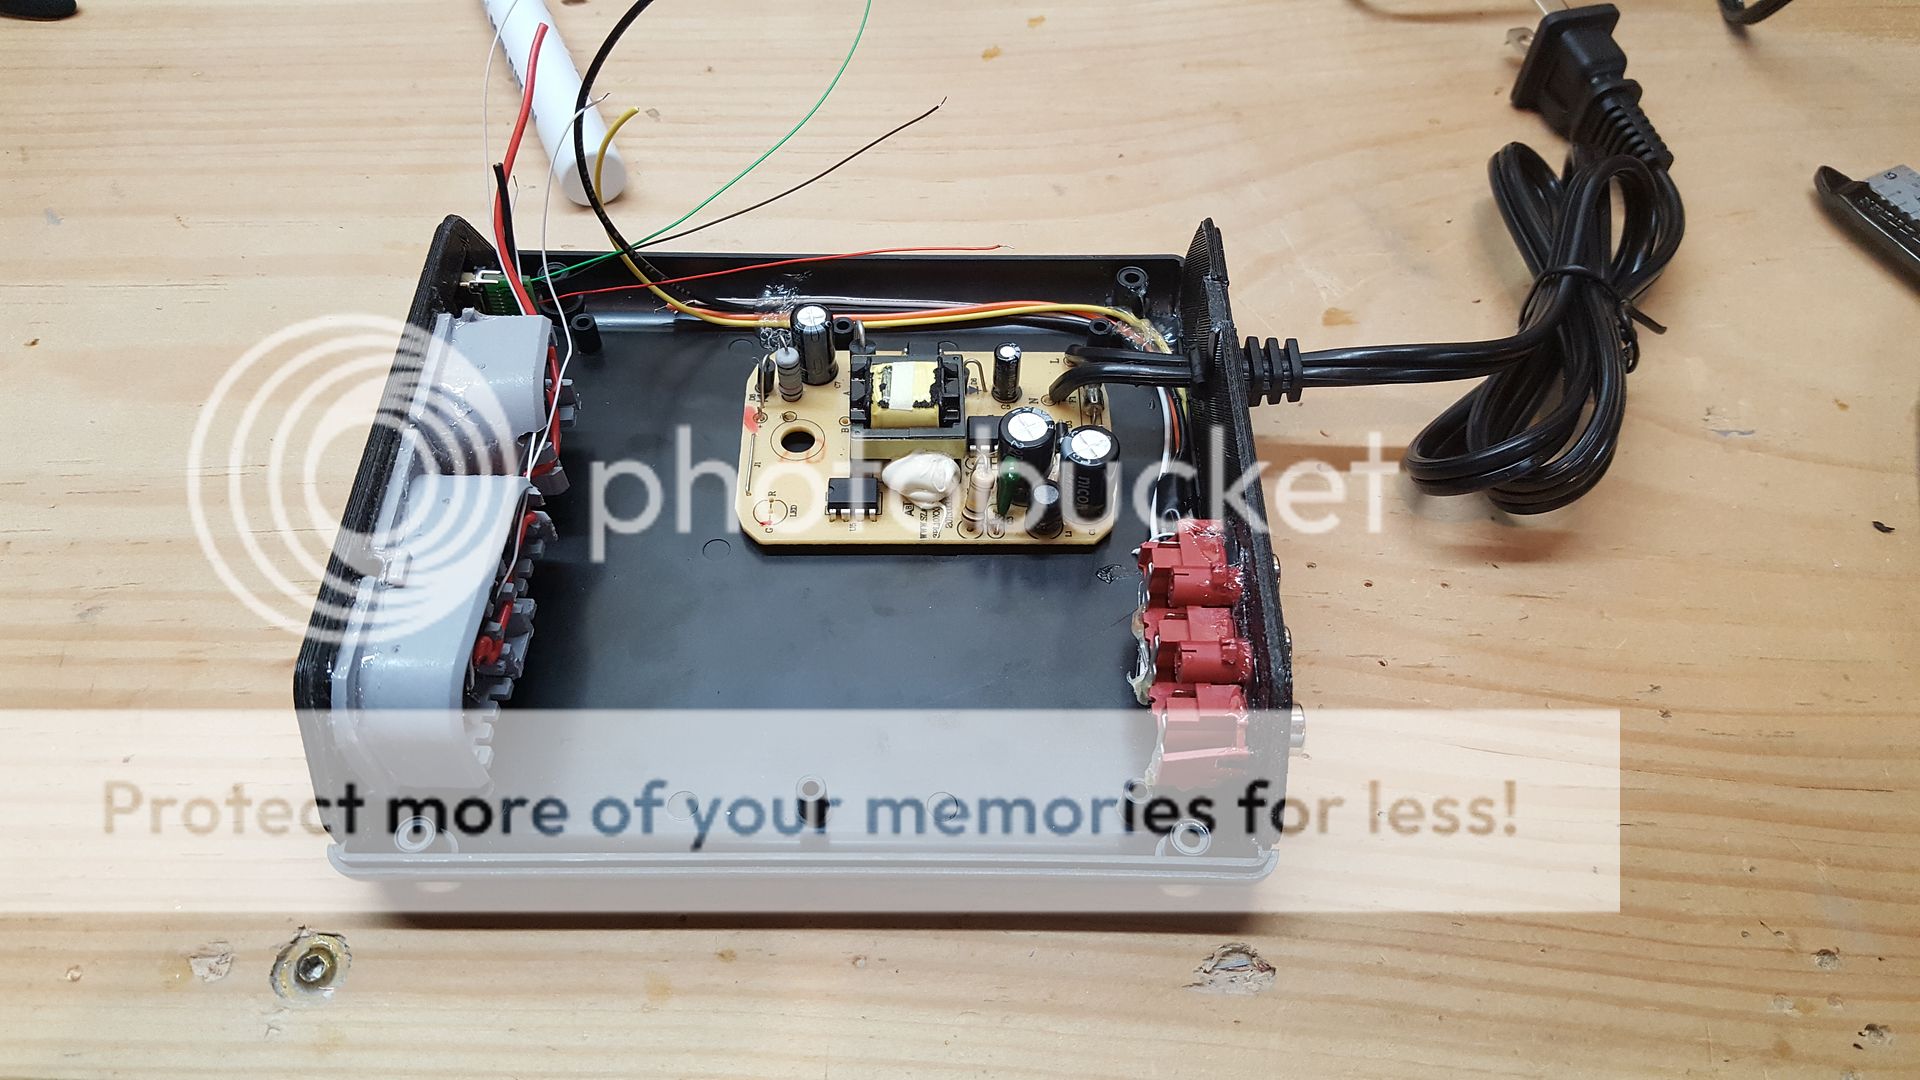
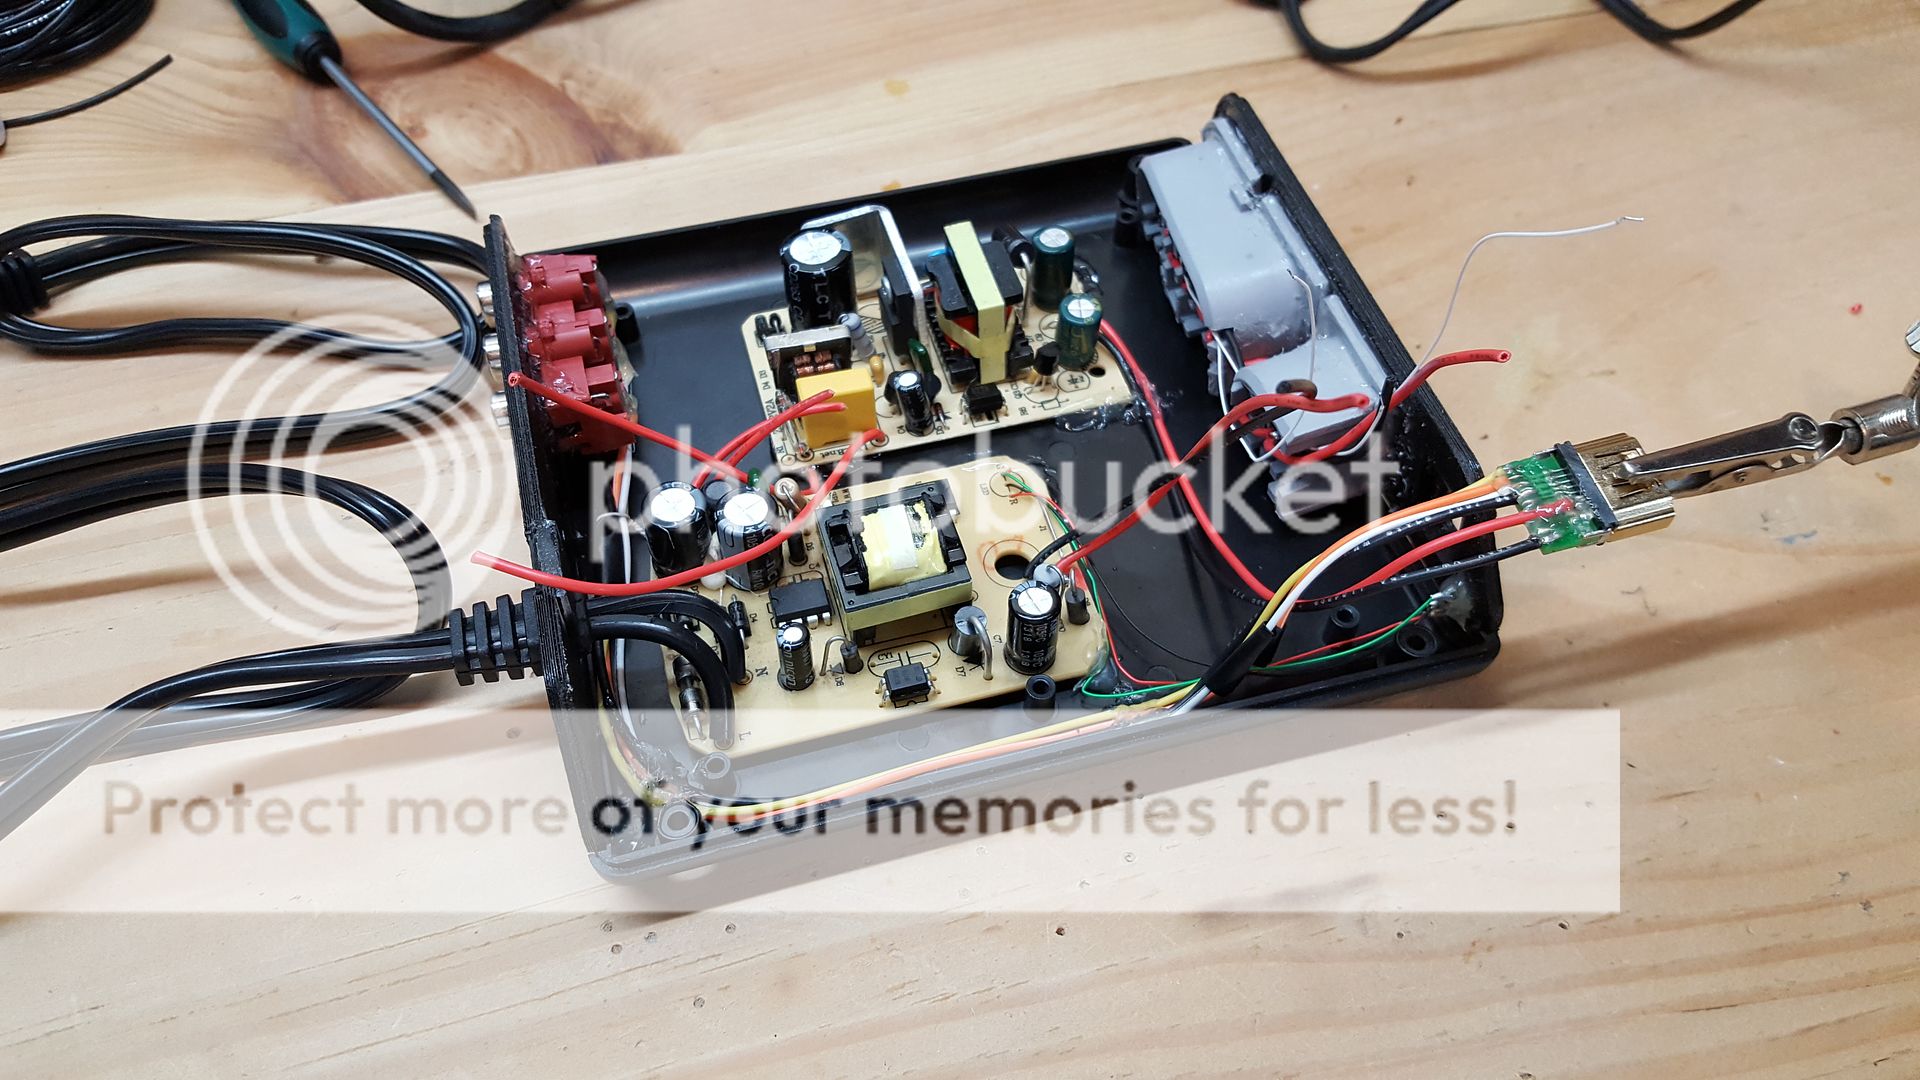
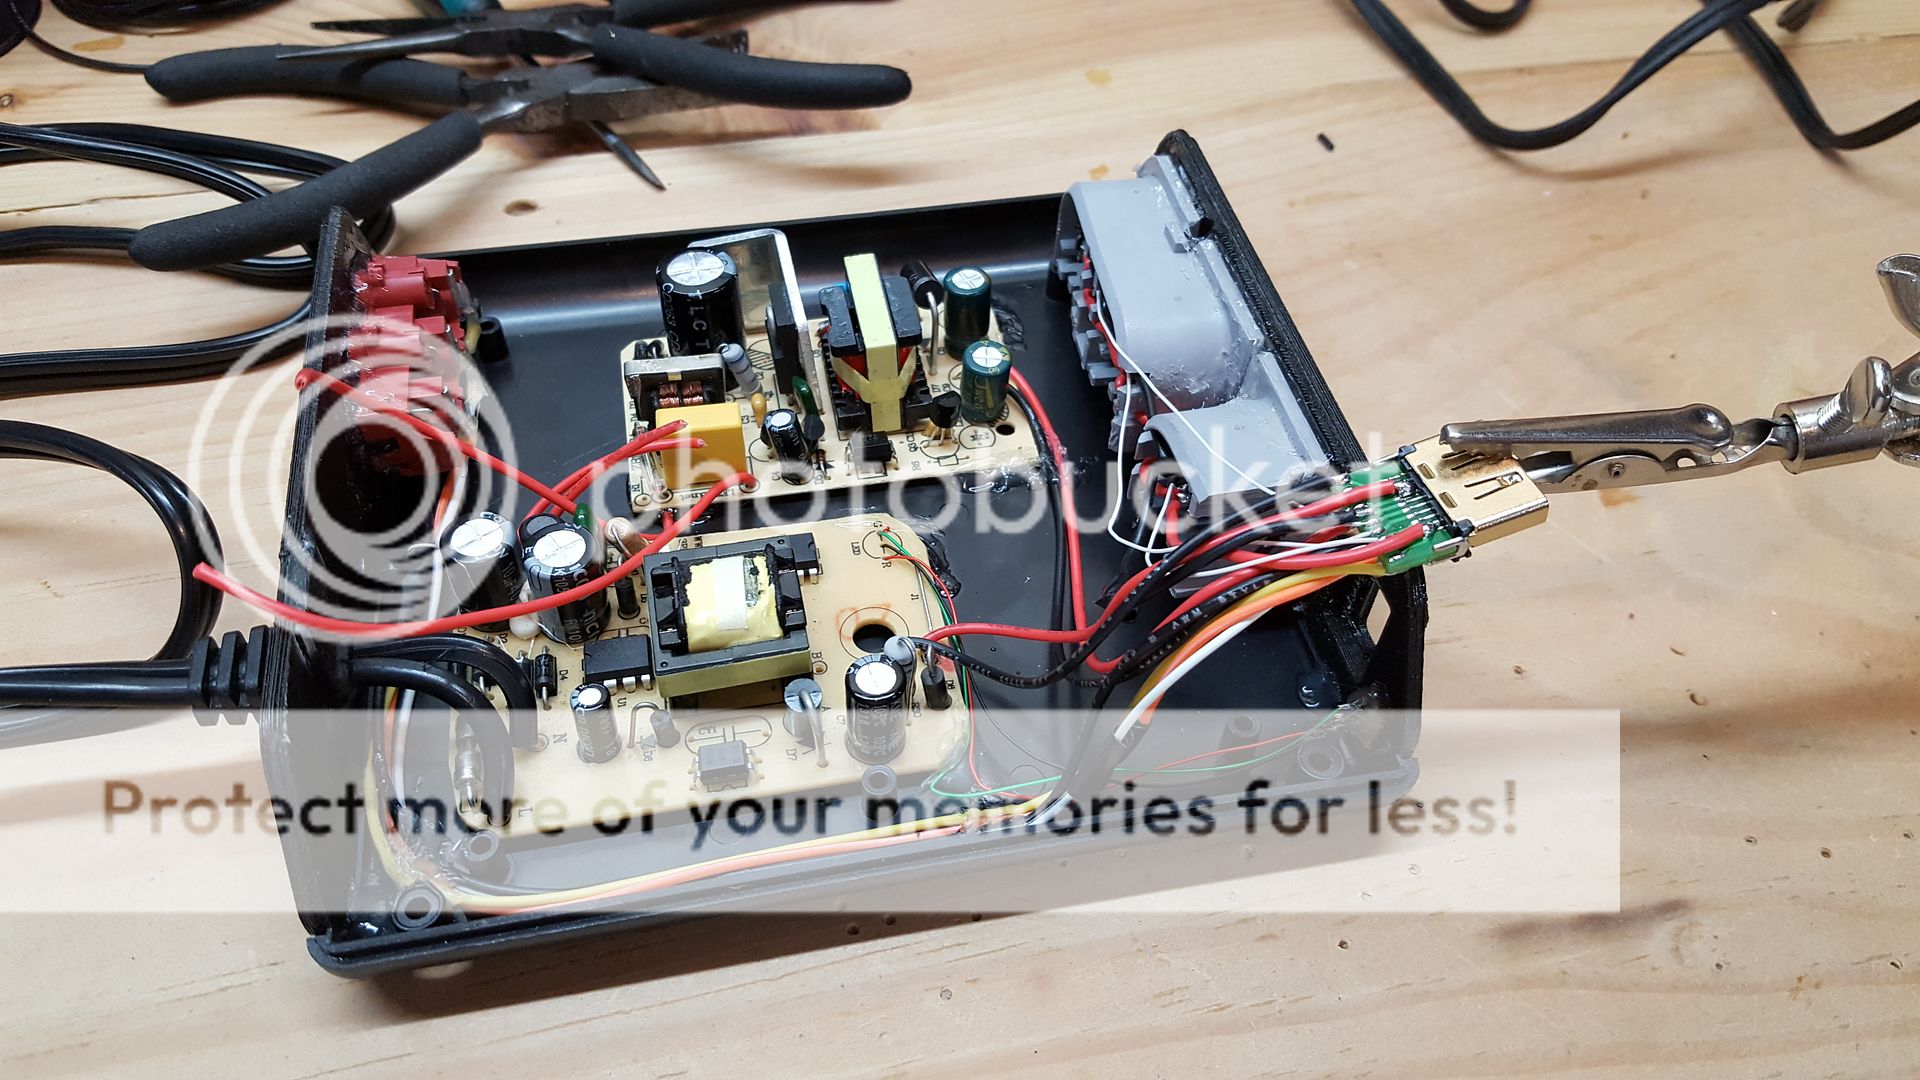
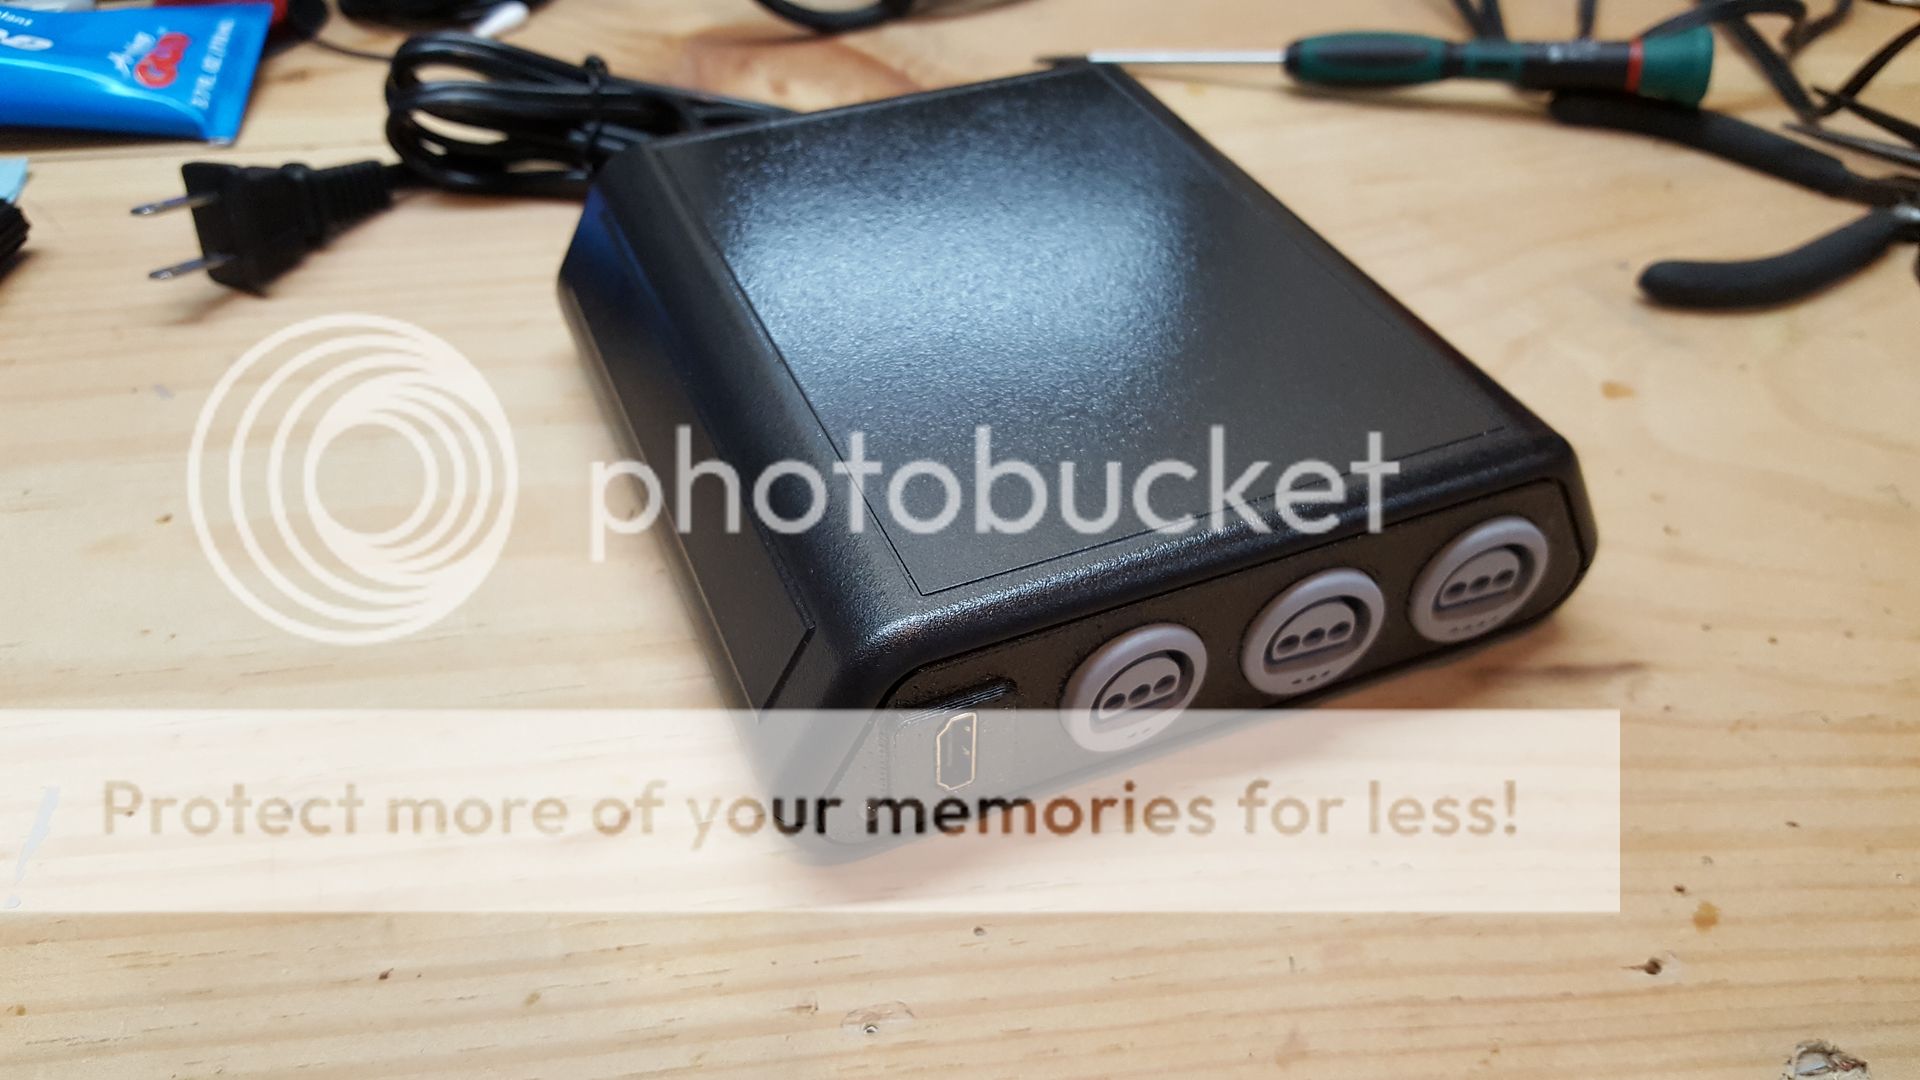
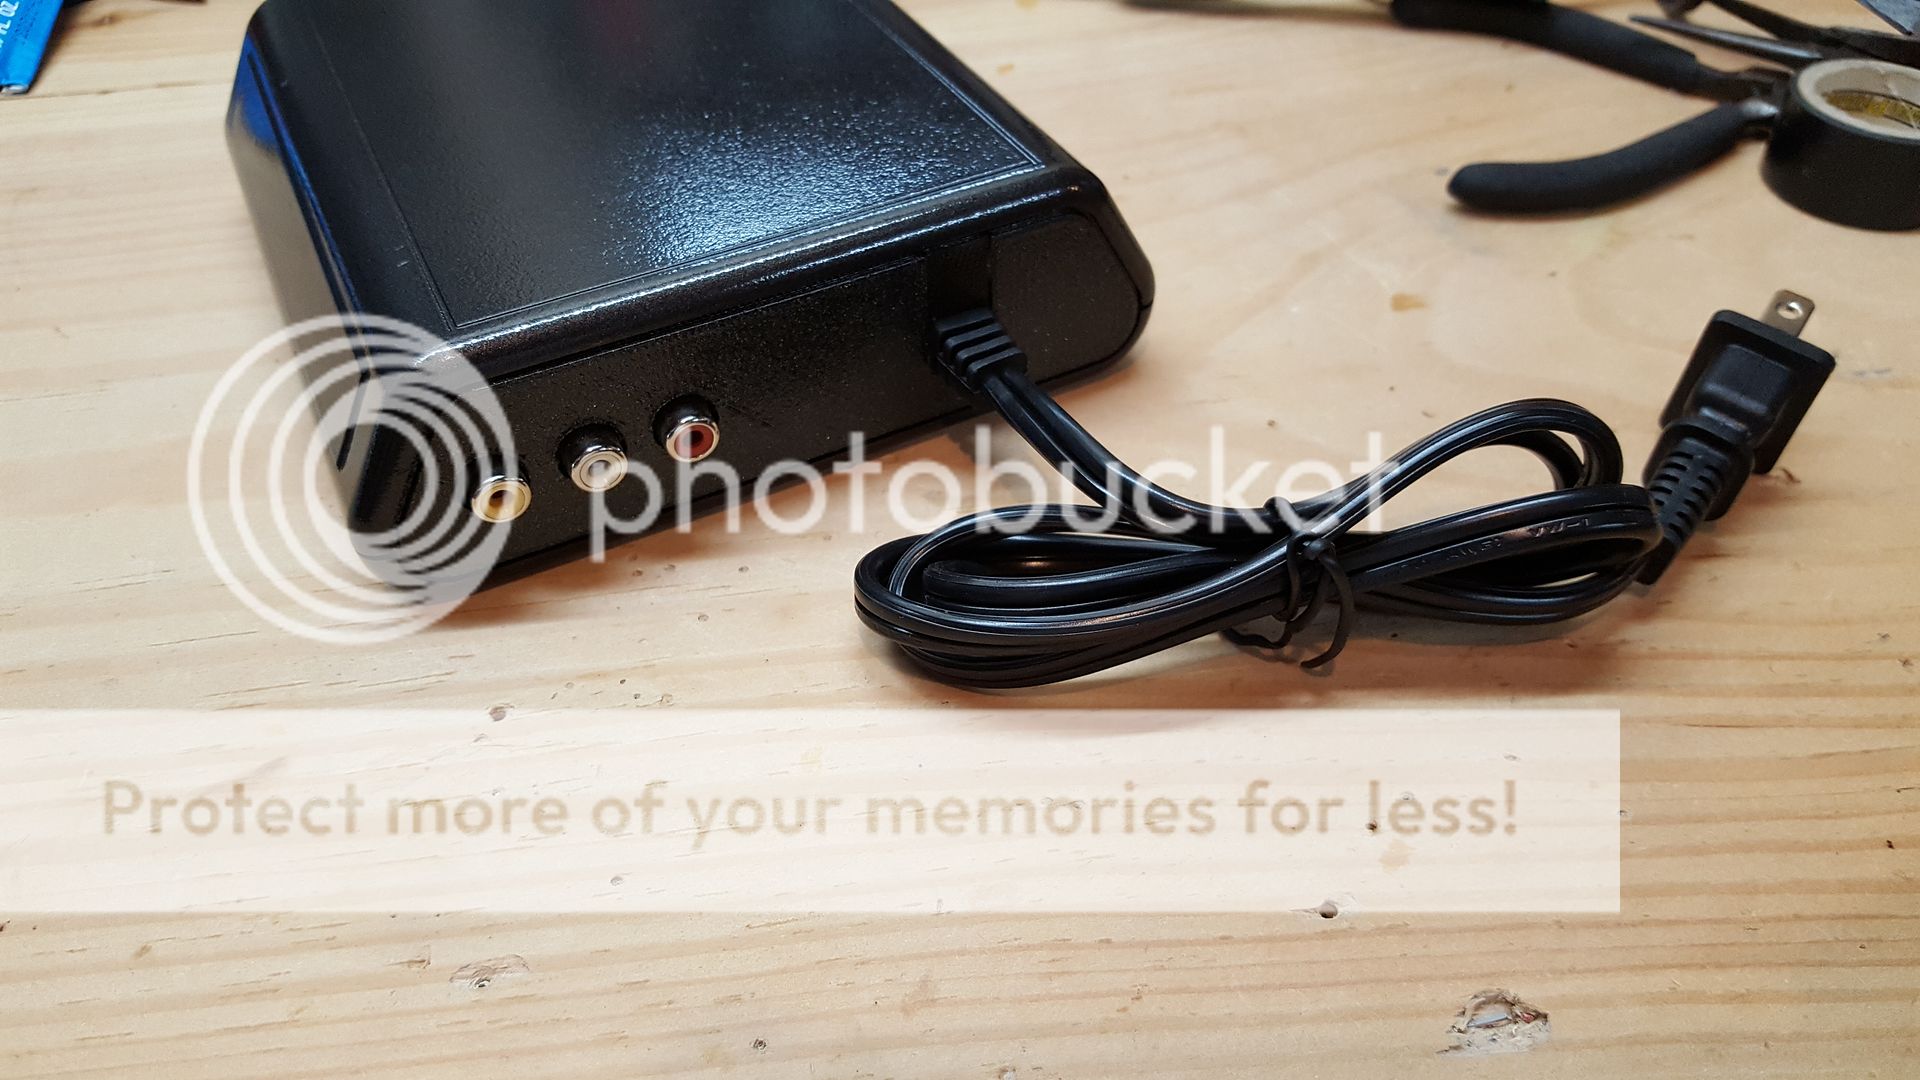
This is probably the most advanced N64 I'd done to date as it uses all custom printed PCBs, custom controller and audio amp (all designed by RDC), and all reworked 3D printed files for the casing. Also, this is going to include a breakout box which will be used for A/V out to a TV, the additional 3 Player controller plug in and will also house the charger and wall power circuits for the handheld.
So this was going pretty smooth until a couple weeks ago when I some how fried my PAL N64 board which has left me waiting on a new one from my modding buddy in the UK. All the main wiring has been done though so once the new boards get here, it should go fairly smoothly, at least that's the hope.
Here are some early concepts and progress pics. Hope you enjoy.

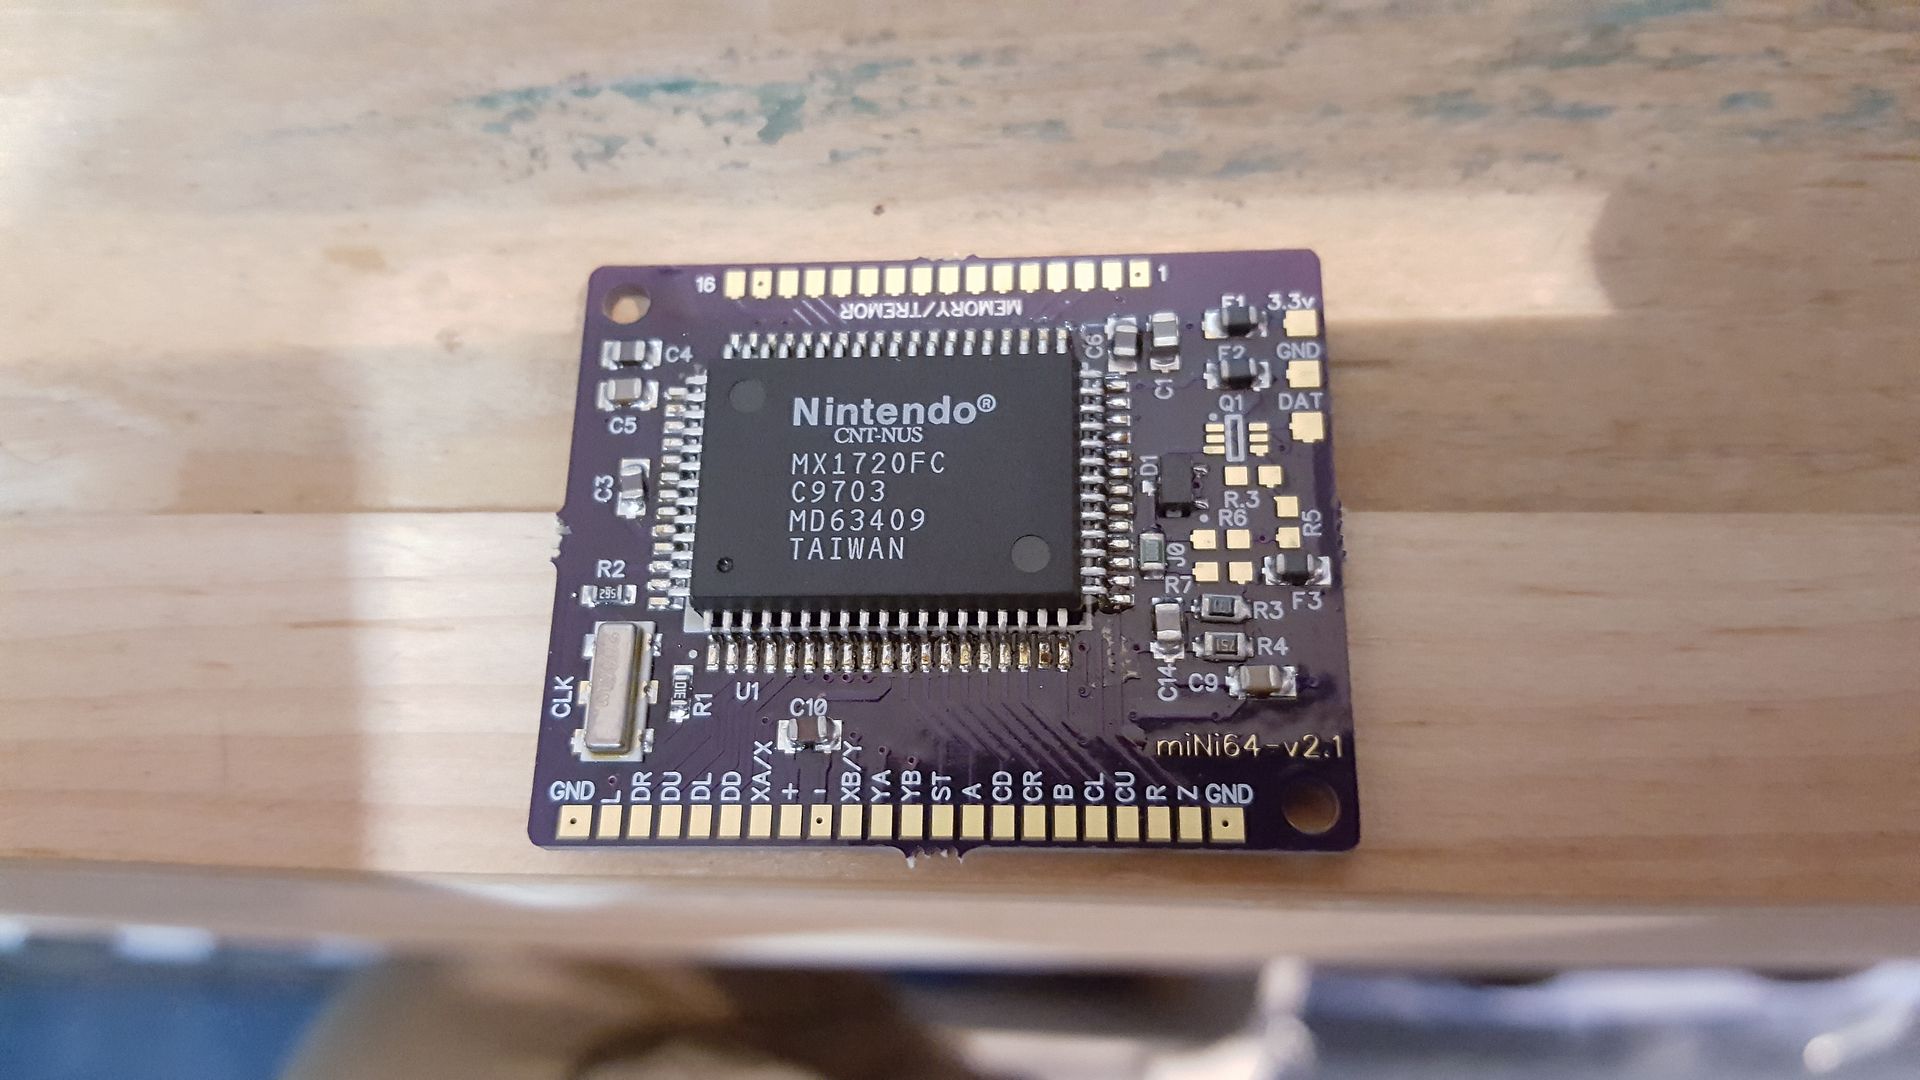
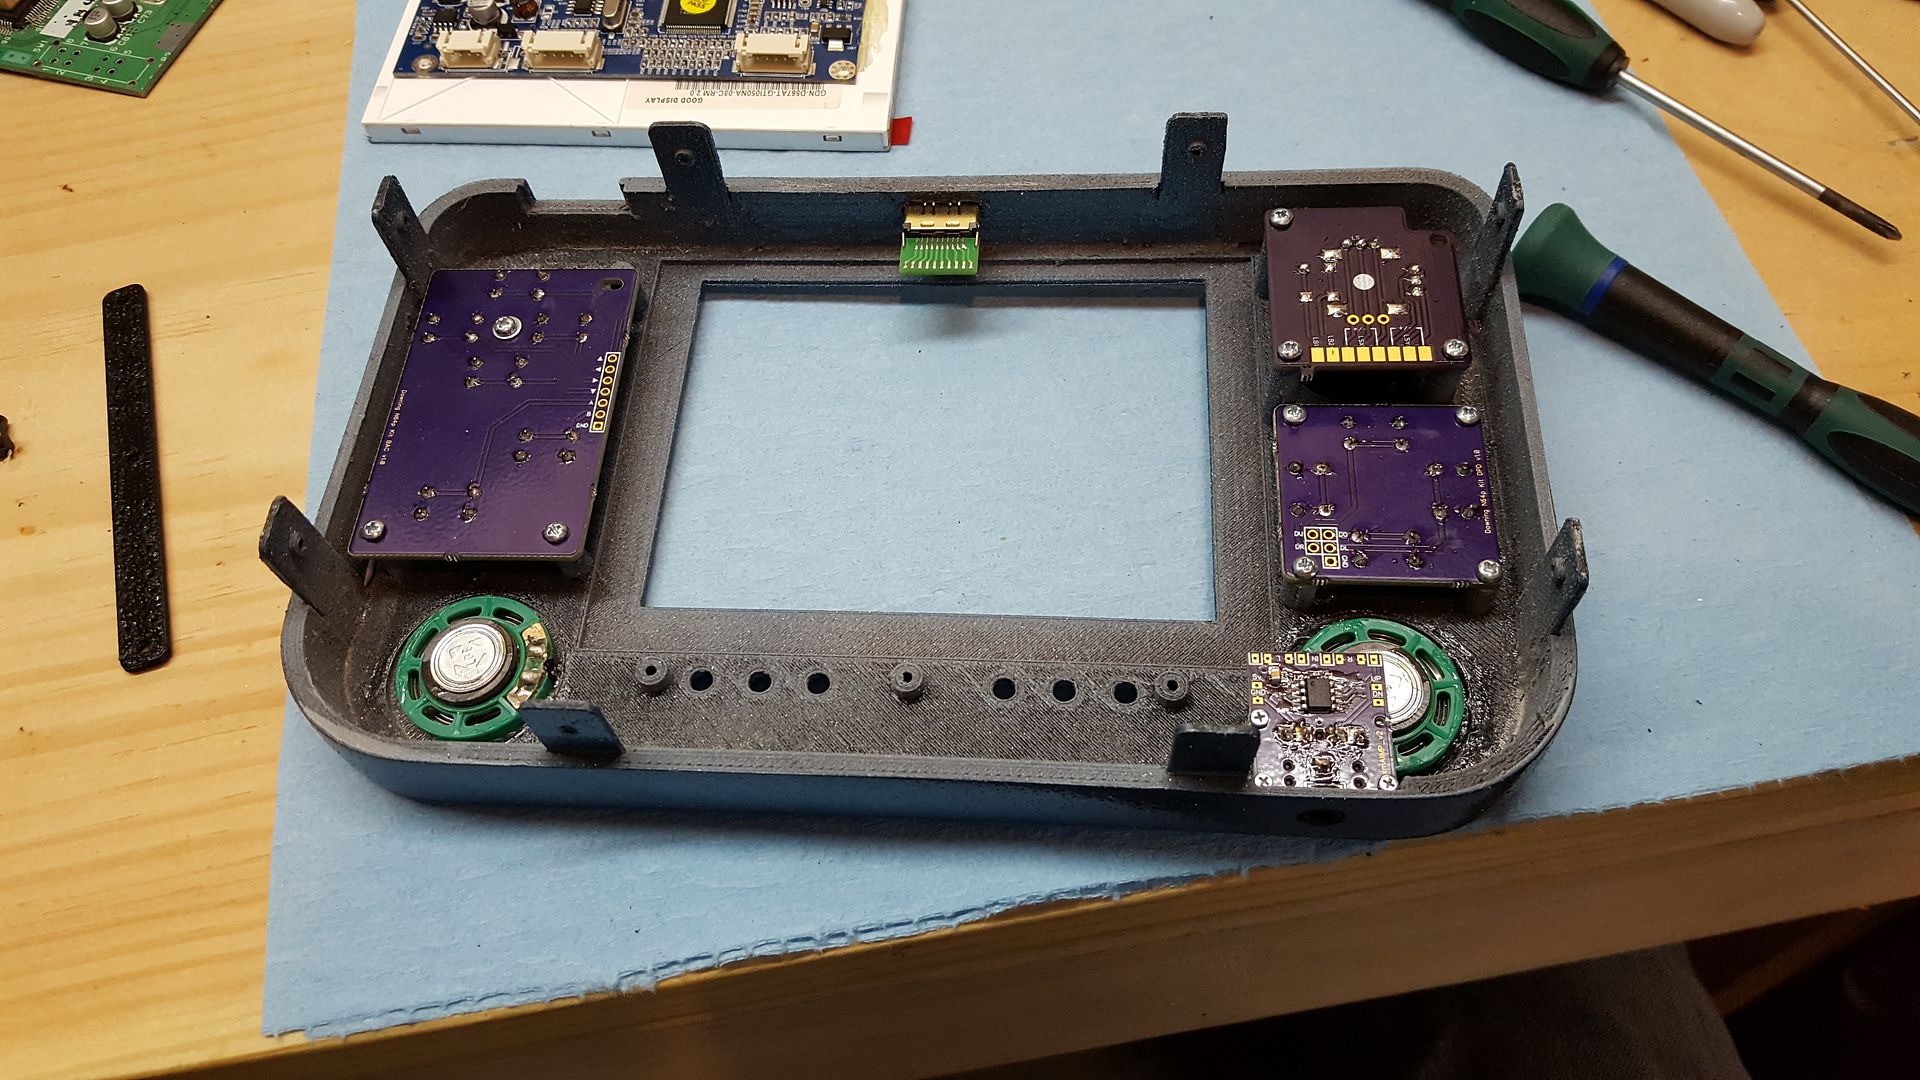
RDC's miNi64 V2.1 controller board. Excellent space saver and compact design. Works so much easier than chopping up an original or 3rd party board.
(Note: All PCBs were designed for me by RDC, though I gave him the dimensions and parameters that each board needed to fall into)
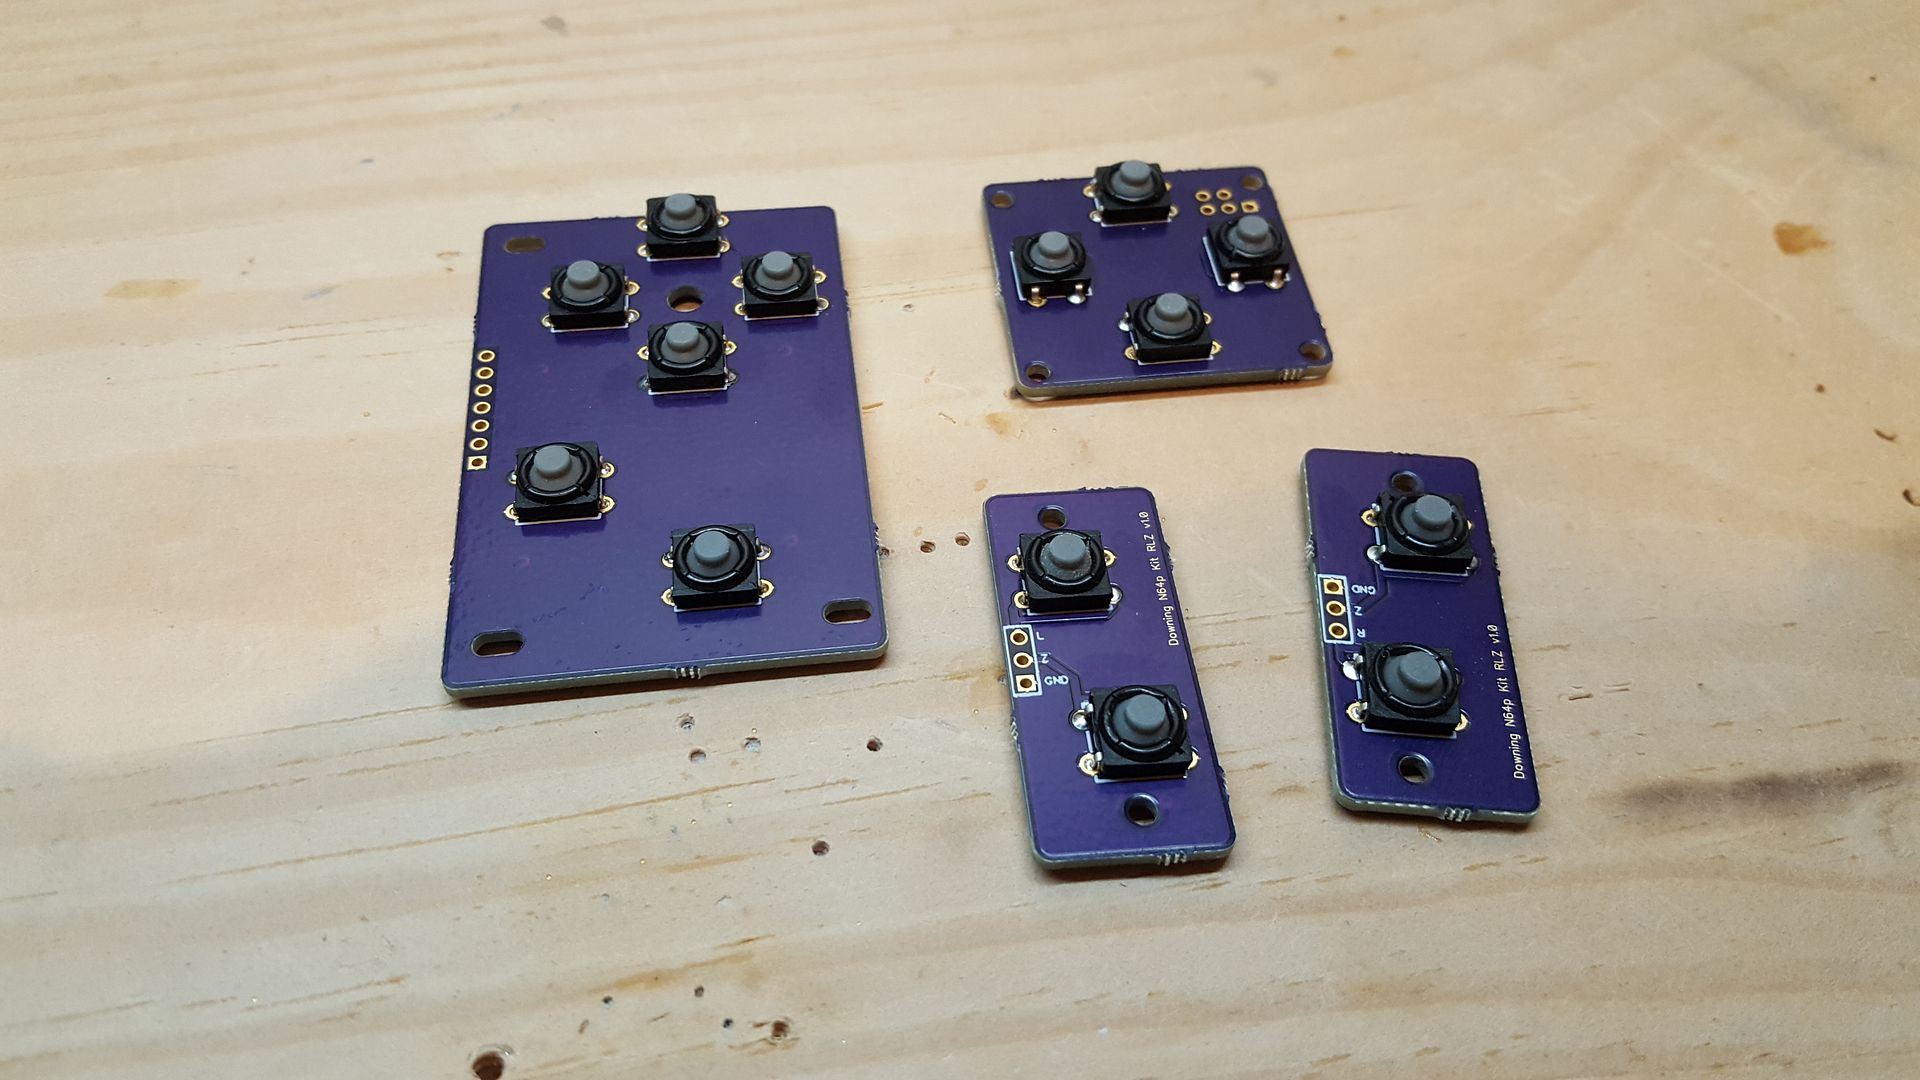
Custom tact boards for all the controller buttons this time. Also, these can be used with rubber tact pads like the original controllers if you wish as under these switches lay the contact points.
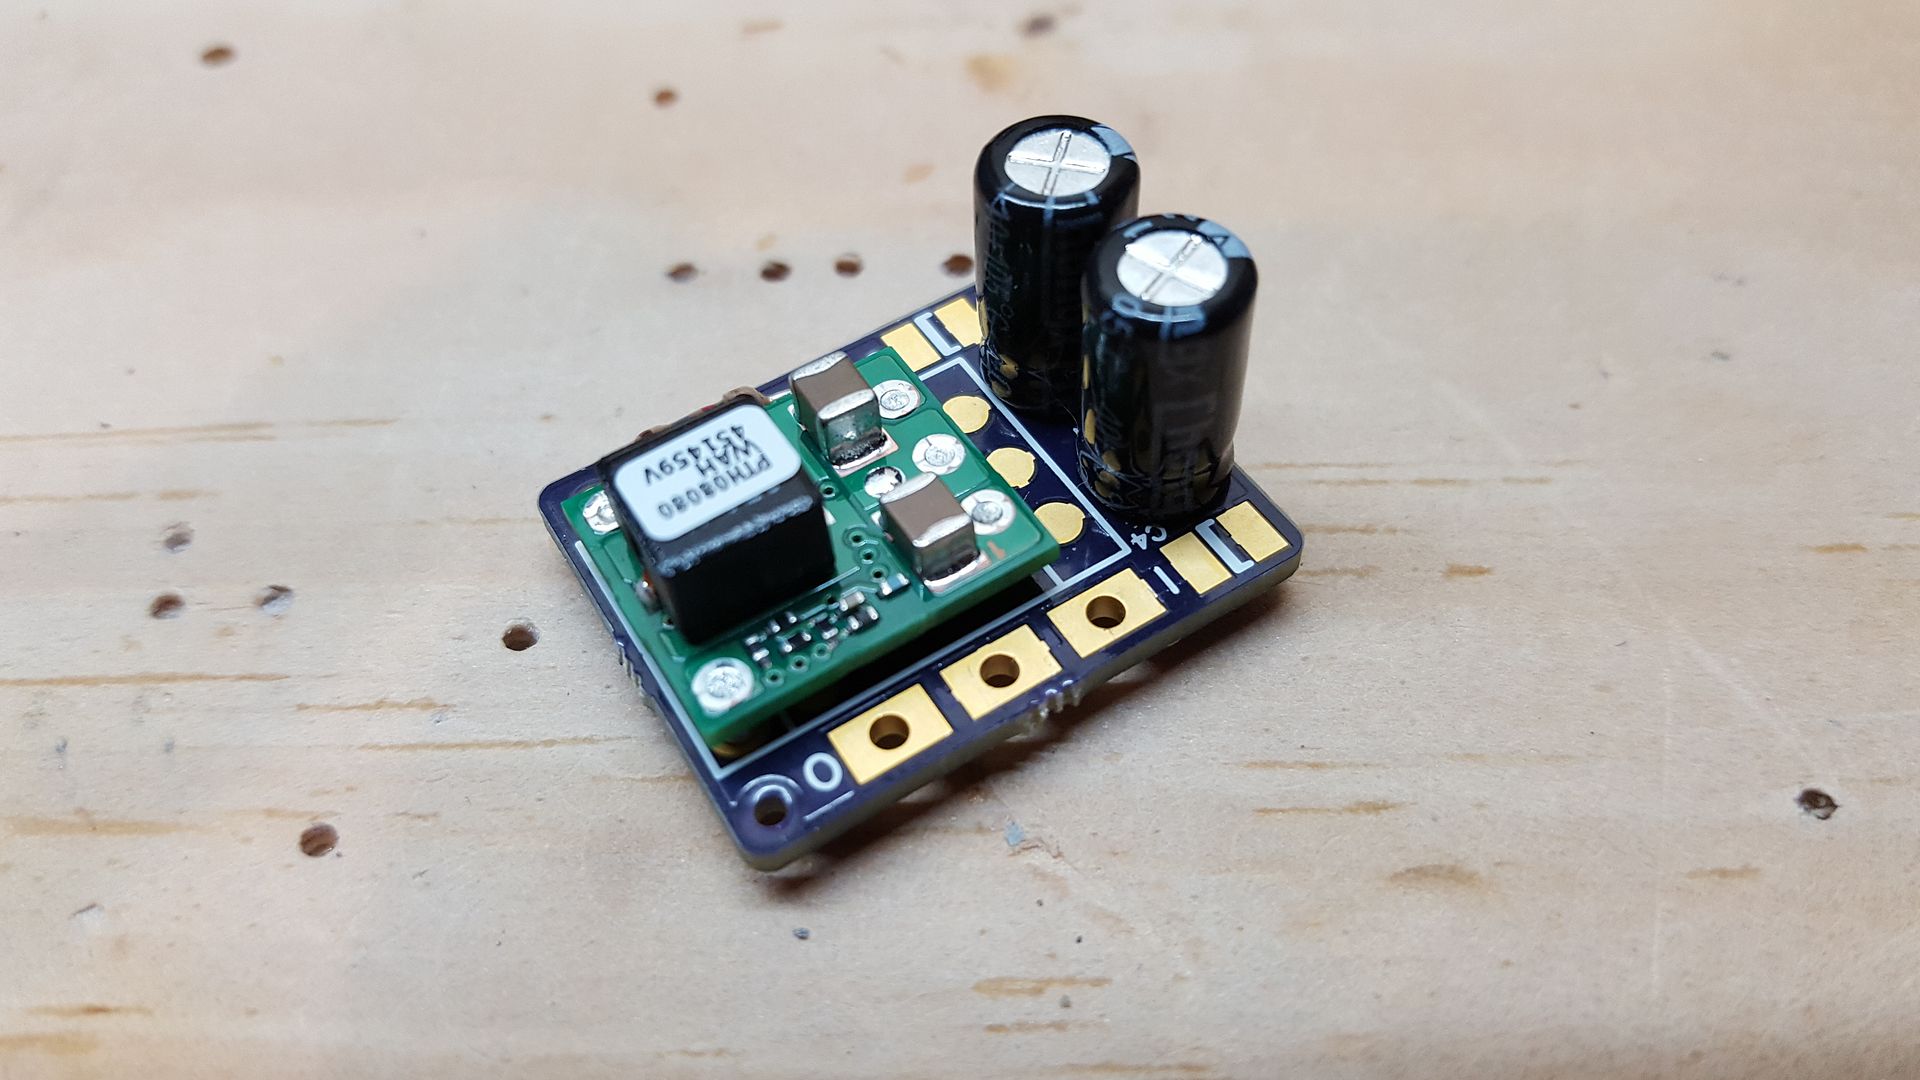
Custom PTH08080WAZ or WAH breakout board. This can be used with SMT or through hole caps, resistor and regulator. SMT saves more space, but does cost quite a bit more. Just depends on how much room you've got to work with.
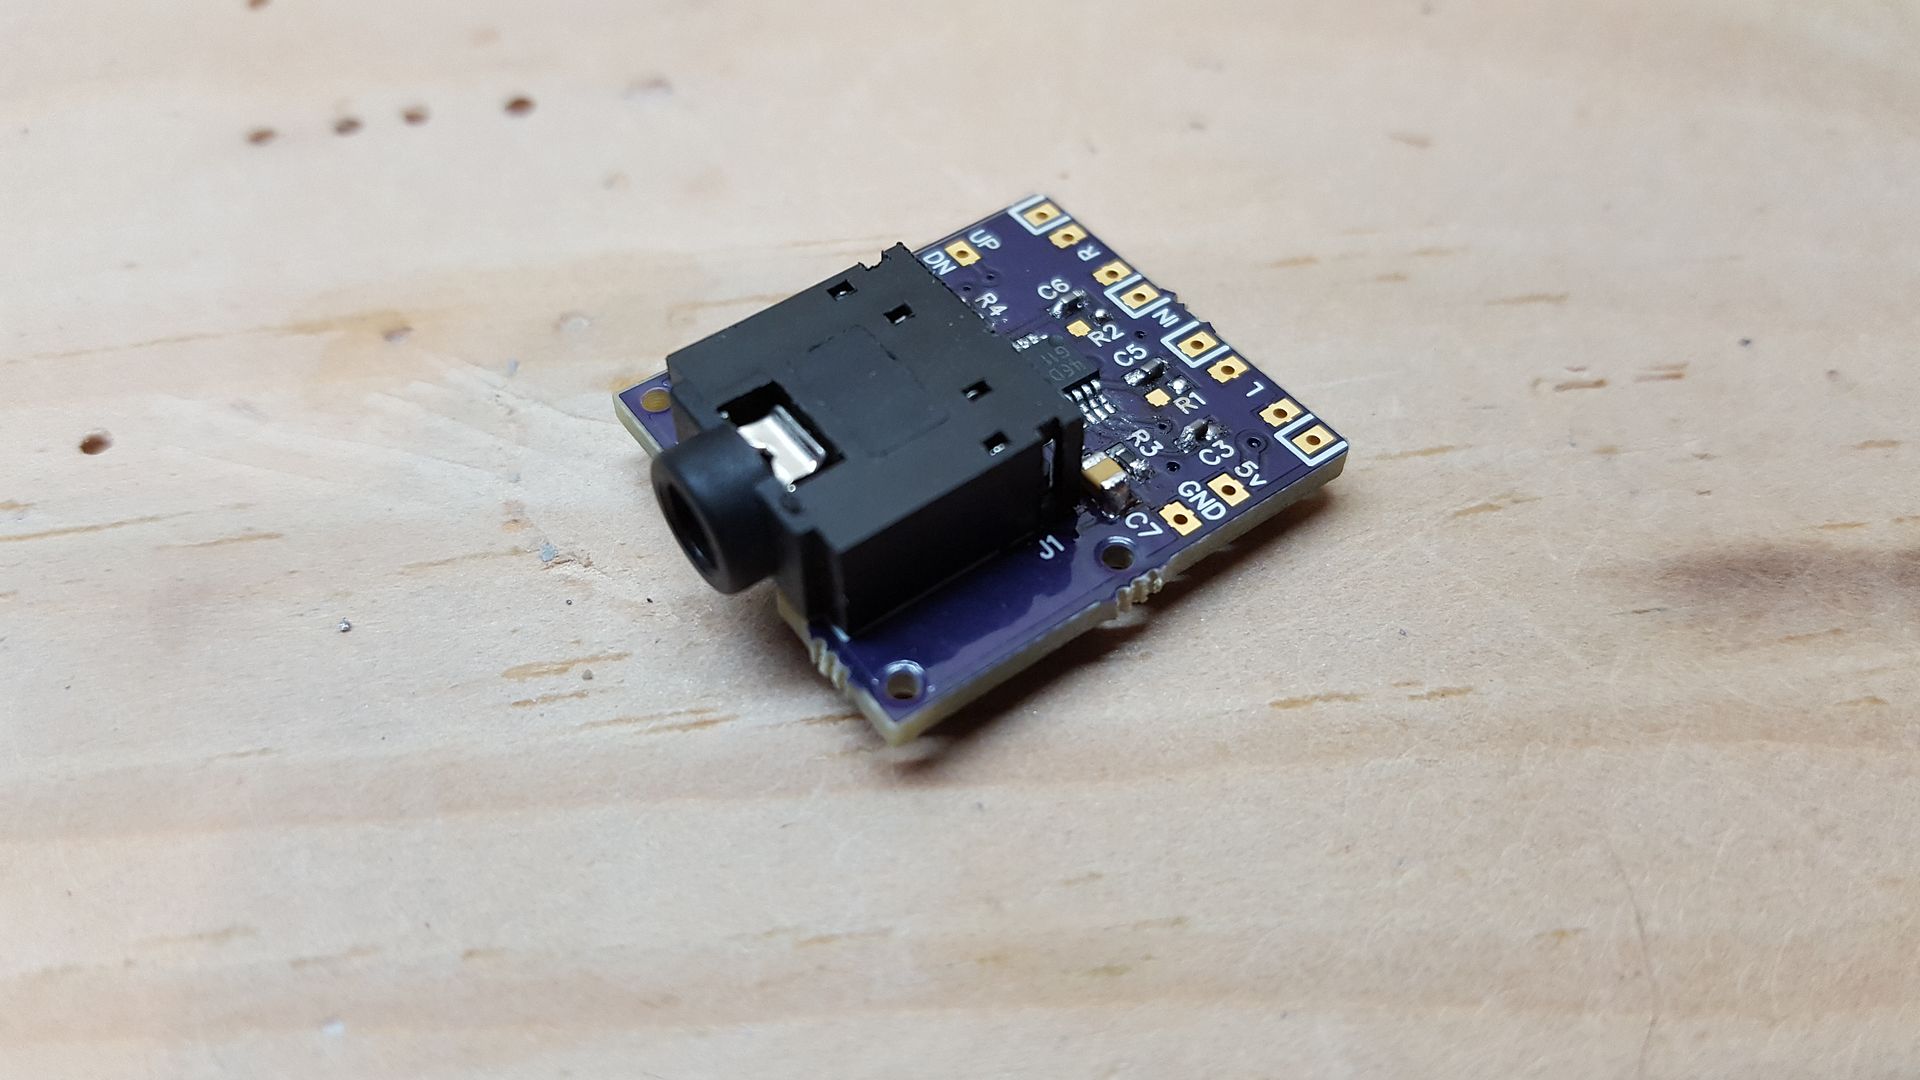
Custom audio amp with built in switchable headphone jack. I no longer need to use an additional button like the other versions of these N64p's had to use. Much easier to wire as well.
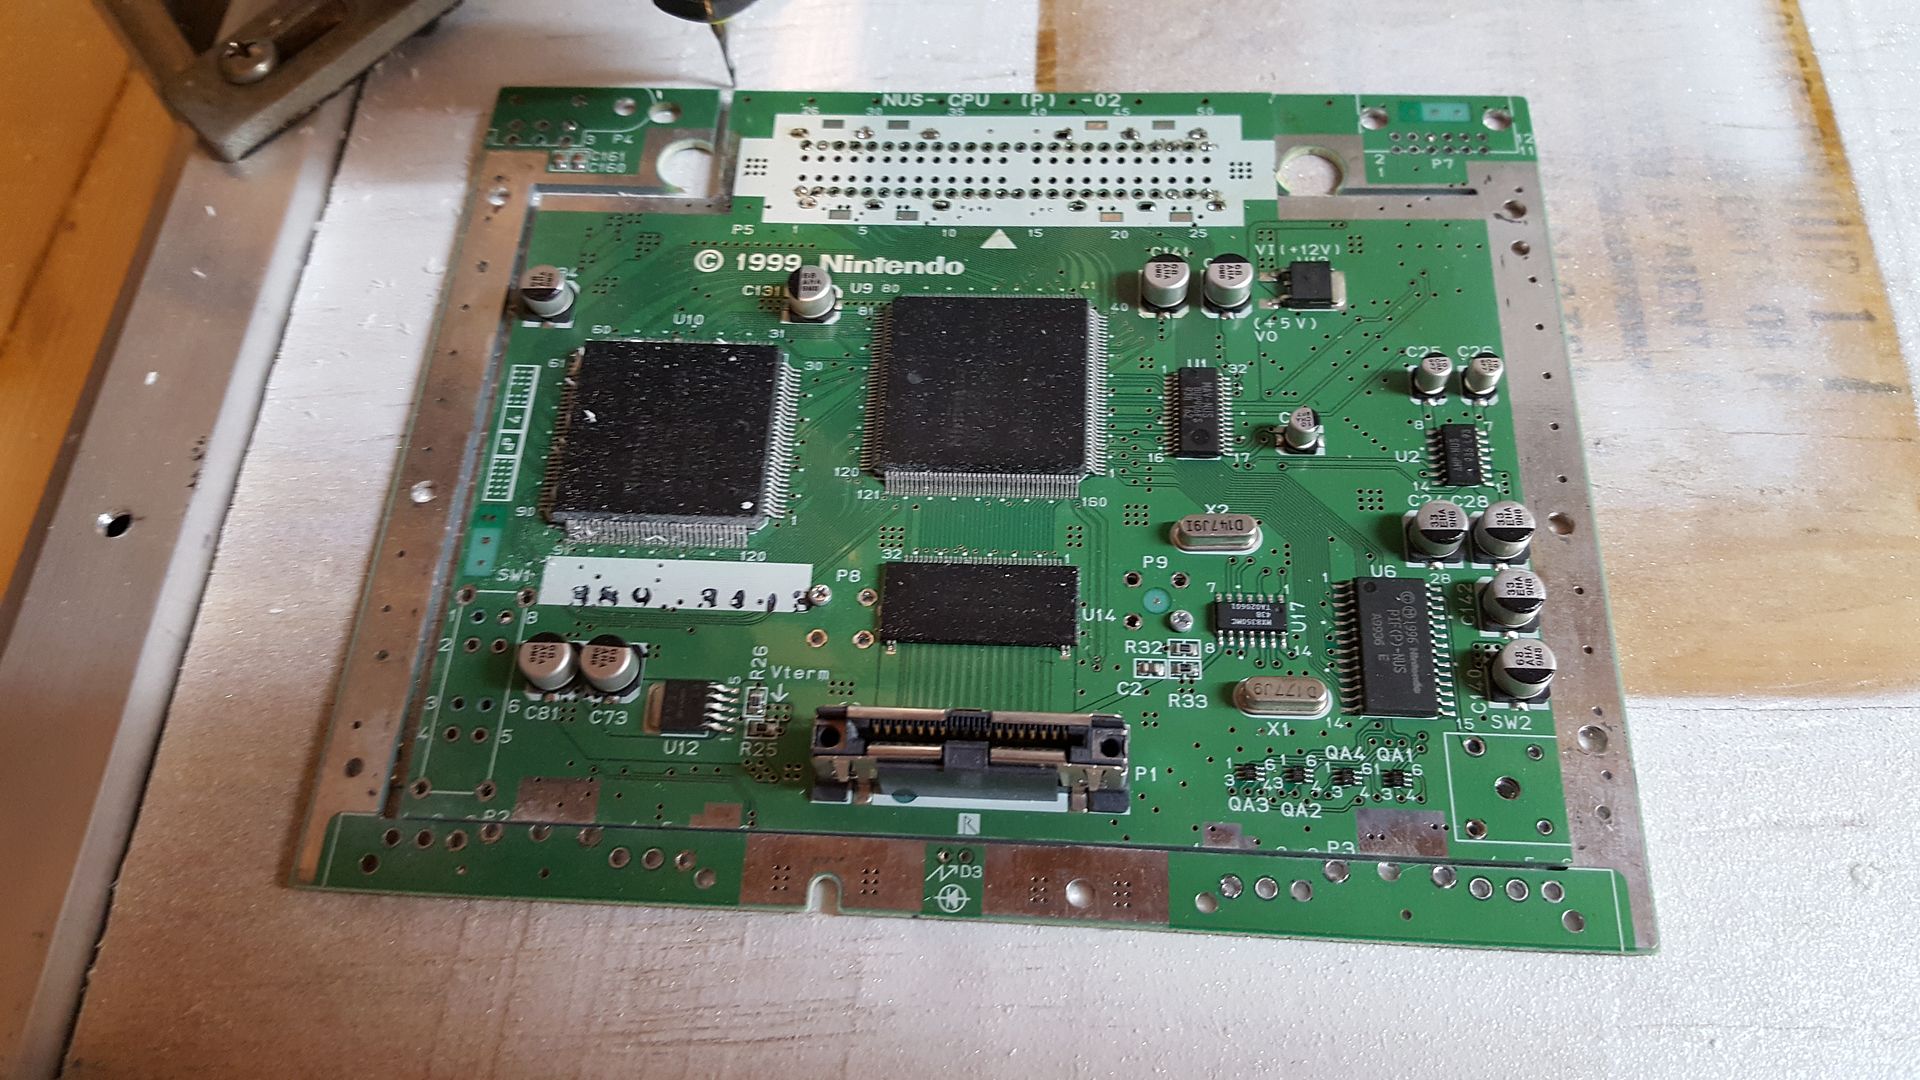
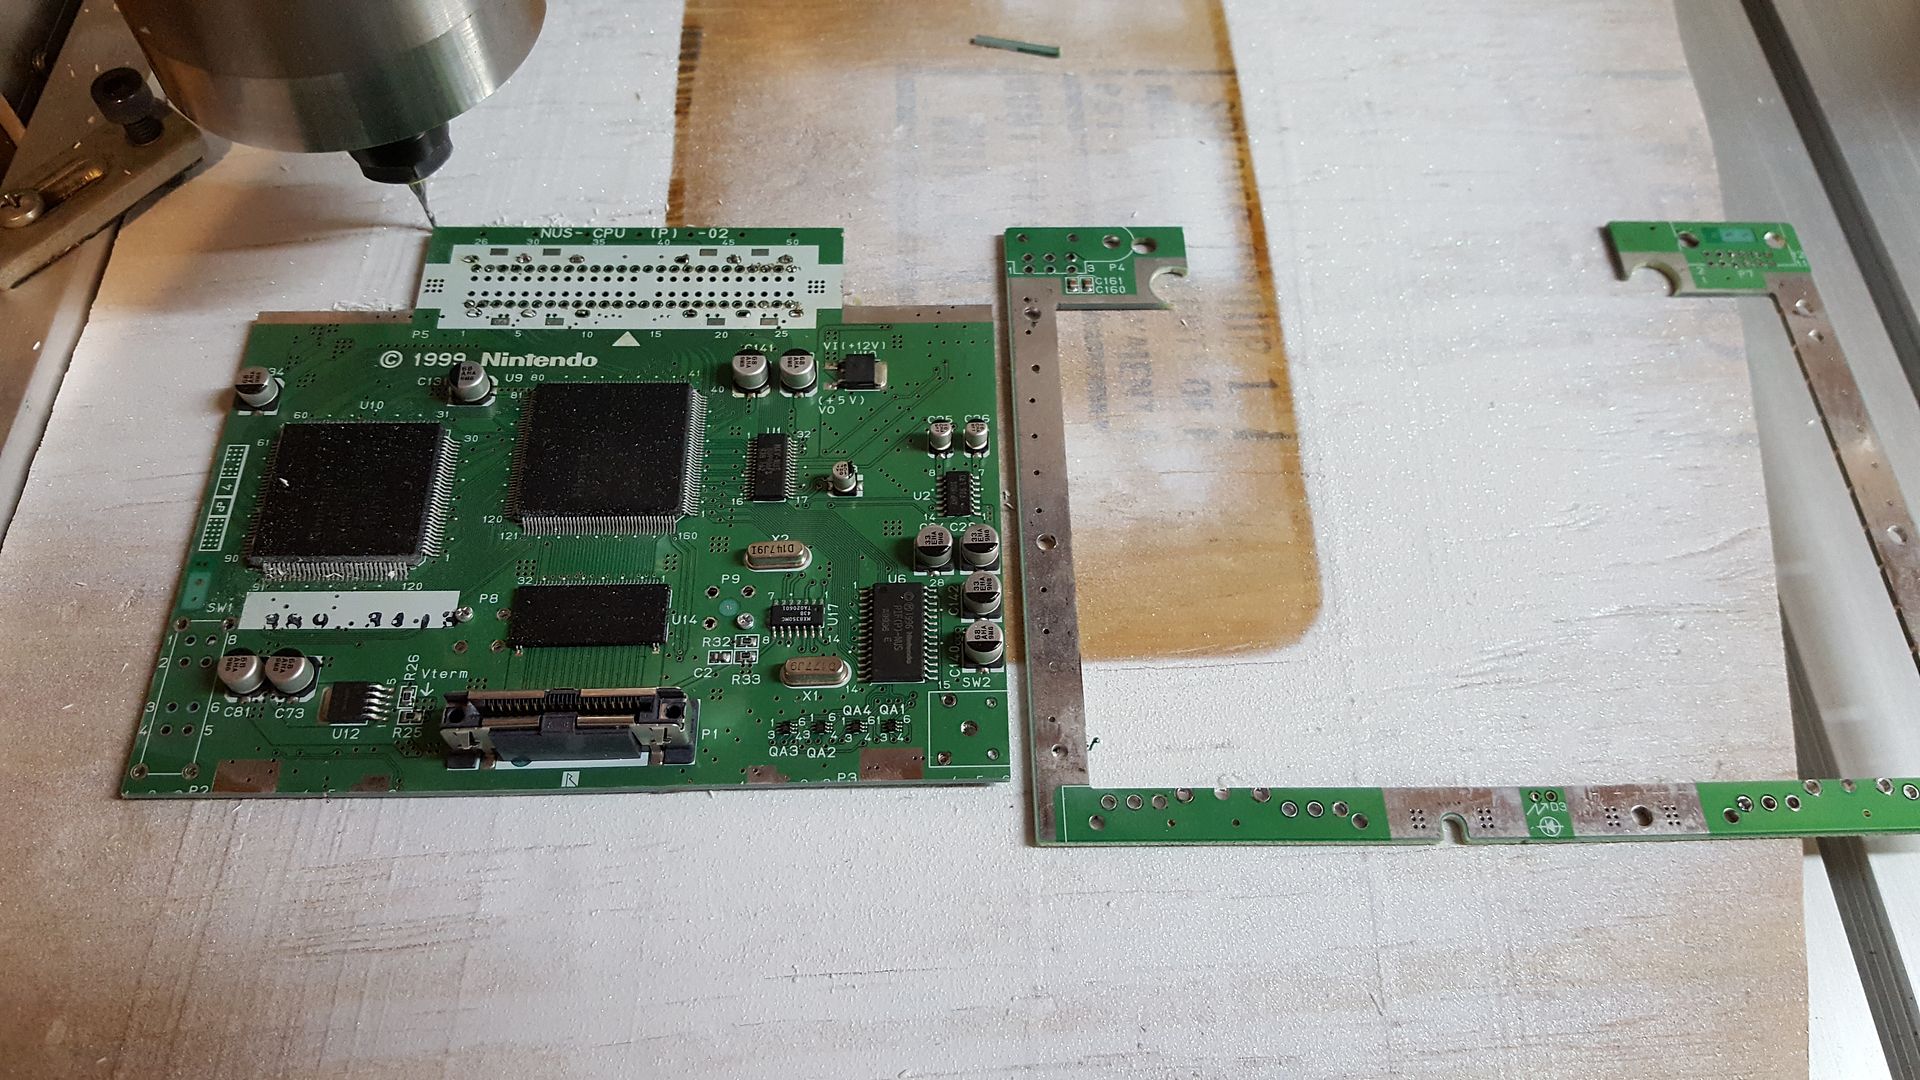
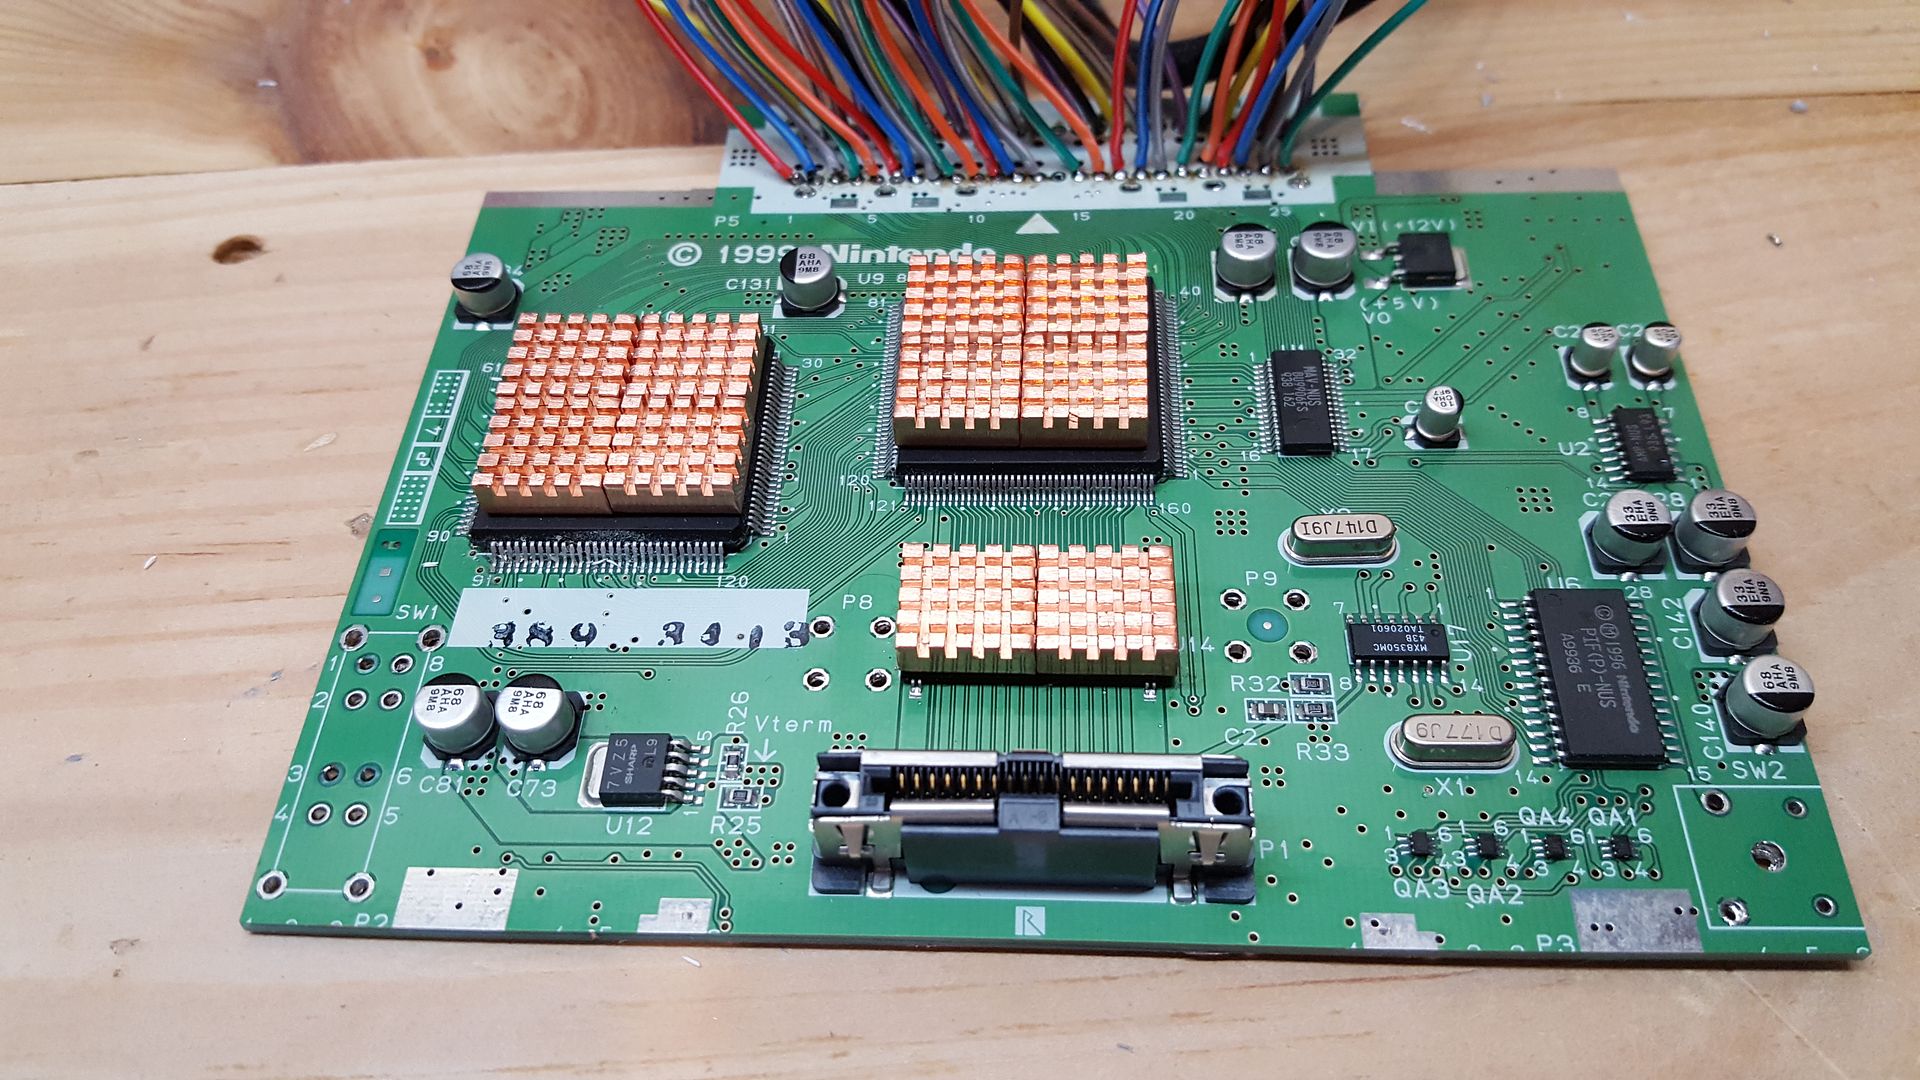
I don't care how many methods of board trimming there are out there, nothing beats the CNC machine for making board cuts. The finish is so smooth and clean, no sanding is required after the fact.
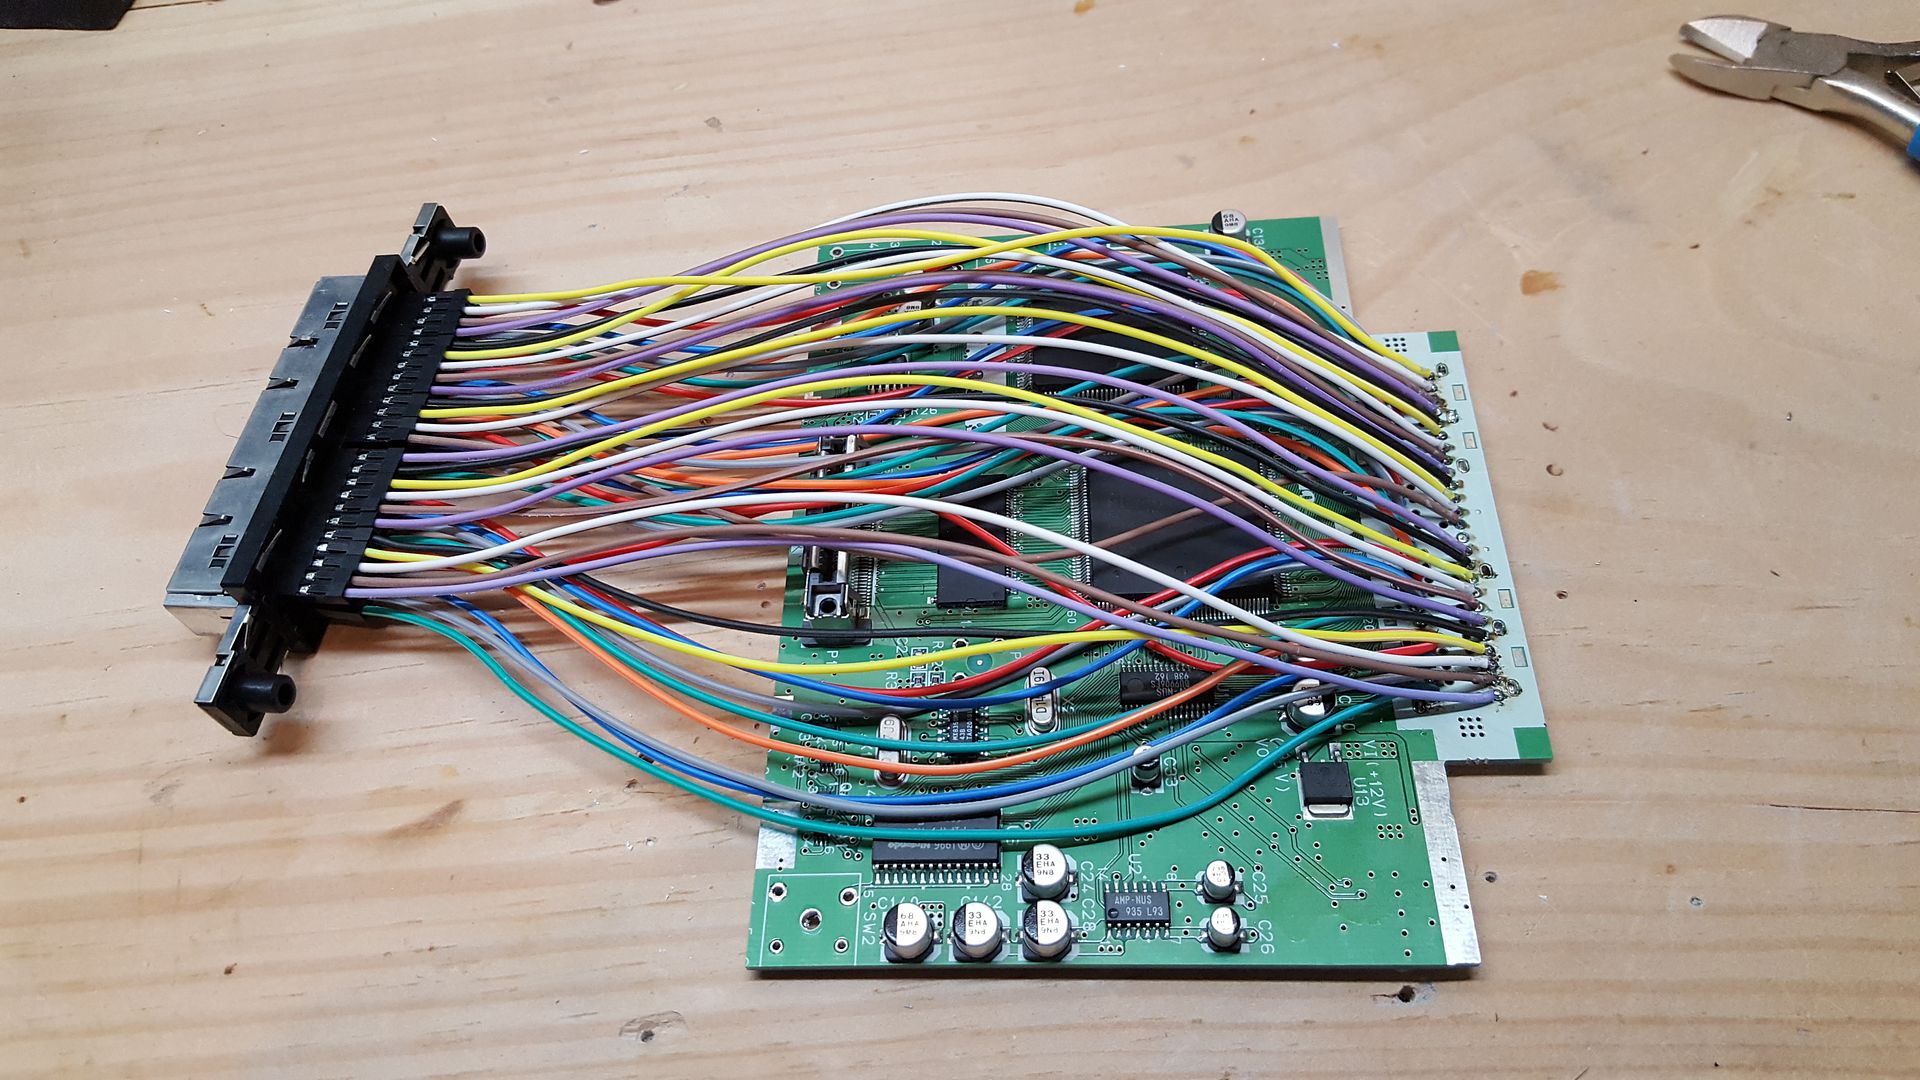
This jumper wire method I tried a few months ago I abandoned as the wire was just too thick and too long to use right out of the box. Though it would have been an awesome time saver. If there are lower profile versions of these jumpers I'd love to find them as I was able to wire a cart slot in full in less than 10 minutes! But for now, I'm back to 30AWG wrapping wire.
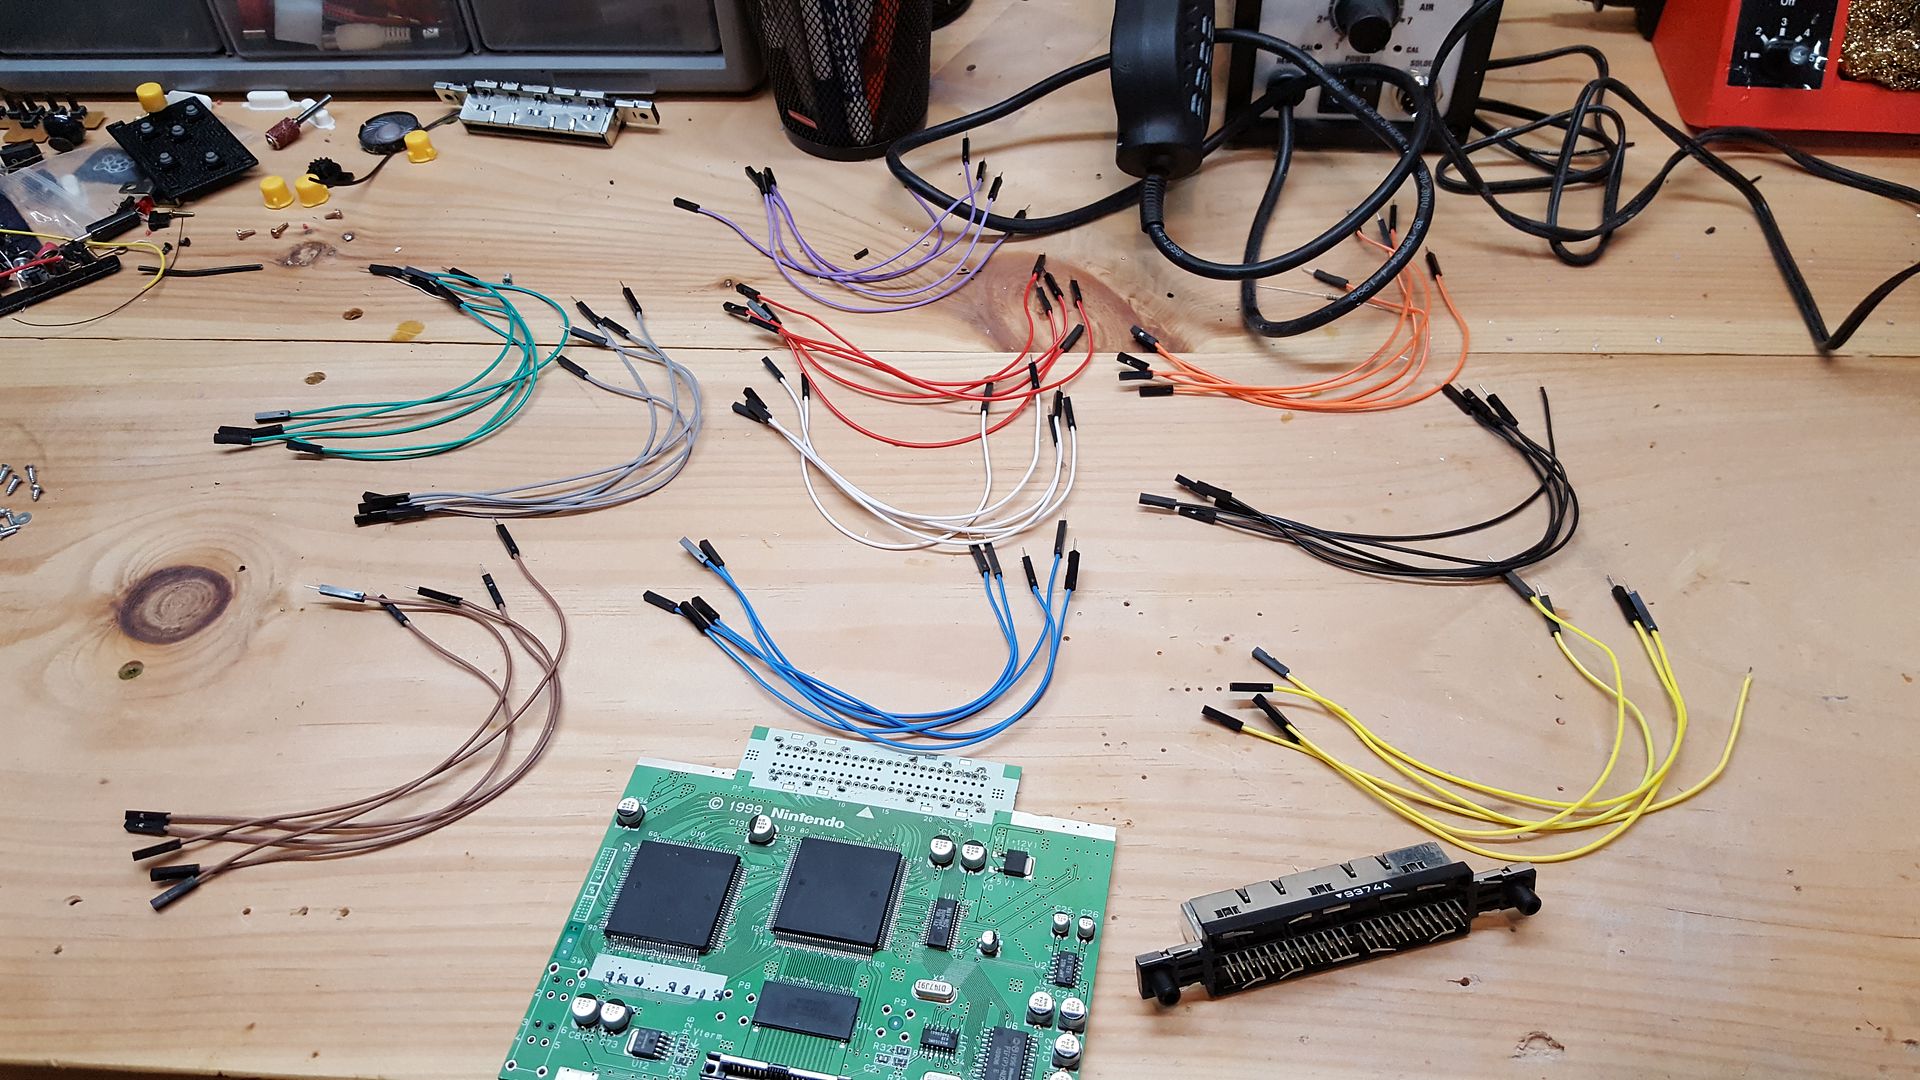
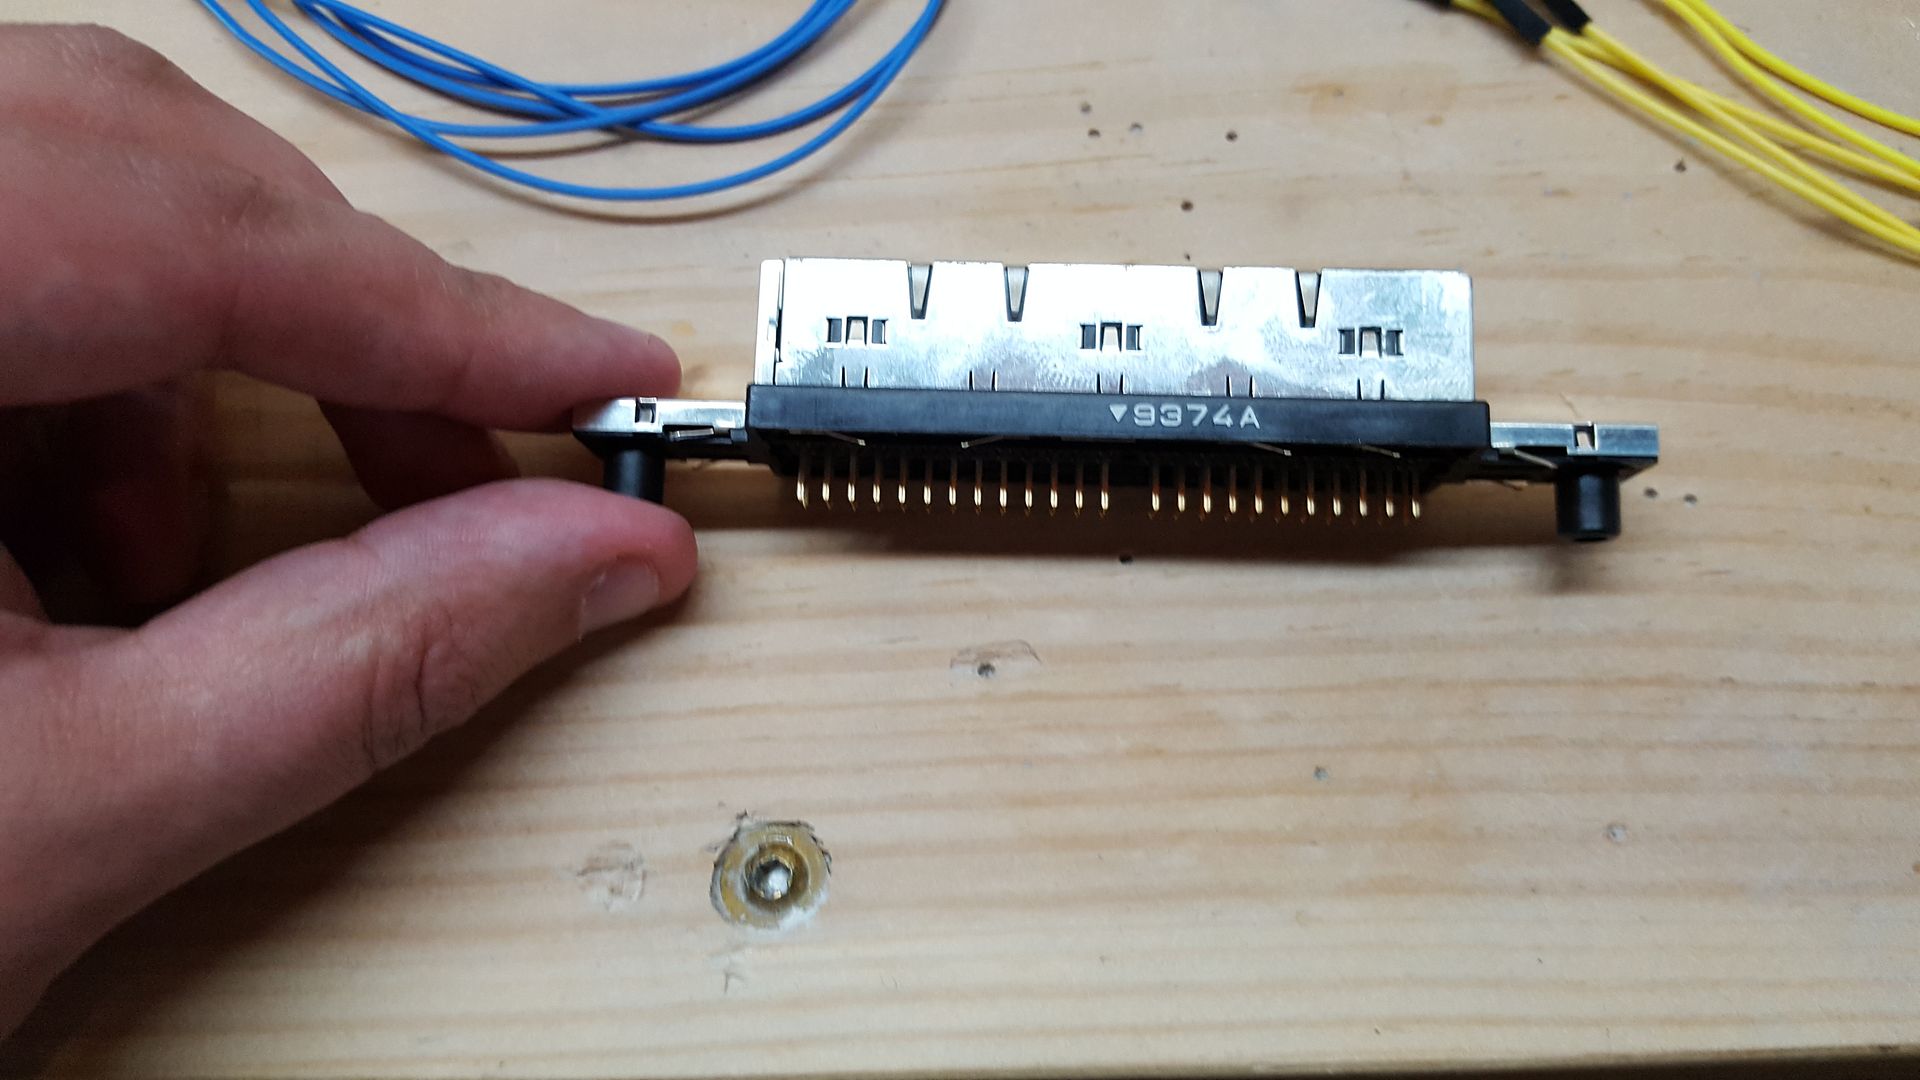
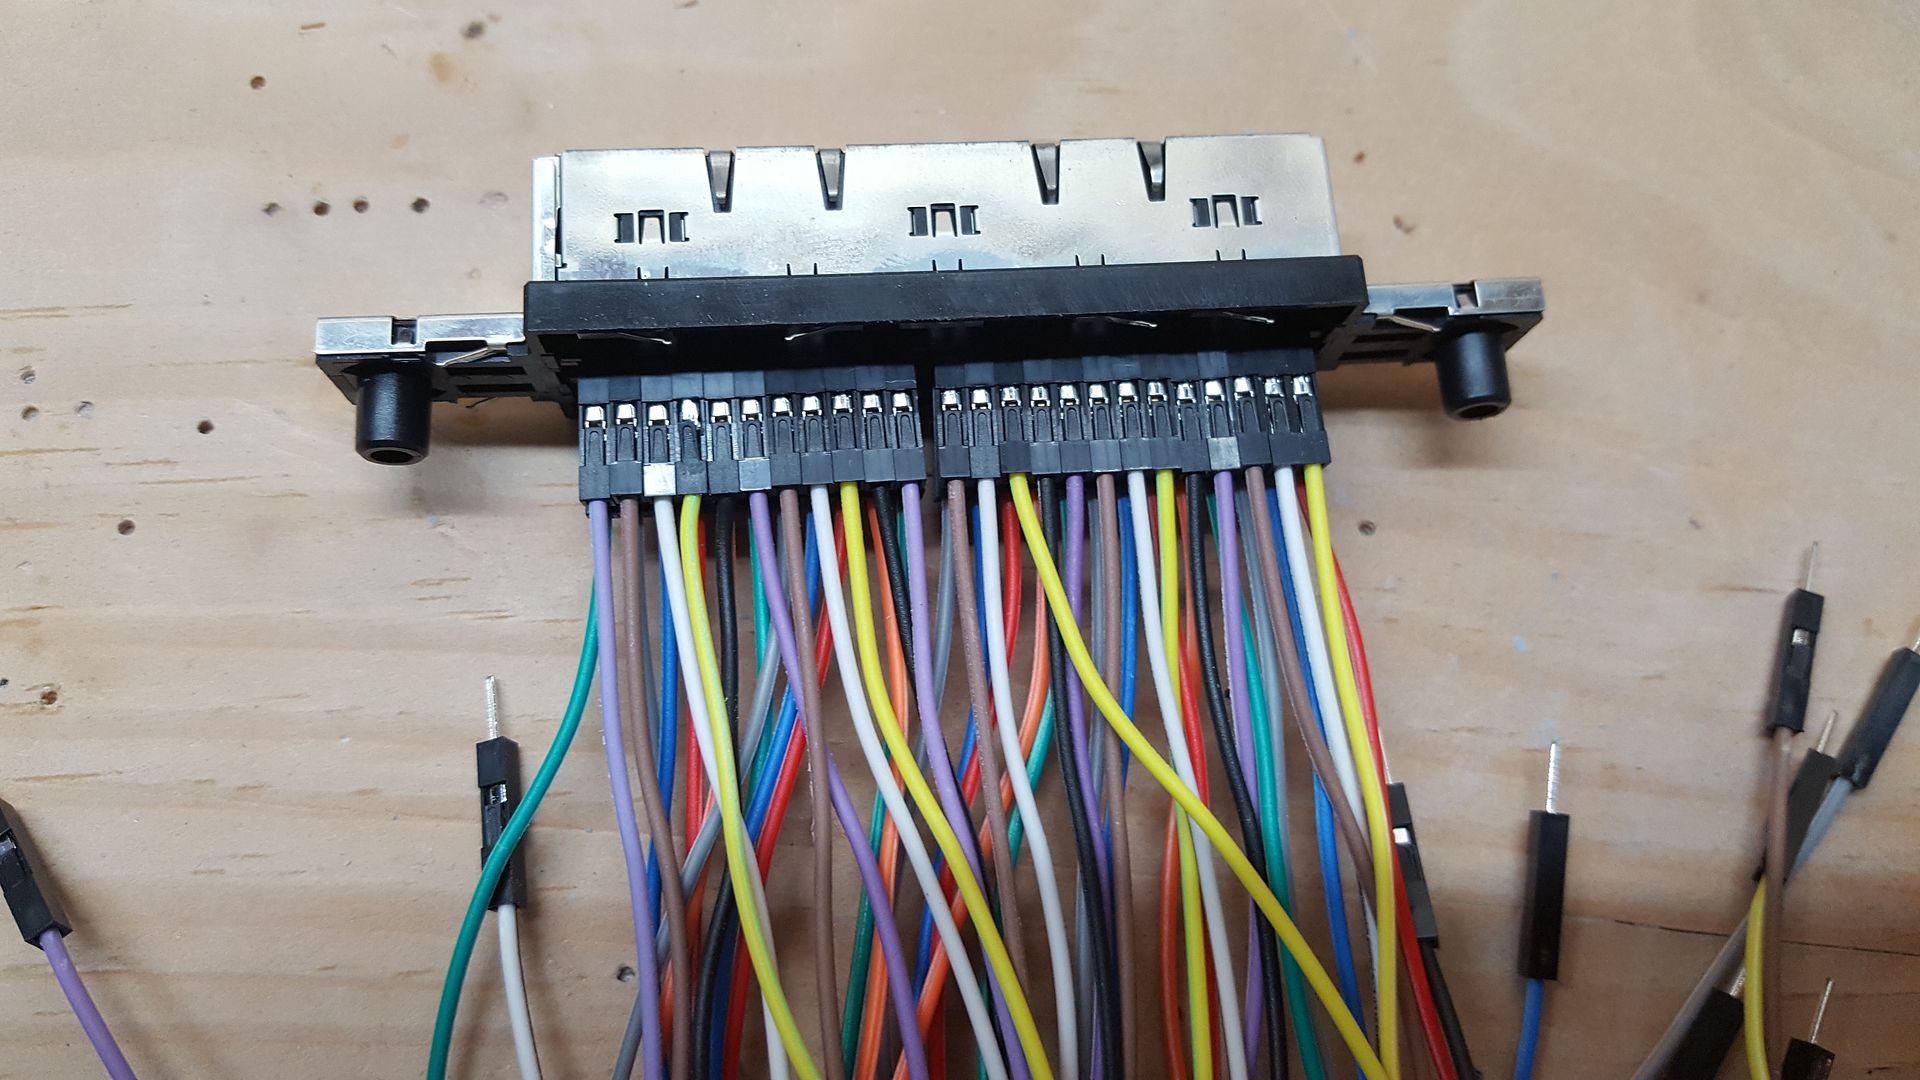
Yes I know I only really needed 27 wires, but this was the first test with the jumpers and seeing if the board worked at all after the trim. I did get it working with 27 wires after the fact, but then somehow fried the freaking board.
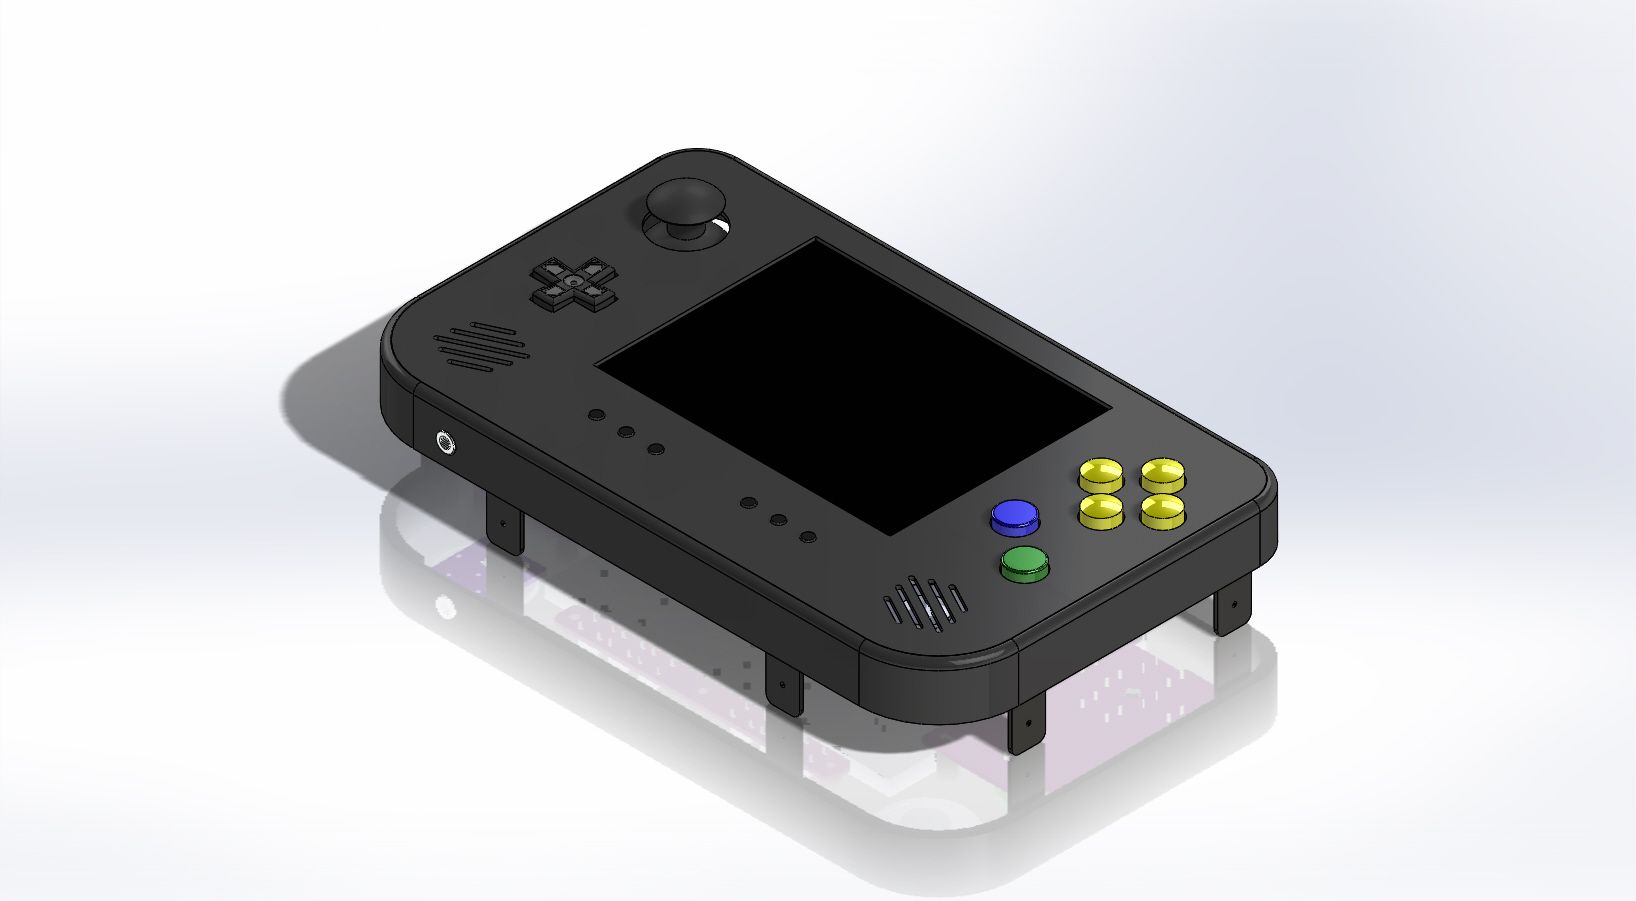
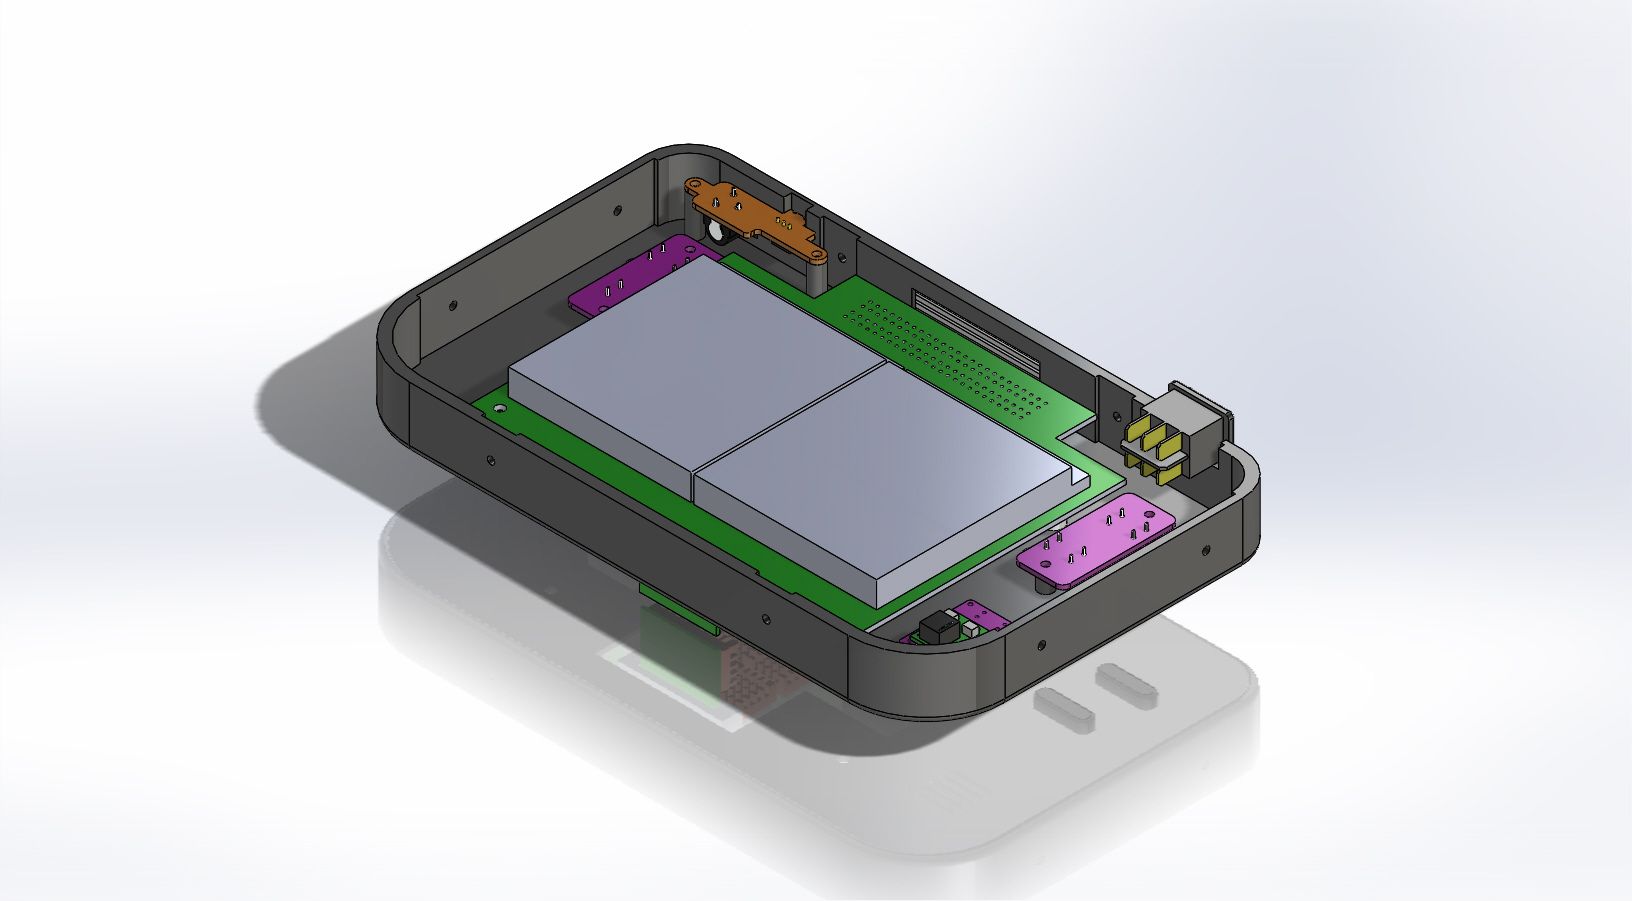
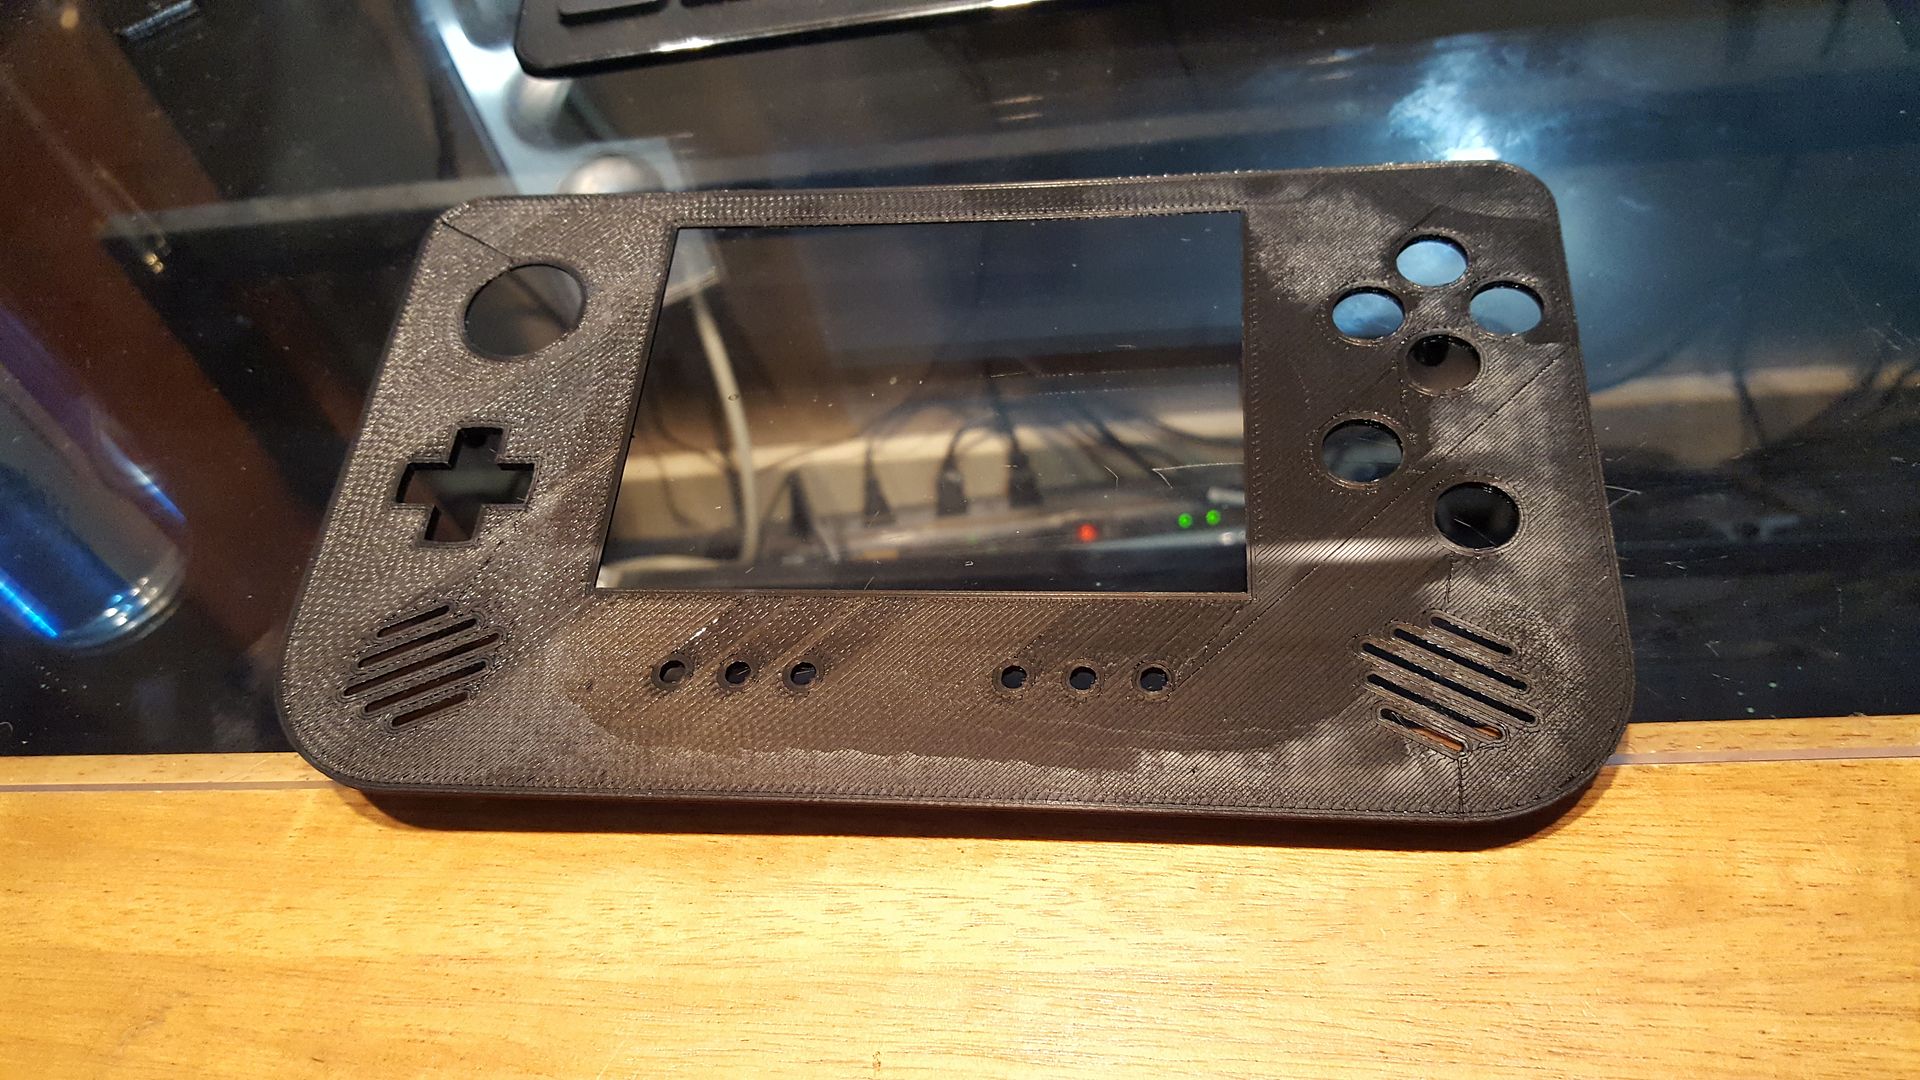
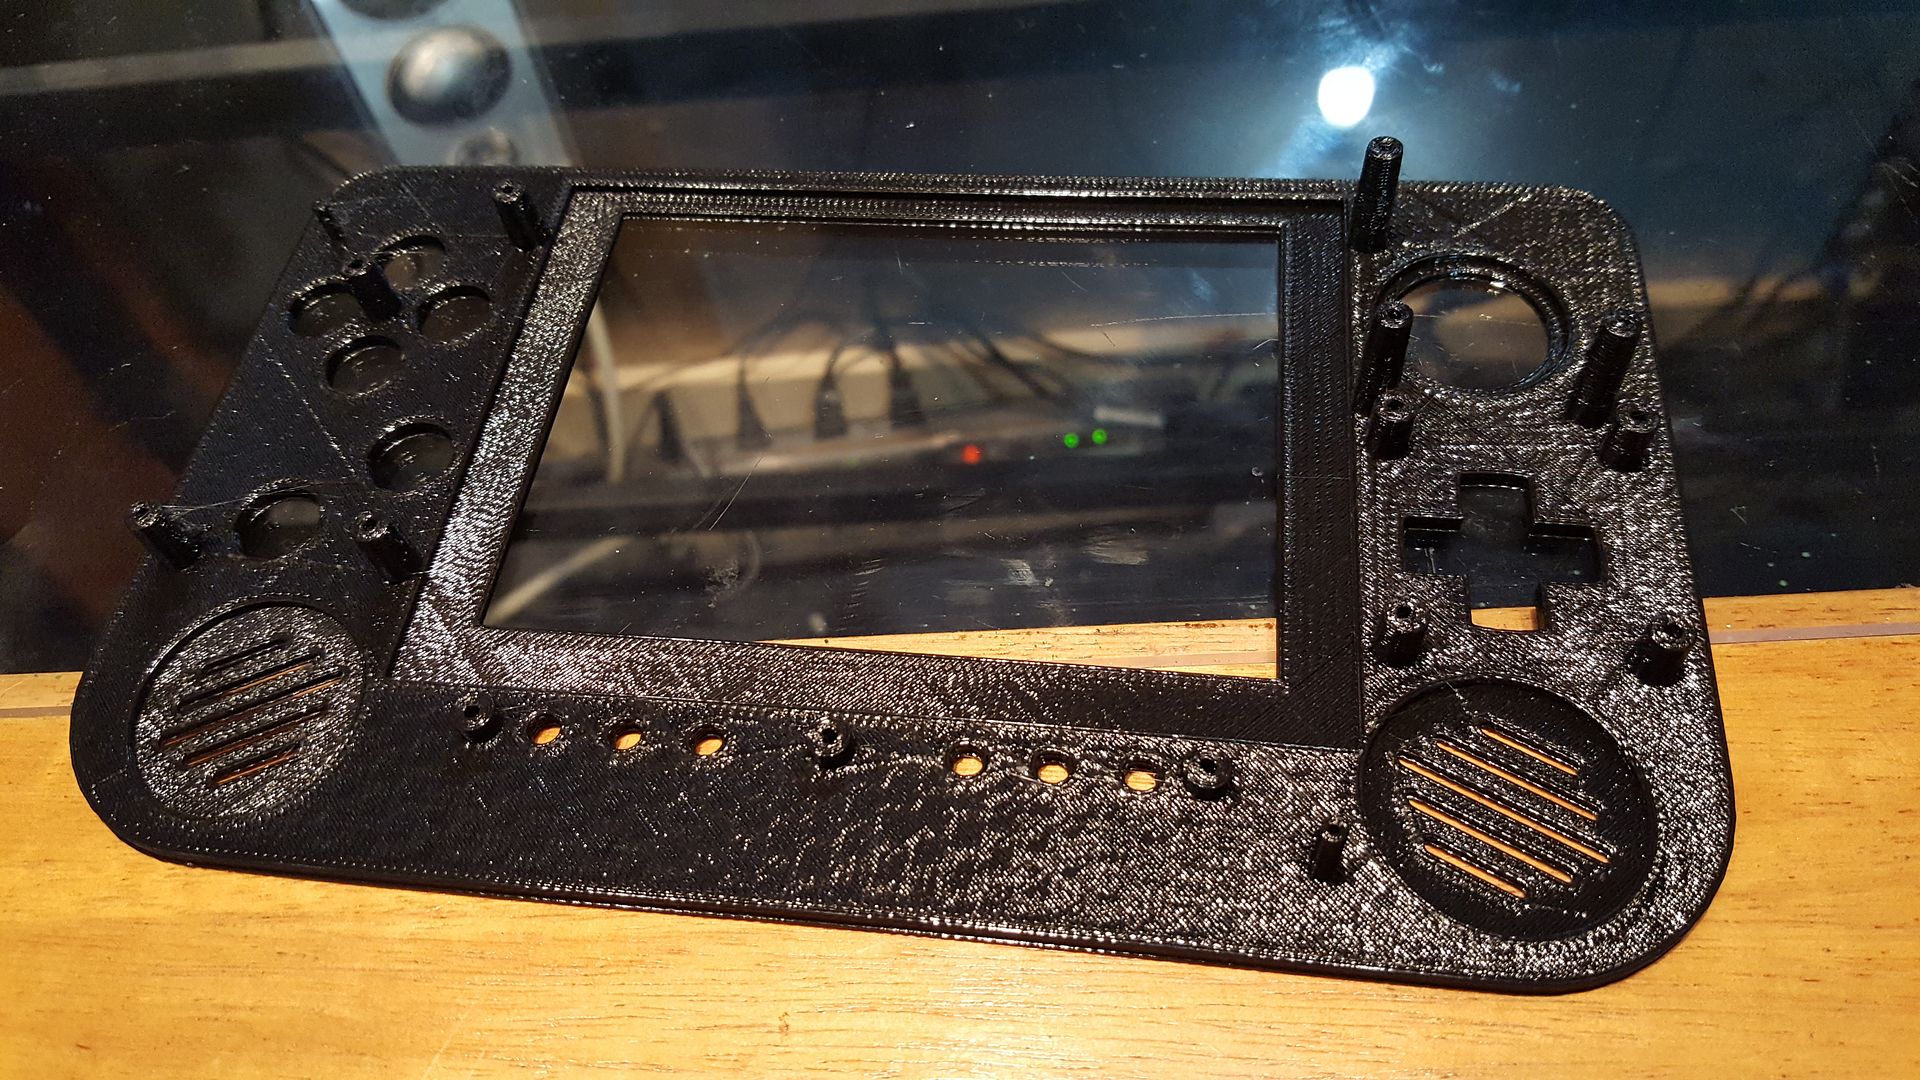
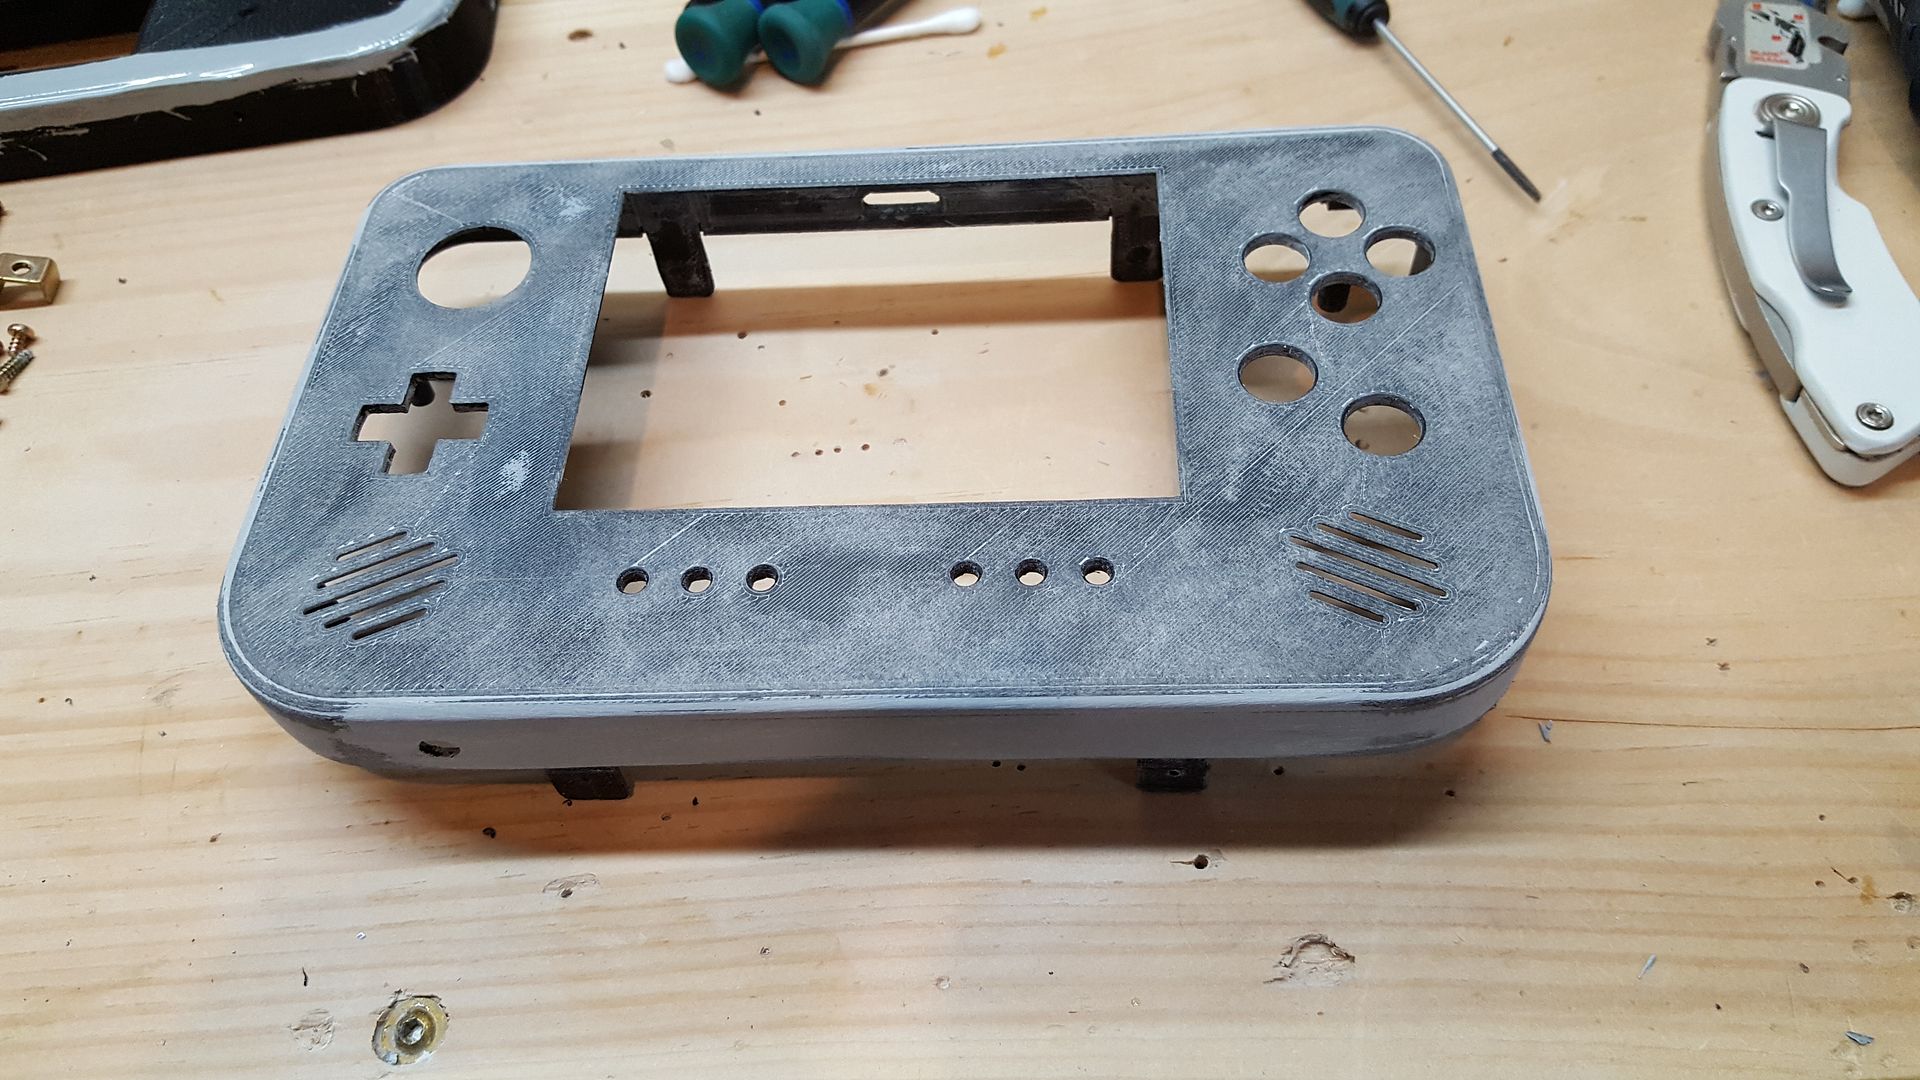
And yes, my favorite part, the case work! All parts on this one were 3D printed, though now my CNC is back up and running, I will probably go back to the 3D print back and front brackets and CNC'd front and back face plates using 3D printed standoffs and mounting brackets instead. Cuts the filling/case work down a great deal as the finish cuts are perfect with the CNC, none of these lines and gaps left by 3D printers.

The end of the filling and sanding work which takes forever!
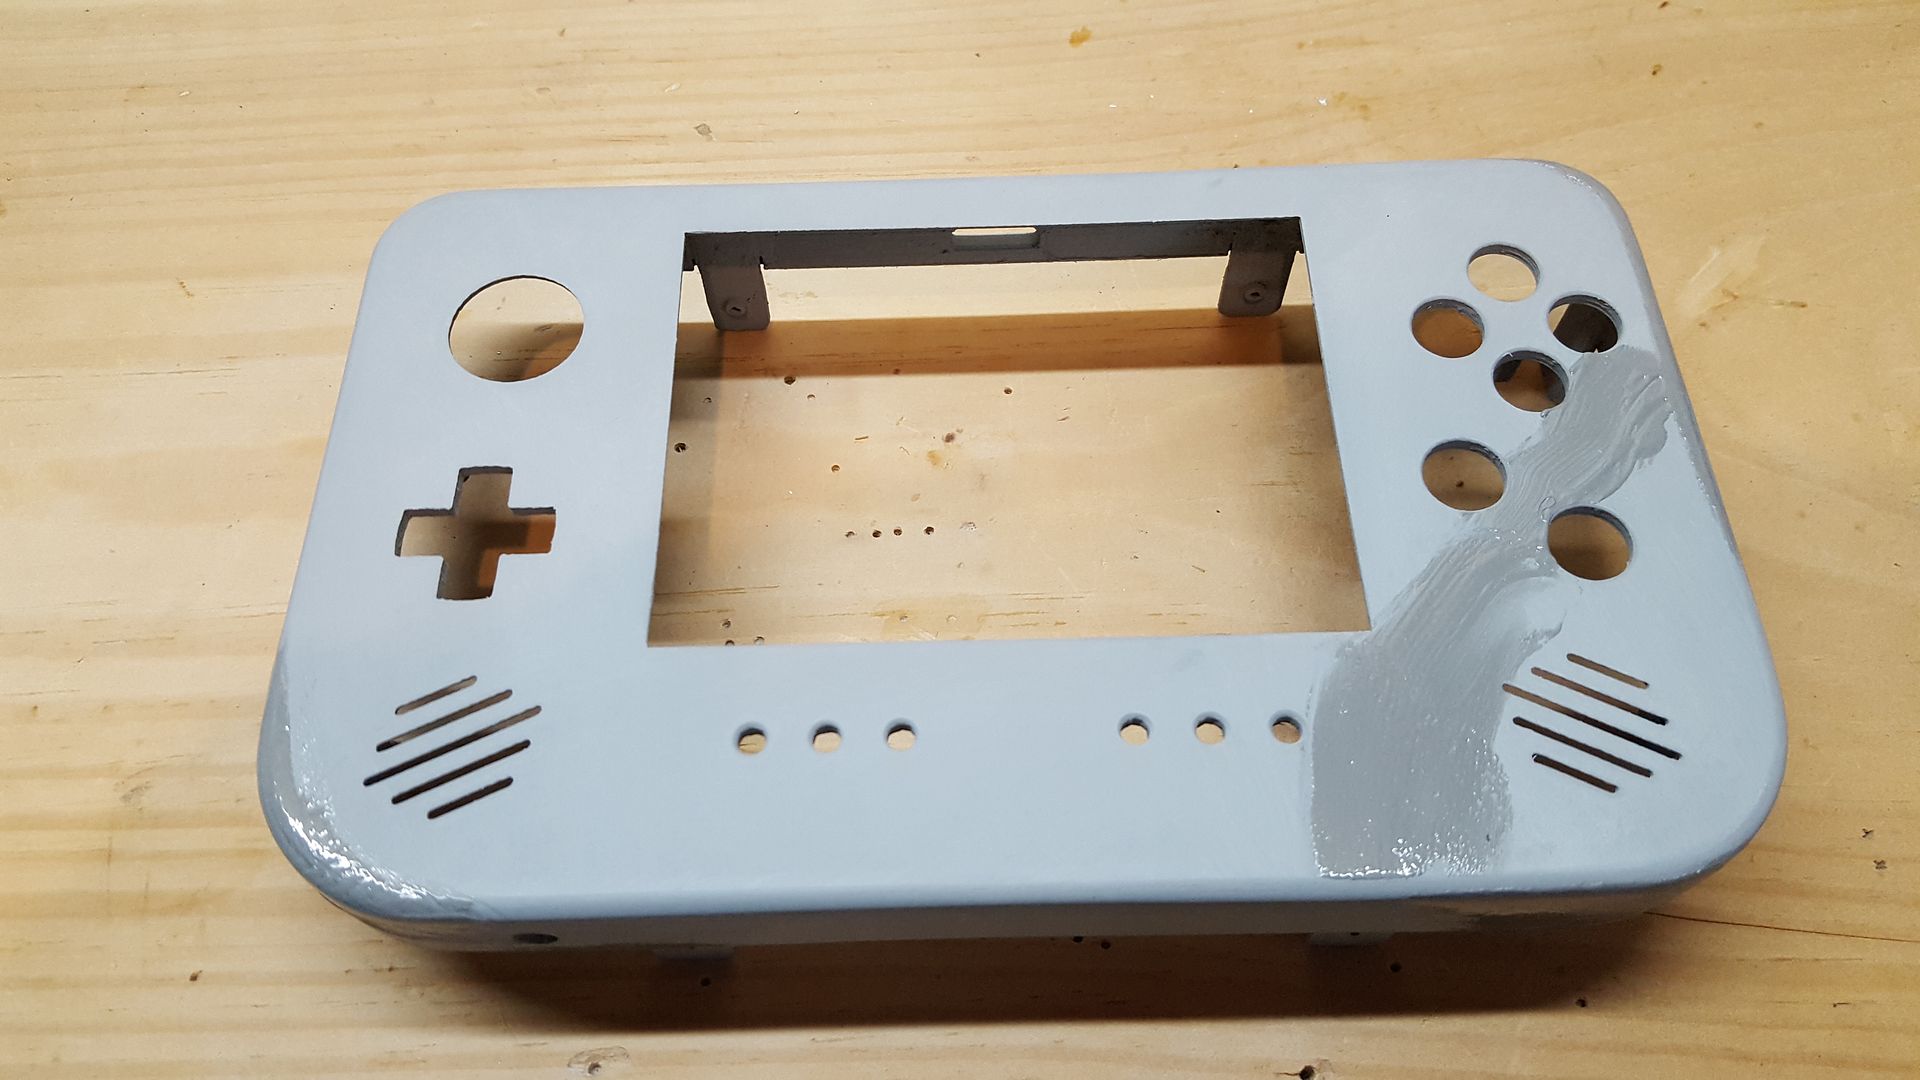
First coat of primer and additional filling
First coat of finish. Not perfect but decent.
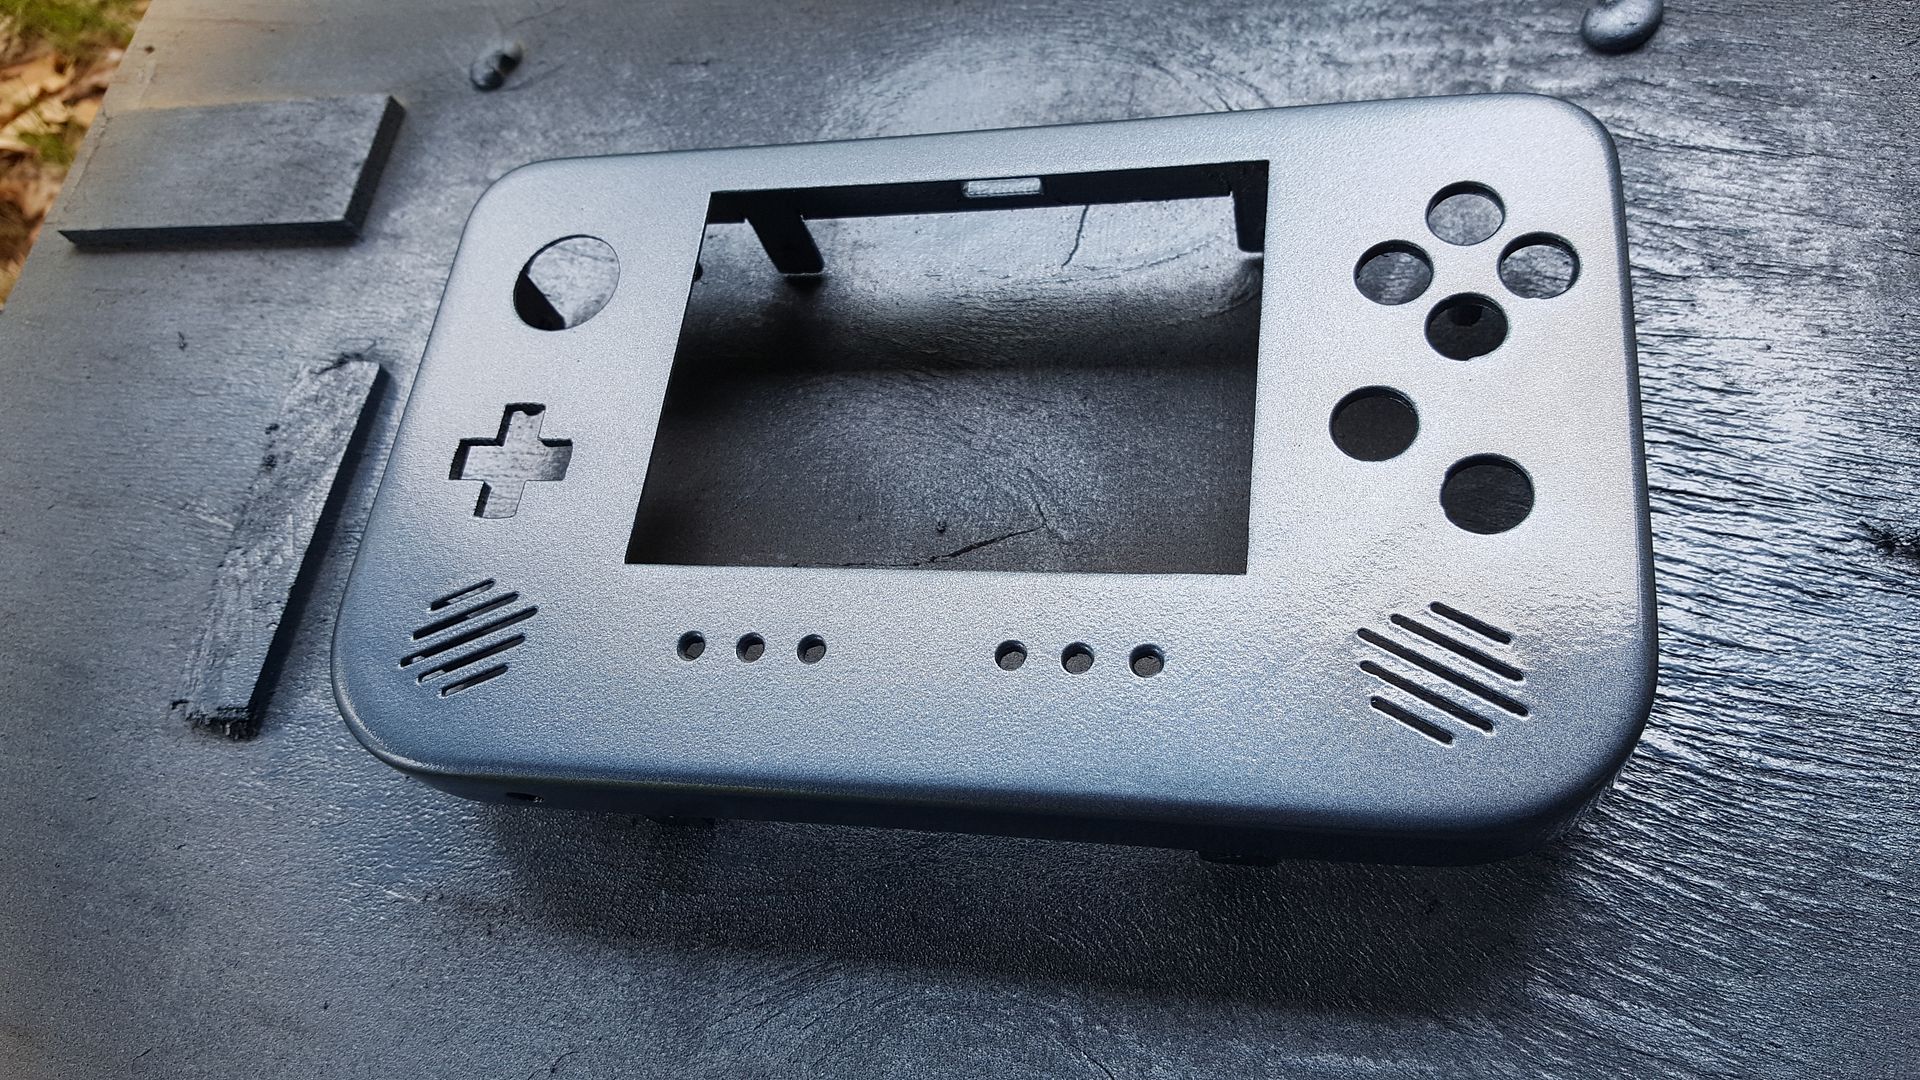
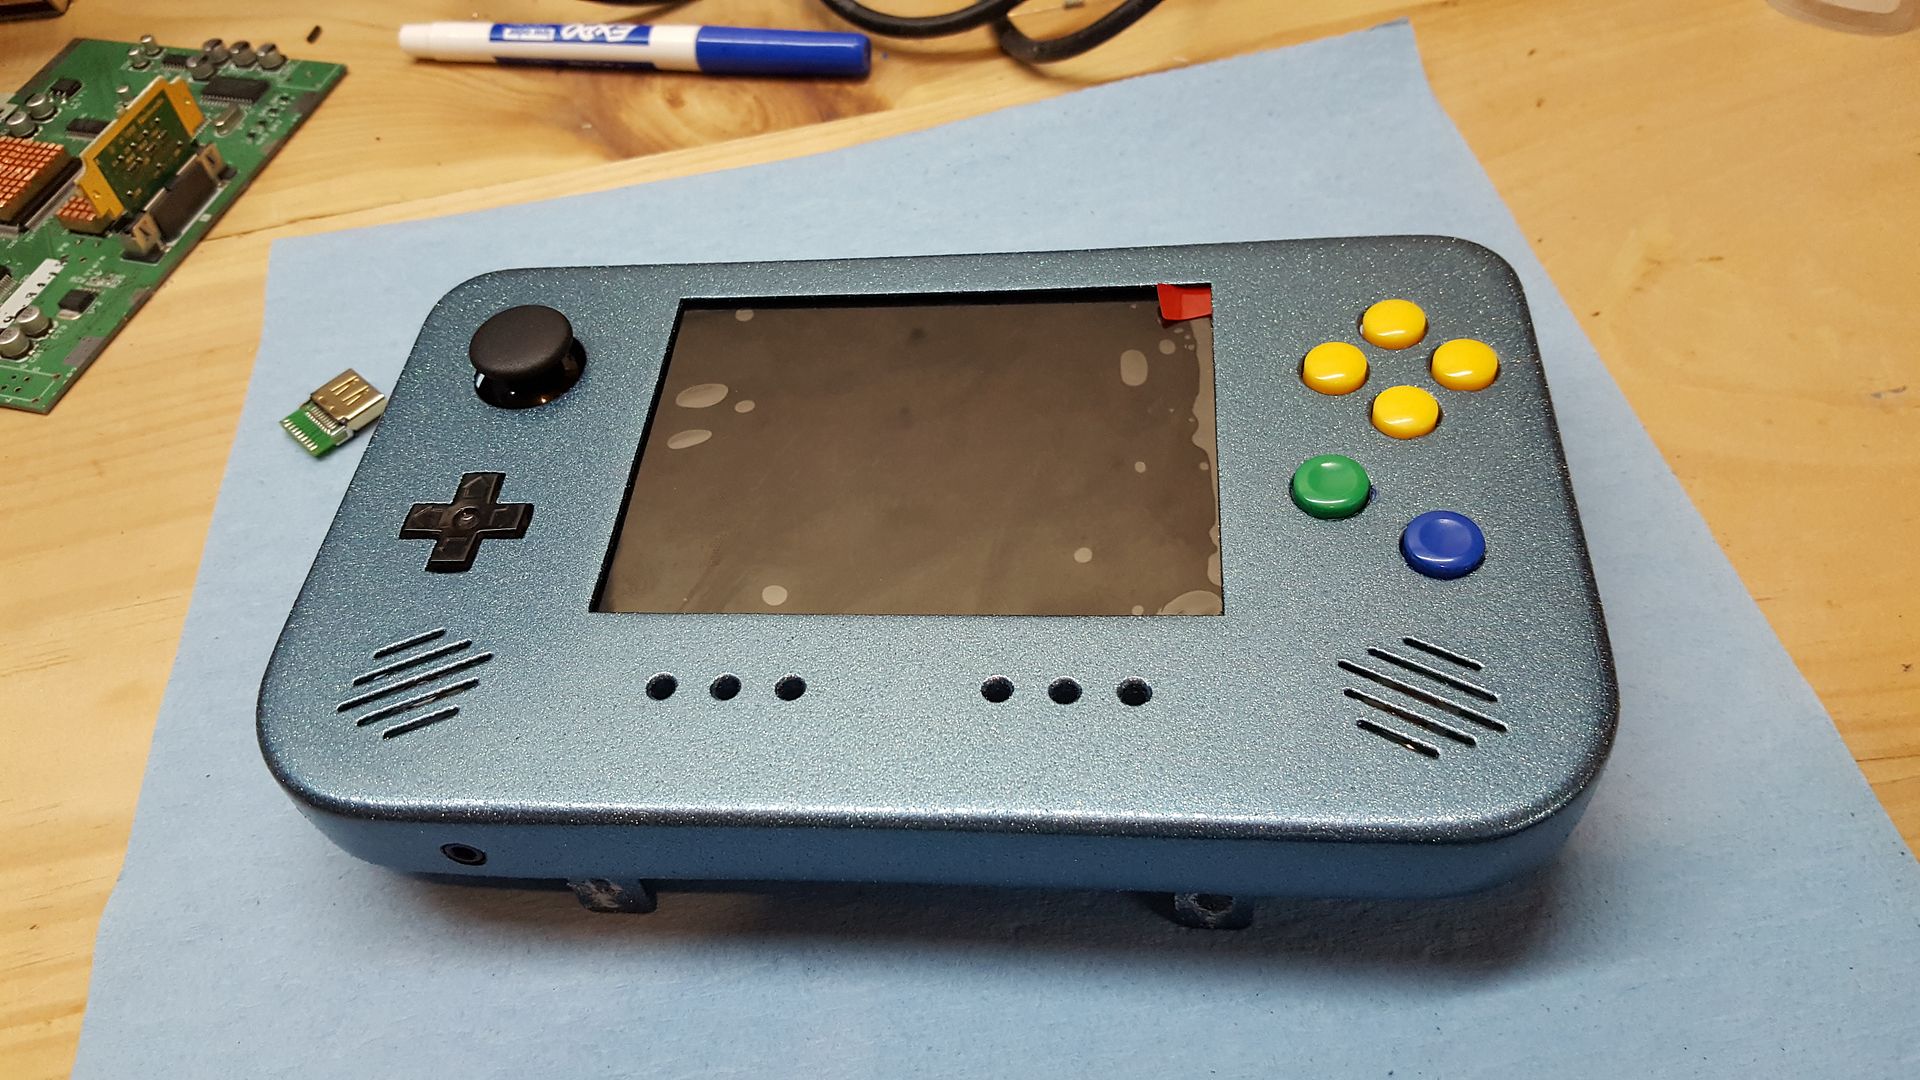
Texture applied which covers the imperfections nicely.
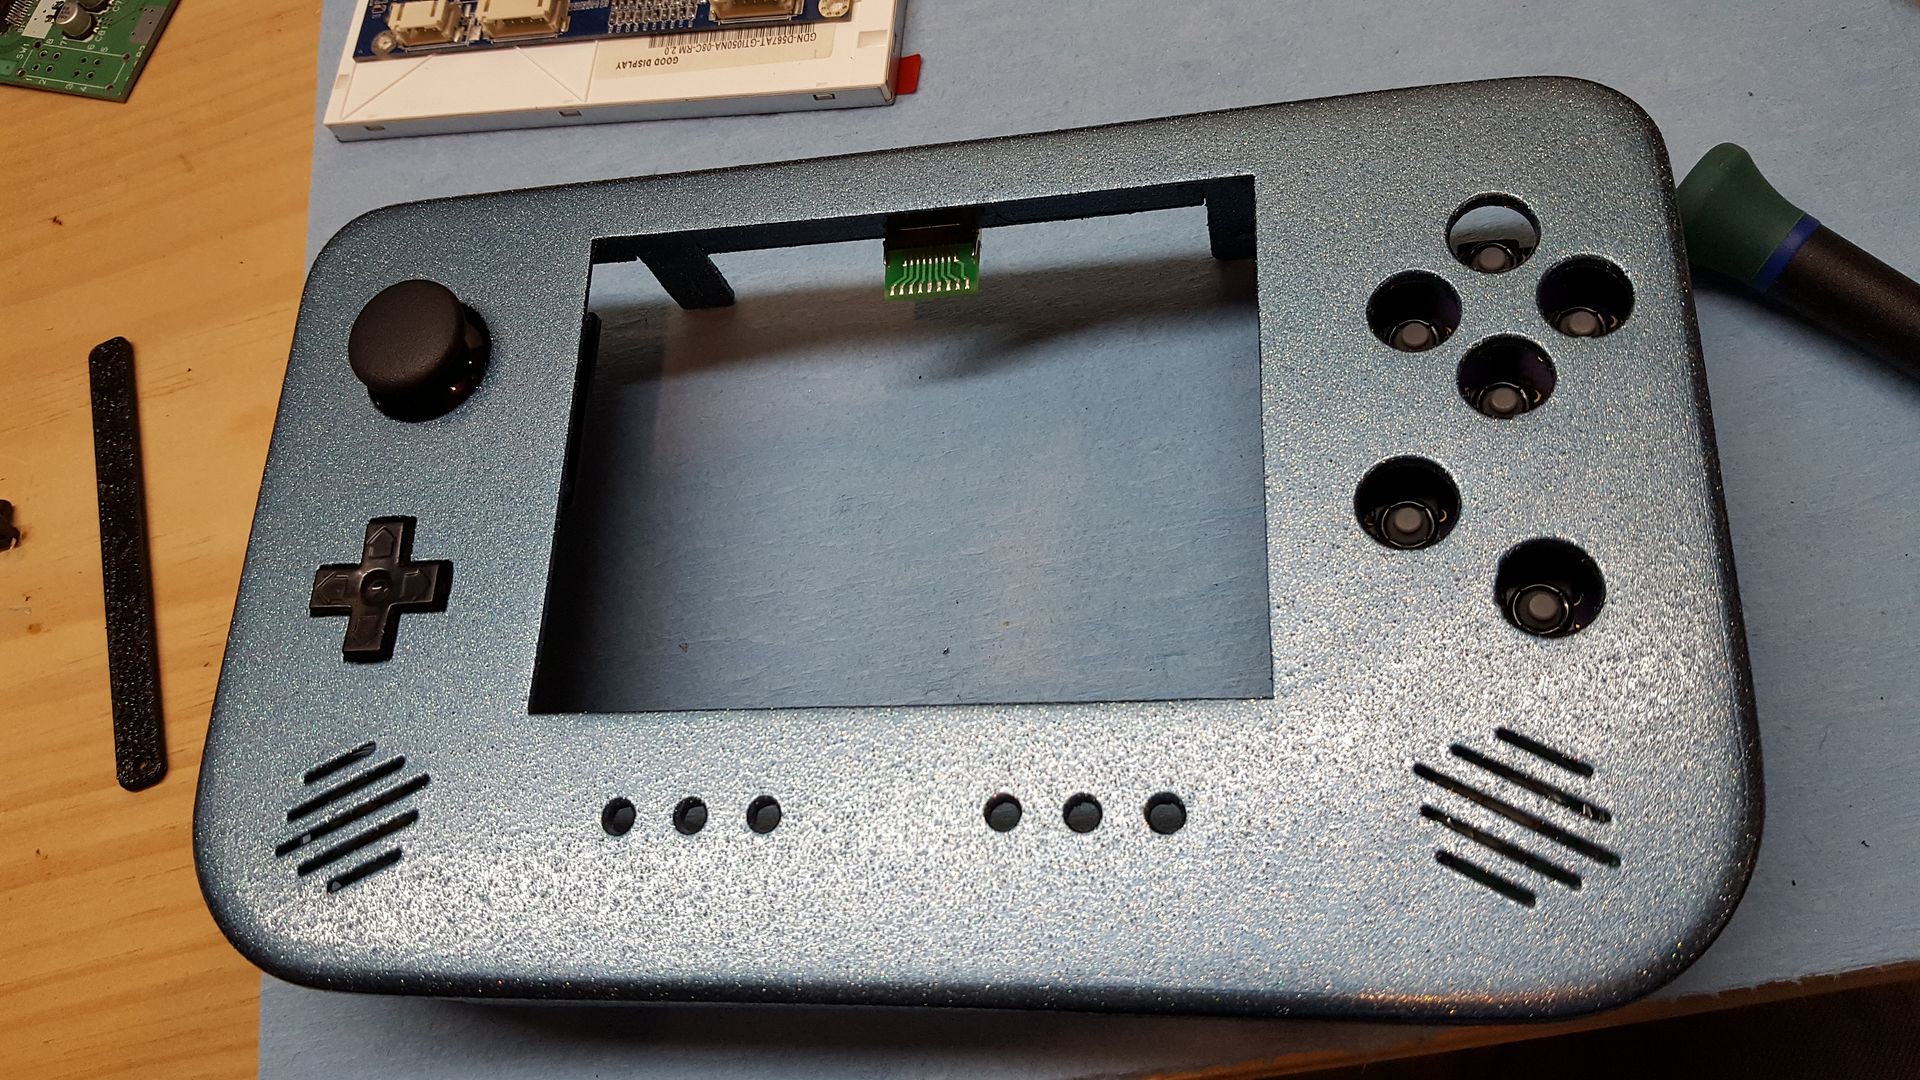
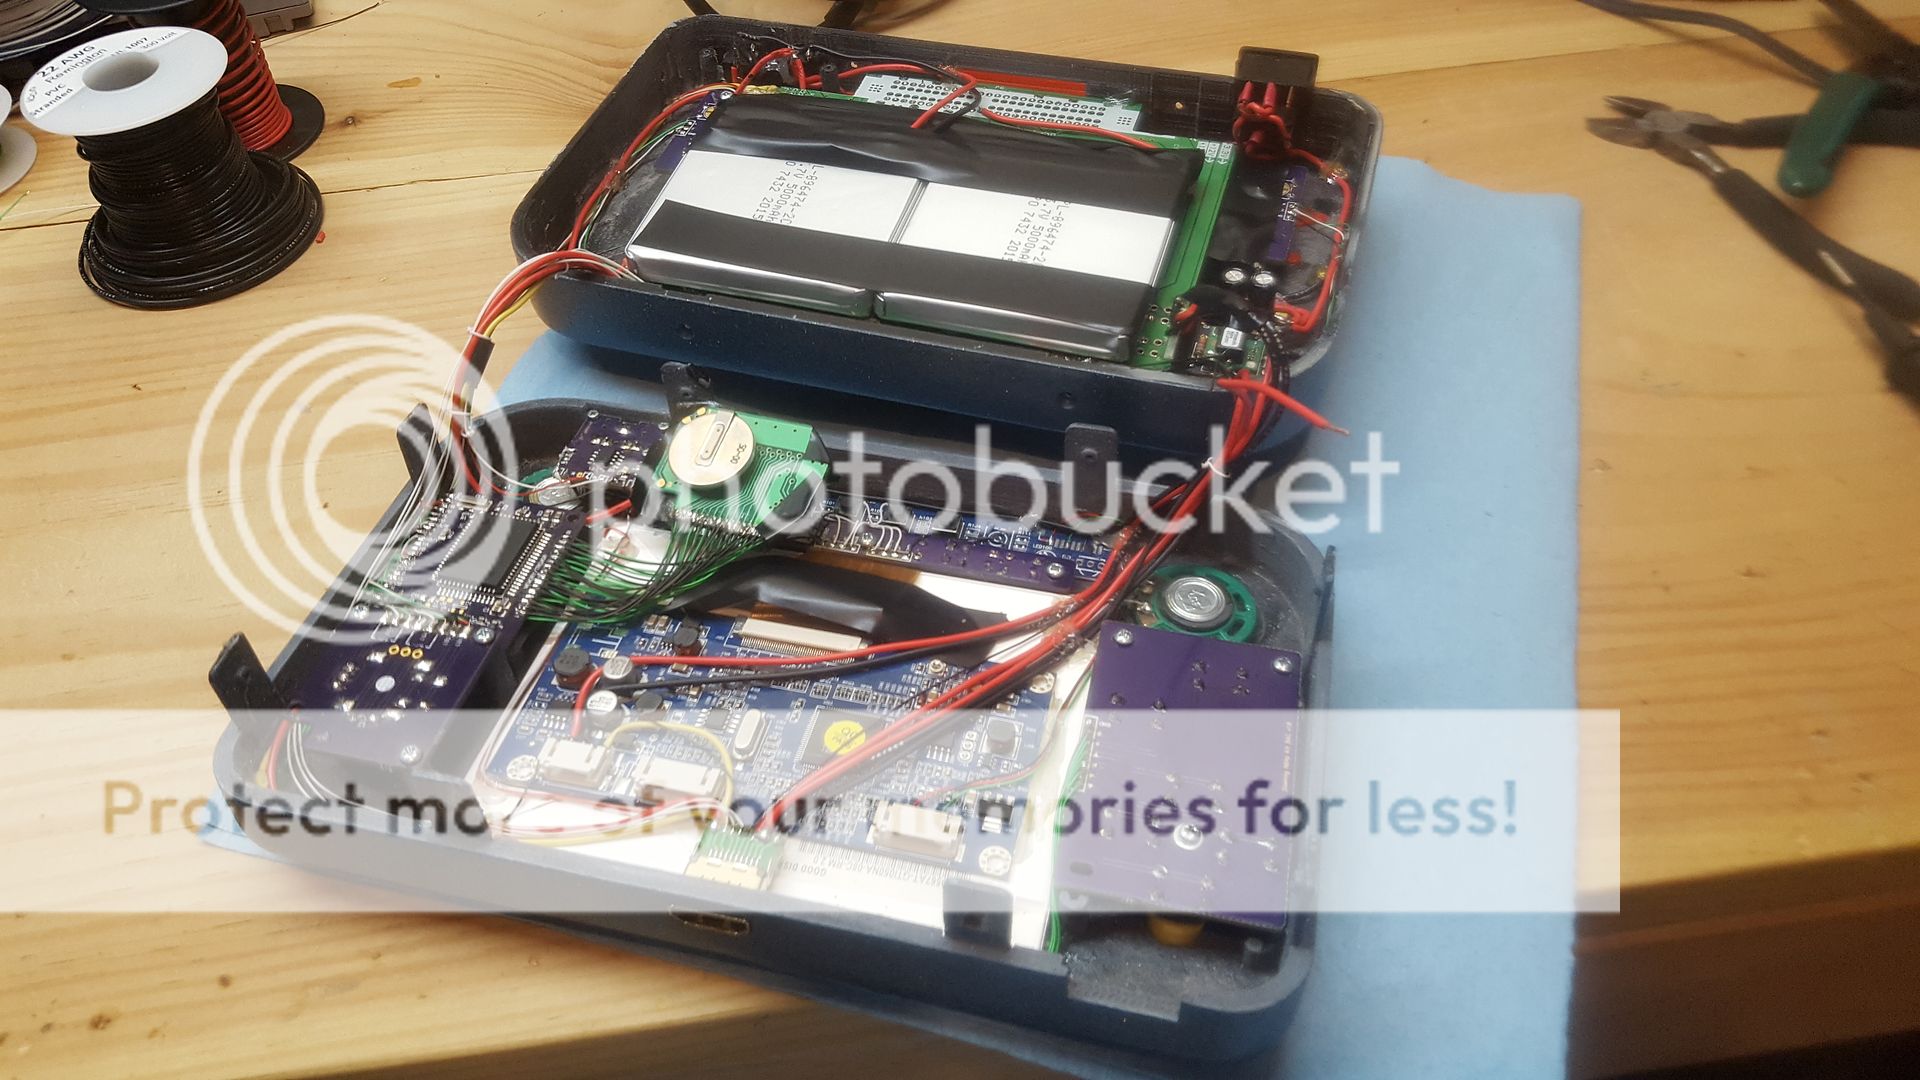
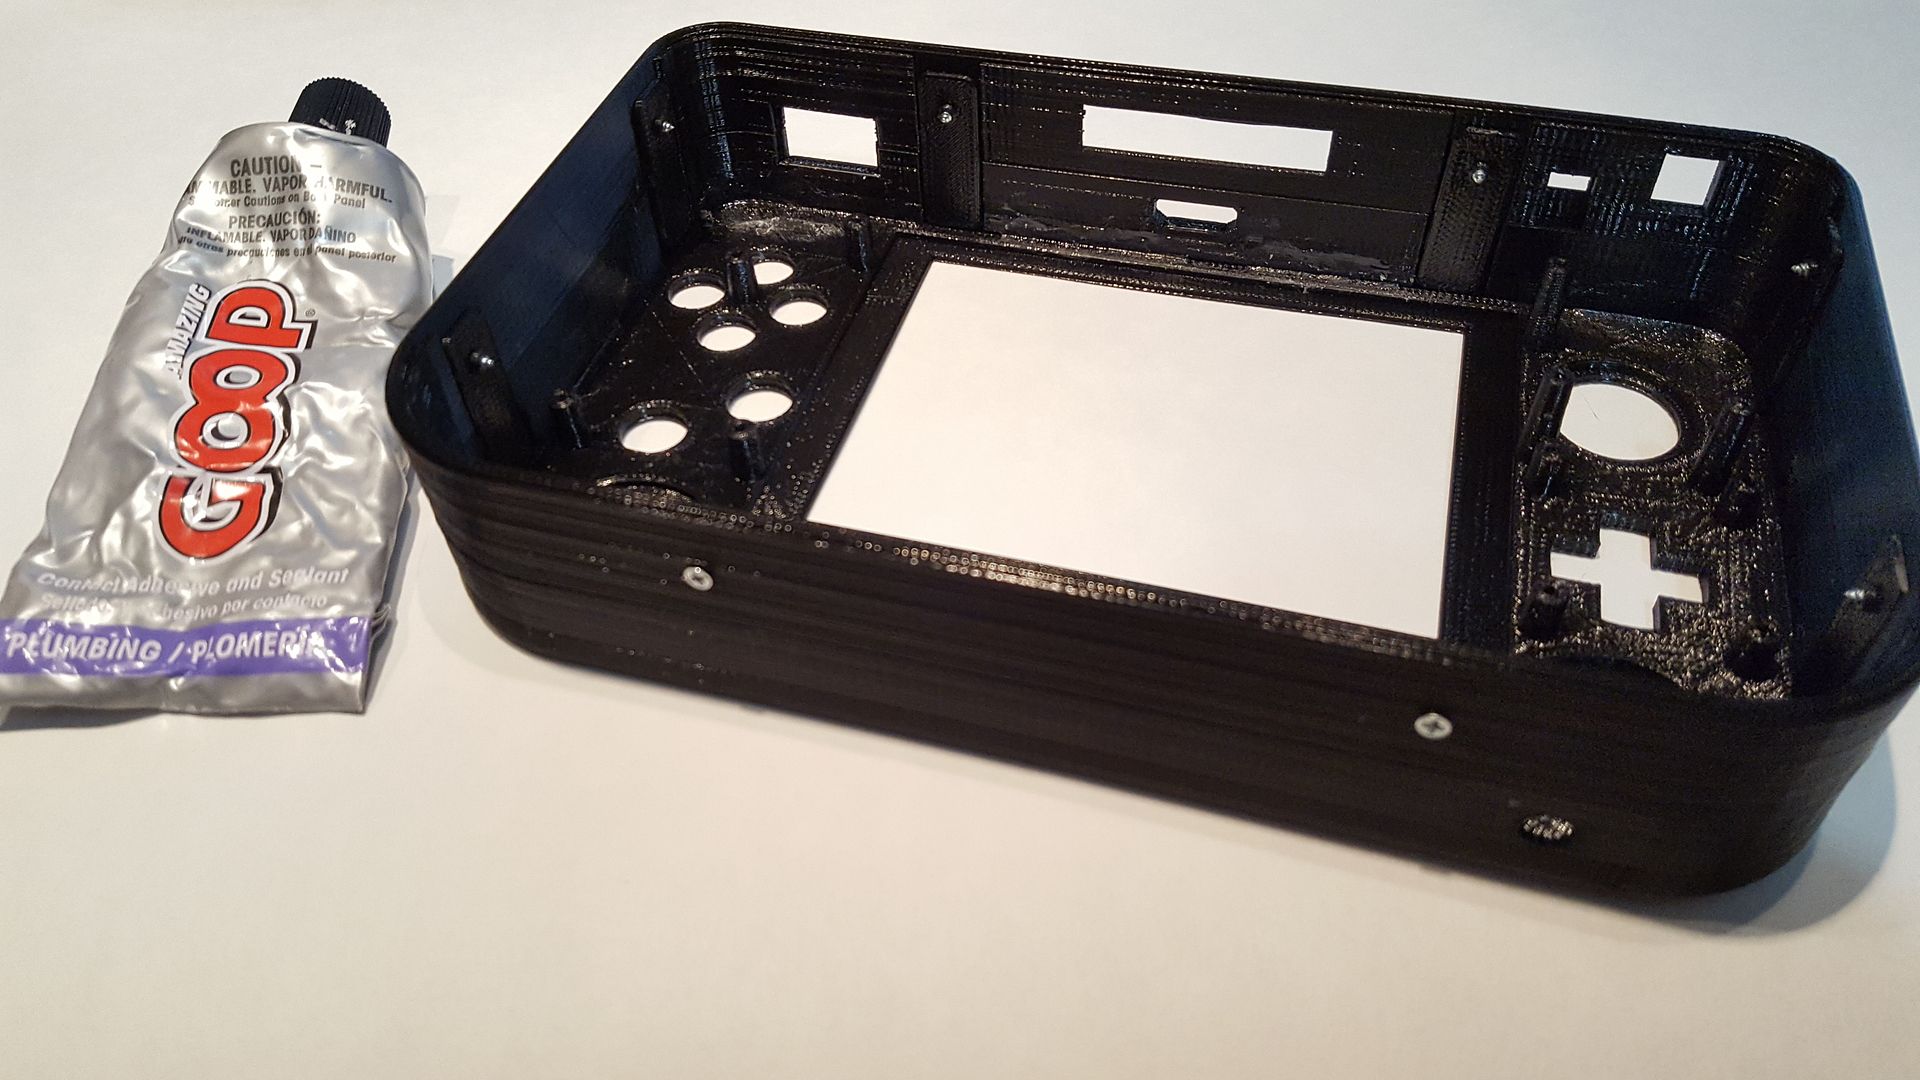
Adding the components.
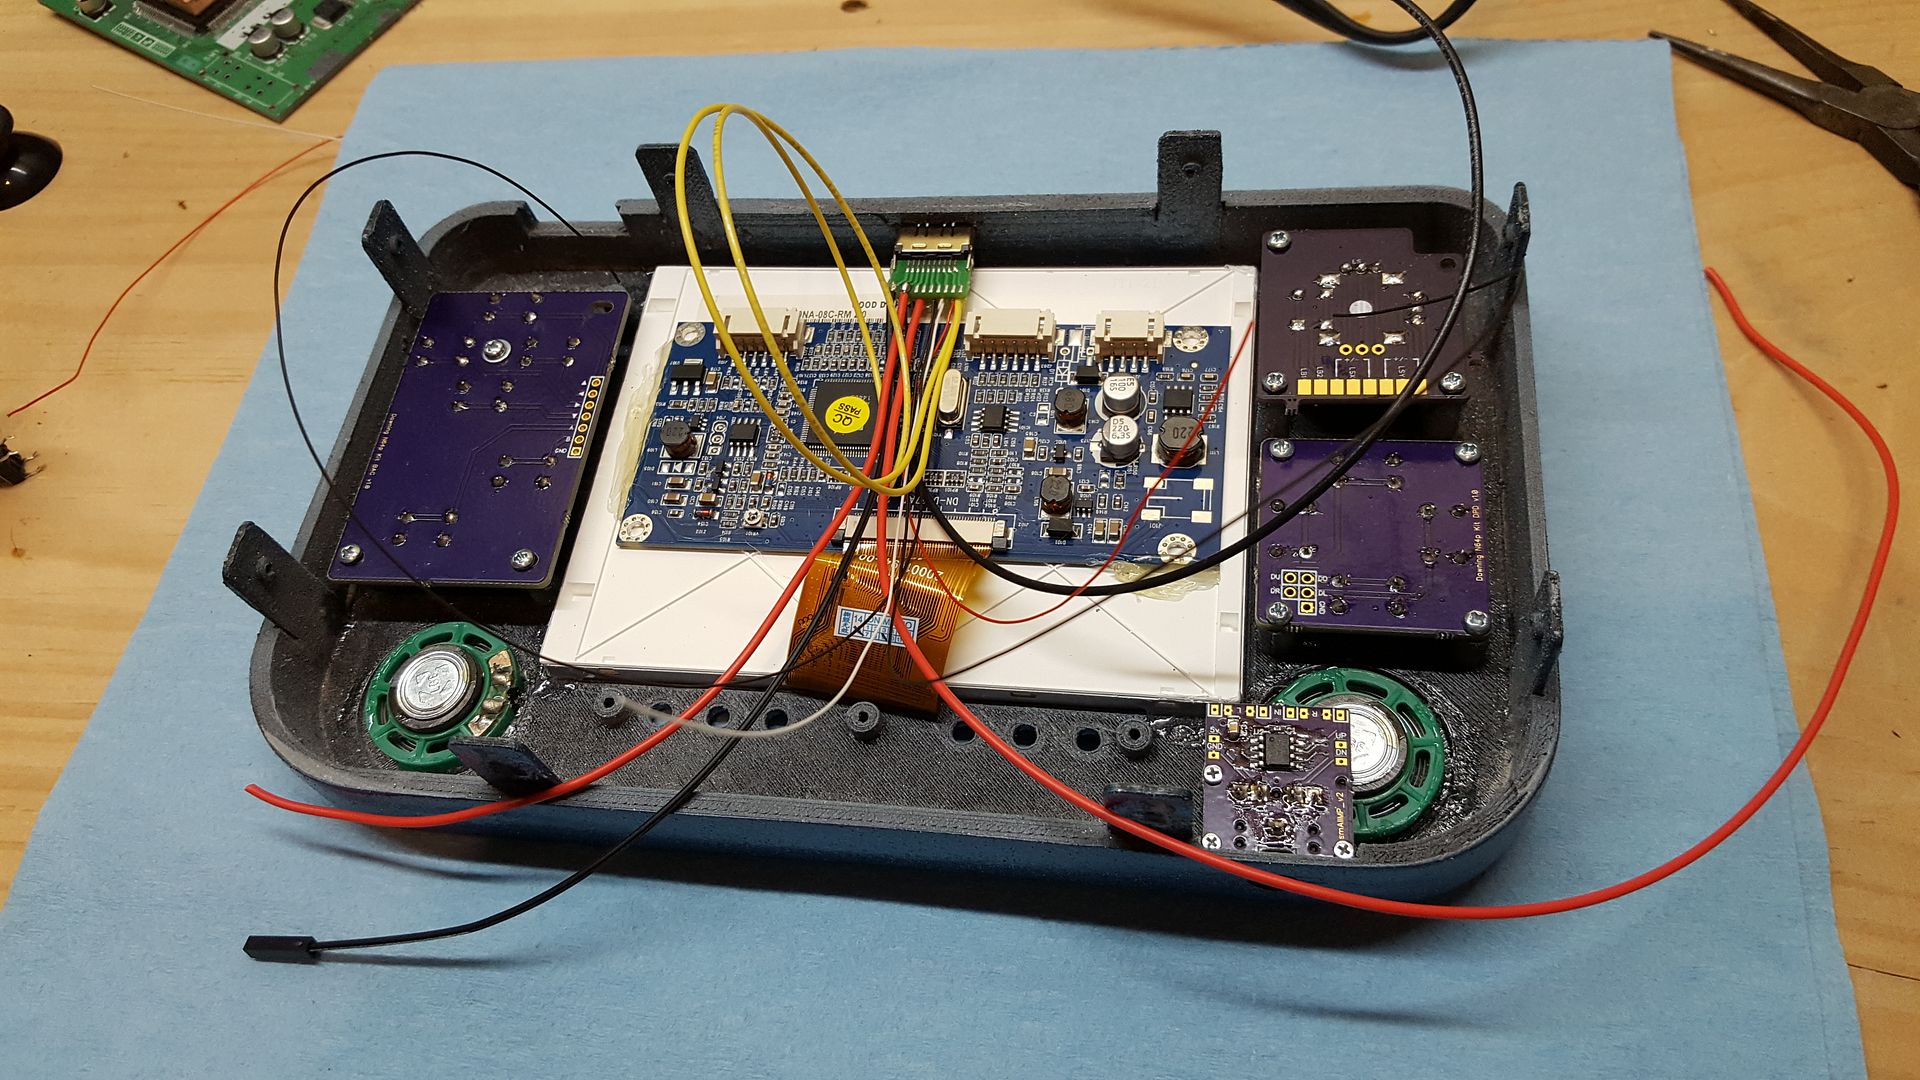
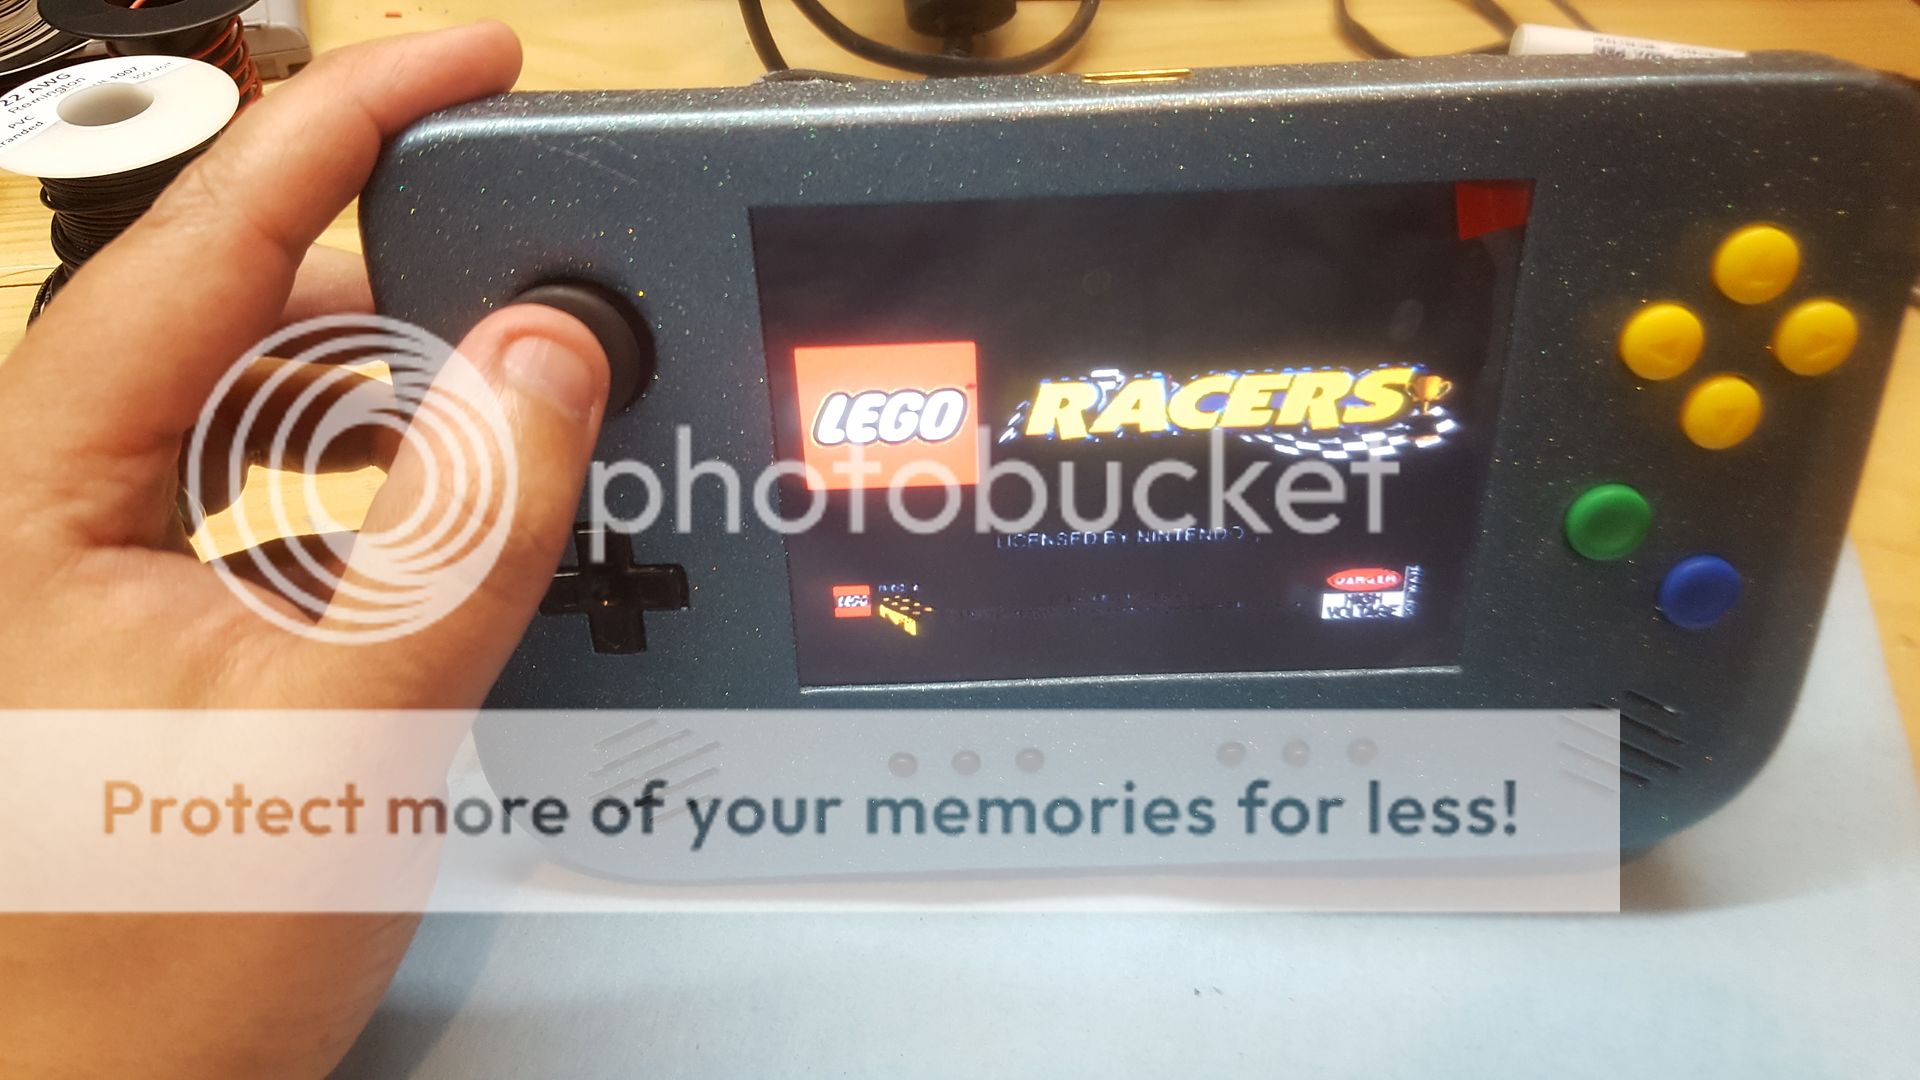
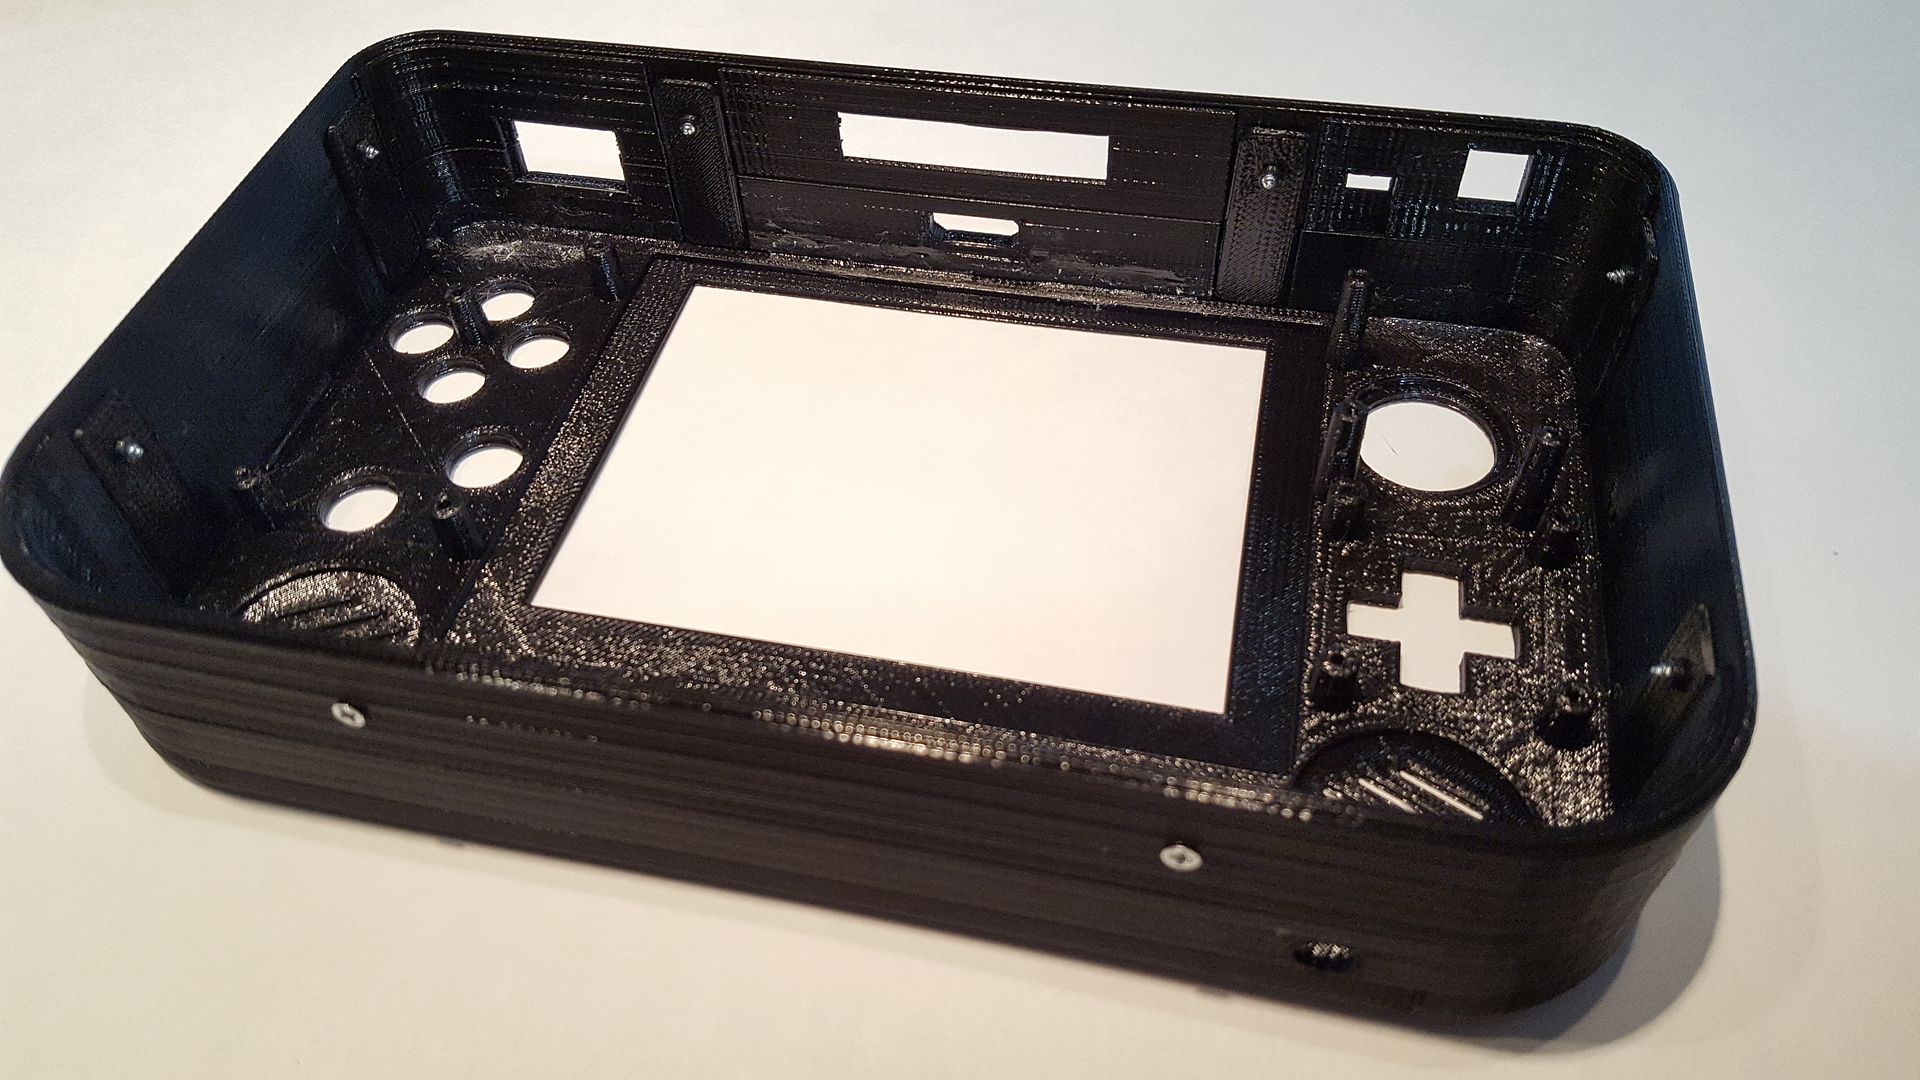
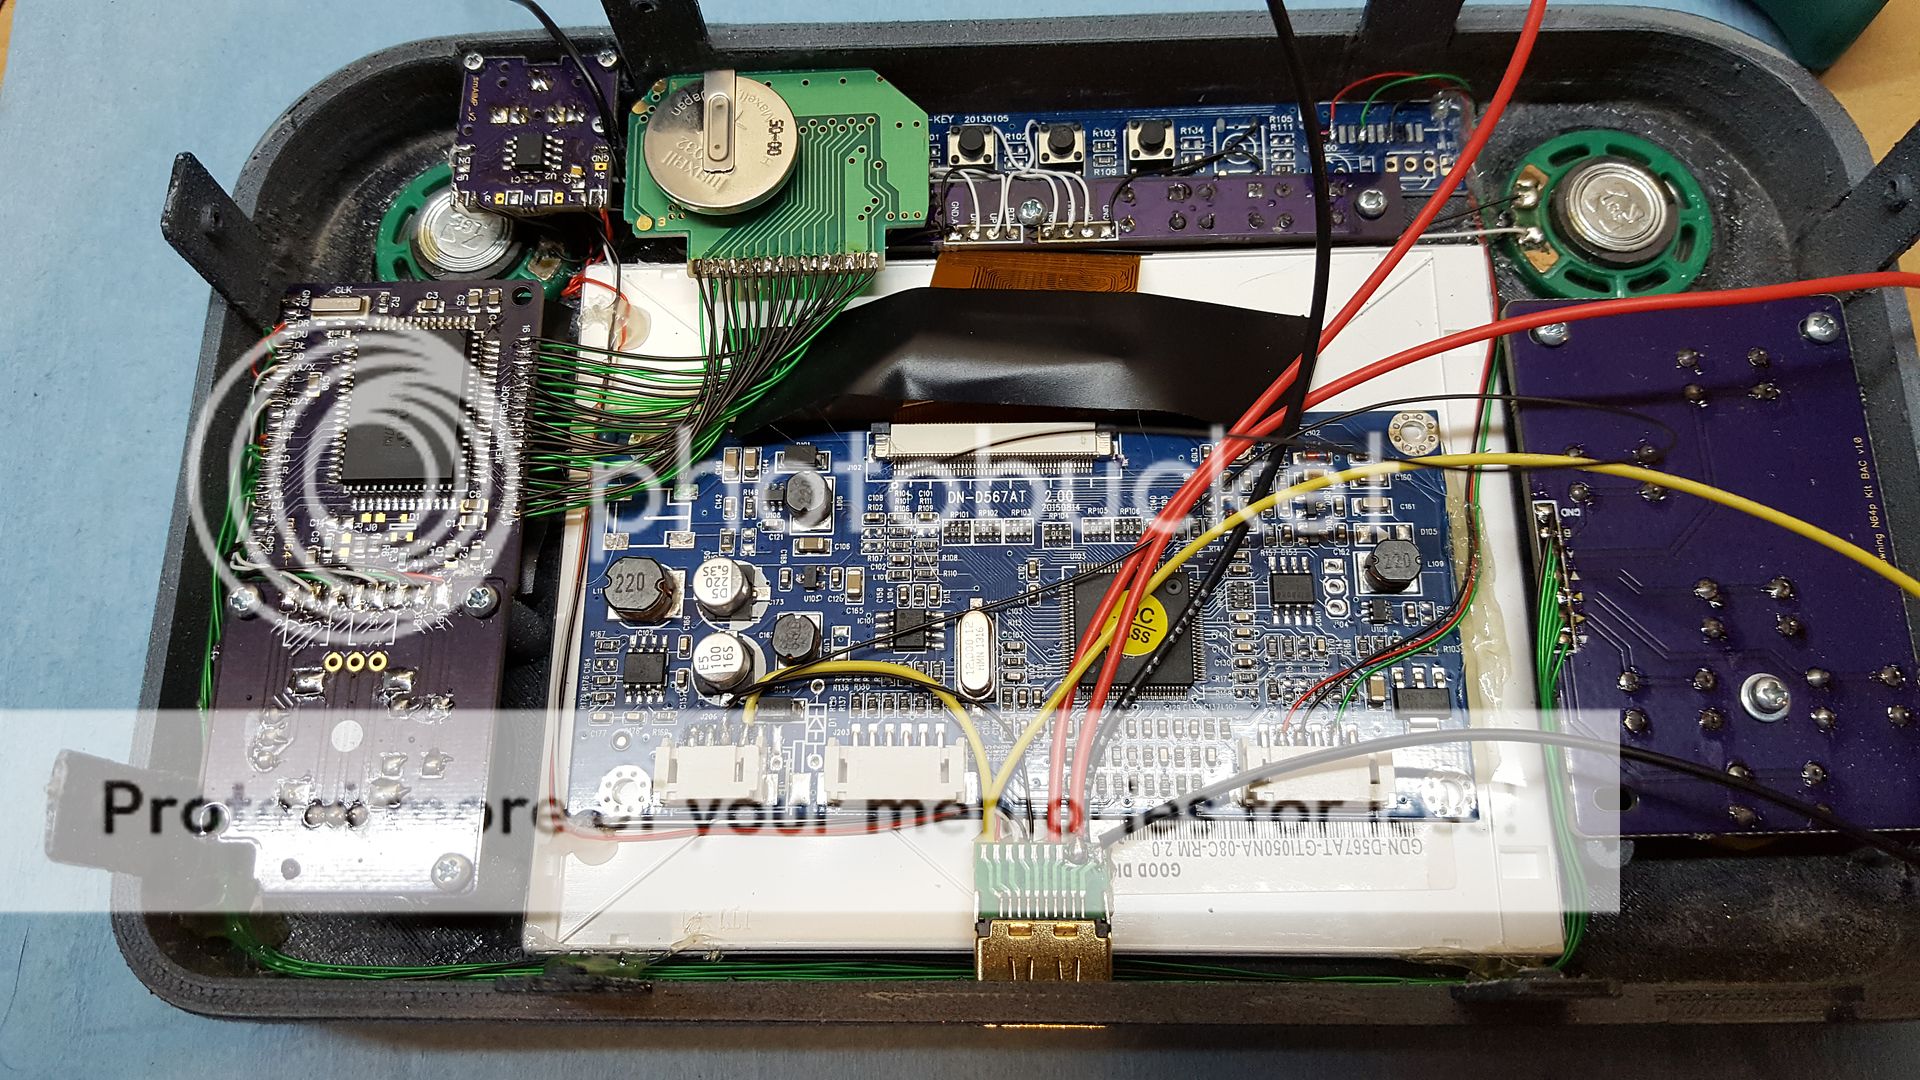
The front face ready for wiring.
I've made progress since this last pic and will update in a new post. Thanks for looking!
This is probably the most advanced N64 I'd done to date as it uses all custom printed PCBs, custom controller and audio amp (all designed by RDC), and all reworked 3D printed files for the casing. Also, this is going to include a breakout box which will be used for A/V out to a TV, the additional 3 Player controller plug in and will also house the charger and wall power circuits for the handheld.
So this was going pretty smooth until a couple weeks ago when I some how fried my PAL N64 board which has left me waiting on a new one from my modding buddy in the UK. All the main wiring has been done though so once the new boards get here, it should go fairly smoothly, at least that's the hope.
Here are some early concepts and progress pics. Hope you enjoy.
RDC's miNi64 V2.1 controller board. Excellent space saver and compact design. Works so much easier than chopping up an original or 3rd party board.
(Note: All PCBs were designed for me by RDC, though I gave him the dimensions and parameters that each board needed to fall into)
Custom tact boards for all the controller buttons this time. Also, these can be used with rubber tact pads like the original controllers if you wish as under these switches lay the contact points.
Custom PTH08080WAZ or WAH breakout board. This can be used with SMT or through hole caps, resistor and regulator. SMT saves more space, but does cost quite a bit more. Just depends on how much room you've got to work with.
Custom audio amp with built in switchable headphone jack. I no longer need to use an additional button like the other versions of these N64p's had to use. Much easier to wire as well.
I don't care how many methods of board trimming there are out there, nothing beats the CNC machine for making board cuts. The finish is so smooth and clean, no sanding is required after the fact.
This jumper wire method I tried a few months ago I abandoned as the wire was just too thick and too long to use right out of the box. Though it would have been an awesome time saver. If there are lower profile versions of these jumpers I'd love to find them as I was able to wire a cart slot in full in less than 10 minutes! But for now, I'm back to 30AWG wrapping wire.
Yes I know I only really needed 27 wires, but this was the first test with the jumpers and seeing if the board worked at all after the trim. I did get it working with 27 wires after the fact, but then somehow fried the freaking board.
And yes, my favorite part, the case work! All parts on this one were 3D printed, though now my CNC is back up and running, I will probably go back to the 3D print back and front brackets and CNC'd front and back face plates using 3D printed standoffs and mounting brackets instead. Cuts the filling/case work down a great deal as the finish cuts are perfect with the CNC, none of these lines and gaps left by 3D printers.
The end of the filling and sanding work which takes forever!
First coat of primer and additional filling
First coat of finish. Not perfect but decent.
Texture applied which covers the imperfections nicely.
Adding the components.
The front face ready for wiring.
I've made progress since this last pic and will update in a new post. Thanks for looking!

 )
)