Allo!
The Project:
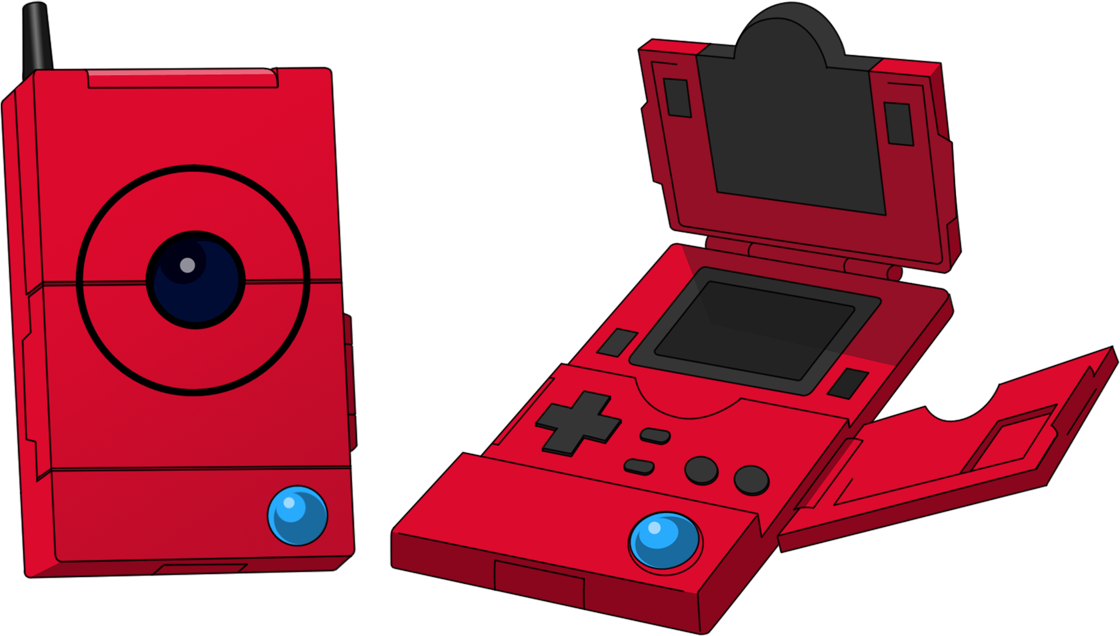
Modifying a GBA SP to appear as a Generation II Pokédex, while fully maintaining the aesthetic of the Pokédex.
Plans Including Potential Inclusions:
- A Custom PCB for Triple Cartridge Slots (possibly quadruple)
- A custom PCB for button layout (to maintain aesthetic)
- Built In Bluetooth Controller Cart (still on the fence about this, but more likely if Cam is scrapped)
- Built In Gameboy Camera or GBA Worm Cam (Potentially scrapped, still looking at it)
- Internal EZ Flash Omega (only if Cam is scrapped)
- Built In Gameboy Printer Emulator Board
- New Backlit Screen
- Relocated Ext.1 & Ext.2 Ports
- Replace Ext.2 Port with USB-C Port
- Extended/Larger Capacity Battery (still working out the solution)
- Custom Housing to look like Pokedex
- Bluetooth Audio Out (maybe?)
- 3.5mm Audio Out
- Relocated Power Indicater LEDs
The Research Begins:
Knowing I wanted to use a GBA SP, and knowing that I wanted to do a custom button setup I began by acquiring a GBA SP from @modio to mess around with so I could get a better understanding of the mobo with a hands on approach.
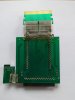
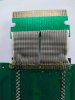
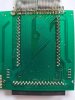
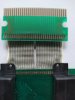
Also ordered a Gamester Game Changer (initially goofed and bought the GamePad extender as they look very similar and I very foolishly only searched for Gamester GBA SP) so I can take a look at how they built their board and how they've made it function.
With just these two steps above, I've already gotten a number of ideas and setups put together in my head.
With the Button PCB, I will be carefully removing all the buttons from the main board and soldering custom pass-thru risers in their place. Then I'll be soldering the risers to the custom board which will have new buttons soldered in the modified layout. This board I have entirely planned out, just need to actually draw it up.
The second custom board will have the multiple cartridge slots, pass-thru for the relocation of the Ext. ports, 3.5mm out, USB-C out, a dual action physical switch, and potentially regulators for batteries if the extended battery solution requires it.
This board i have alot of placement figured out, but not the trace work. I also need to figure out the Dual Action physical switch, this is absolutely necessary because without it I won't be able to maintain GB/GBC compatability. The GBA cartridge slot has a mechanical switch that is pressed when you insert a Gameboy or Gameboy Color cartridge, but is not pressed by a GBA cartridge, and this mechanical switch changes the voltage required for the particular cartridges, Gameboy/Color requiring 5V while GBA uses 3V. In the design, I am going to setup so it's natural resting state will be in this 5V mode with the mechanical switch pressed for a full Gameboy/Color cart slot, and then the other slots will be set to 3V by this switch taking the pressure off of the mechanical switch. With this, if I use a Cam it will have to be the Worm Cam to maintain this switch system working.
I intend for the Gameboy/Color cart slot and GBA cart slot to be fully flush with the left side of the console, if I build in the bluetooth cart or EZ Flash Omega will determine the layout for the additional slots, but the EZ Flash will have it so the sd card slot of the EZ Flash is flush with the right side of the console.
The back of the case will be a slide and lock panel to cover the game cart slots and the physical switch, so it can maintain the aspect ratio.
I am still working on how I will be placing the L & R buttons, but currently thinking of flat buttons built into the back of the case and adding the L/R tact switches to the custom pcb.
The Ext Ports and 3.5mm out will be routed to the bottom of the housing, while bluetooth audio out will be literally in the antenna of the console.
Routing the power LEDs to the bottom globe/sensor on the console.
If I use the Worm Cam, it will be set in the clamshell and in place of the camera sensor there.
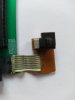
As for screen replacement, I'll be using the laminated IPS display from FunnyPlaying
At some point in the next few days I'll be drawing the Controls PCB, and the general layout for the Multicart pcb, to add to this post.
-_-_-_-_-_-_-_-_-_-_-_-_-_-_-_-_-_-_-_-_-
Added Comments/Discovery/
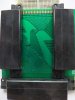
1- Just found that the GBA SP boots fully without requiring a screen attached at all, and maintains full functionality, unlike the DS and subsequent DS models later on. *This was tested with the battery from my personal SP, and a backup copy of Nights Into Dreams Score Attack.*
2- Adding a larger battery is actually much simpler than I had thought it might be. I've narrowed down to either using a 5800mAh 3.7v LiPo-Ion or 4000mAh 3.7v LiPo-Ion battery, both of which use a simple JST connector for only positive & negative pins. With this I can now add a JST female connector to the Multicart PCB with pass through to the original battery terminals of the SP motherboard.
3- Drawing out the current GBA SP console footprint while open finding it to be 15 1/2cm length by 8 1/10cm width. This gives it a larger footprint than the Gameboy Color by almost 24cm. 125.55 SP vs 101.64 GBC.
4- I'm making physical footprint cutouts for different components and game carts so as to properly create the new footprint of the Pokedex case.
The Project:
Modifying a GBA SP to appear as a Generation II Pokédex, while fully maintaining the aesthetic of the Pokédex.
Plans Including Potential Inclusions:
- A Custom PCB for Triple Cartridge Slots (possibly quadruple)
- A custom PCB for button layout (to maintain aesthetic)
- Built In Bluetooth Controller Cart (still on the fence about this, but more likely if Cam is scrapped)
- Built In Gameboy Camera or GBA Worm Cam (Potentially scrapped, still looking at it)
- Internal EZ Flash Omega (only if Cam is scrapped)
- Built In Gameboy Printer Emulator Board
- New Backlit Screen
- Relocated Ext.1 & Ext.2 Ports
- Replace Ext.2 Port with USB-C Port
- Extended/Larger Capacity Battery (still working out the solution)
- Custom Housing to look like Pokedex
- Bluetooth Audio Out (maybe?)
- 3.5mm Audio Out
- Relocated Power Indicater LEDs
The Research Begins:
Knowing I wanted to use a GBA SP, and knowing that I wanted to do a custom button setup I began by acquiring a GBA SP from @modio to mess around with so I could get a better understanding of the mobo with a hands on approach.
Also ordered a Gamester Game Changer (initially goofed and bought the GamePad extender as they look very similar and I very foolishly only searched for Gamester GBA SP) so I can take a look at how they built their board and how they've made it function.
With just these two steps above, I've already gotten a number of ideas and setups put together in my head.
With the Button PCB, I will be carefully removing all the buttons from the main board and soldering custom pass-thru risers in their place. Then I'll be soldering the risers to the custom board which will have new buttons soldered in the modified layout. This board I have entirely planned out, just need to actually draw it up.
The second custom board will have the multiple cartridge slots, pass-thru for the relocation of the Ext. ports, 3.5mm out, USB-C out, a dual action physical switch, and potentially regulators for batteries if the extended battery solution requires it.
This board i have alot of placement figured out, but not the trace work. I also need to figure out the Dual Action physical switch, this is absolutely necessary because without it I won't be able to maintain GB/GBC compatability. The GBA cartridge slot has a mechanical switch that is pressed when you insert a Gameboy or Gameboy Color cartridge, but is not pressed by a GBA cartridge, and this mechanical switch changes the voltage required for the particular cartridges, Gameboy/Color requiring 5V while GBA uses 3V. In the design, I am going to setup so it's natural resting state will be in this 5V mode with the mechanical switch pressed for a full Gameboy/Color cart slot, and then the other slots will be set to 3V by this switch taking the pressure off of the mechanical switch. With this, if I use a Cam it will have to be the Worm Cam to maintain this switch system working.
I intend for the Gameboy/Color cart slot and GBA cart slot to be fully flush with the left side of the console, if I build in the bluetooth cart or EZ Flash Omega will determine the layout for the additional slots, but the EZ Flash will have it so the sd card slot of the EZ Flash is flush with the right side of the console.
The back of the case will be a slide and lock panel to cover the game cart slots and the physical switch, so it can maintain the aspect ratio.
I am still working on how I will be placing the L & R buttons, but currently thinking of flat buttons built into the back of the case and adding the L/R tact switches to the custom pcb.
The Ext Ports and 3.5mm out will be routed to the bottom of the housing, while bluetooth audio out will be literally in the antenna of the console.
Routing the power LEDs to the bottom globe/sensor on the console.
If I use the Worm Cam, it will be set in the clamshell and in place of the camera sensor there.
As for screen replacement, I'll be using the laminated IPS display from FunnyPlaying
At some point in the next few days I'll be drawing the Controls PCB, and the general layout for the Multicart pcb, to add to this post.
-_-_-_-_-_-_-_-_-_-_-_-_-_-_-_-_-_-_-_-_-
Added Comments/Discovery/
1- Just found that the GBA SP boots fully without requiring a screen attached at all, and maintains full functionality, unlike the DS and subsequent DS models later on. *This was tested with the battery from my personal SP, and a backup copy of Nights Into Dreams Score Attack.*
2- Adding a larger battery is actually much simpler than I had thought it might be. I've narrowed down to either using a 5800mAh 3.7v LiPo-Ion or 4000mAh 3.7v LiPo-Ion battery, both of which use a simple JST connector for only positive & negative pins. With this I can now add a JST female connector to the Multicart PCB with pass through to the original battery terminals of the SP motherboard.
3- Drawing out the current GBA SP console footprint while open finding it to be 15 1/2cm length by 8 1/10cm width. This gives it a larger footprint than the Gameboy Color by almost 24cm. 125.55 SP vs 101.64 GBC.
4- I'm making physical footprint cutouts for different components and game carts so as to properly create the new footprint of the Pokedex case.
Last edited: