What's new

Plywood and Perfboard Consolized MVS

XCVG

.
Joined
Jan 2, 2020
Messages
20
Likes
16
Portables
1
Update (2020-05-27): It's done! Check out the release post with lots of pictures here.

...I'll figure out a cool name for it eventually, I promise.

Now called the Plywood and Perfboard MVS, at least until I change my mind again. Everyone seems to be using custom PCBs and 3D printing these days, but I don't have access to that. This one will be built oldschool, with plywood and perfboard.

This has been a dream project of mine for a long time, and I've finally decided to actually do it. I'm not sure why I'm doing this now- this is the first major mod project I've done in almost a decade- but hey, why not? The parts are a lot easier to get now than they were last time I checked, or maybe I just have better access now.

Why?

It's the Neo Geo. It's pretty much the holy grail of video game collecting, barring any of the super weird exotic shit. It was kind of before my time, but I guess the arcades where I lived just never updated, because I actually remember seeing the Neo Geo occasionally. My favourite Neo game is Metal Slug, which I've played on real machines, played the hell out of my DS, was the first game I emulated and is one of my favourites on my MAME cab. It's also the last game I played on real hardware- on a cab at LTX 2019. I was excited as hell to see that and my friend who was with me had no idea why.

Why an MVS and not an AES? While things are better now with converters and flashcarts available, an AES setup is still more expensive than an MVS setup.

Why build and not buy? Honestly, it would probably definitely be cheaper to buy a pre-consolized MVS off AliExpress or eBay, but I want something unique, and I want to build it myself.

Project Goals

  • Feature-rich. In addition to the basic power, controller ports, and video, I want Unibios, good RGB output, stereo audio and a few other things.
  • Inexpensive. This isn't a bottom of the bin build, but I'm trying to keep things reasonable because in the end I'm not made of money. We'll see about this one
  • Transportable. I want something I can take with me to parties and events, not something that's going to sit at home all day. This means the unit needs to be relatively compact and fairly sturdy. It also means that full-sized arcade sticks are not an option for controllers.
  • Attractive. I'm going to try to make this one not look like shit. I'm better than I was back in the days of YAP64 and the awesome-face power amplifier, but again, I don't really do much of this stuff anymore.
  • Reversible. I do have to modify the Neo Geo board for stereo sound, Unibios, and non-leaky battery, but I want to avoid permanently soldering the board into the console. I'll also try to do the other board level mods in a reversible or minimally-invasive way. The idea is that I could take the board out and use it in a cab if need be.
I realized at some point that I'm planning this project very much like a software project, down to planning tooling and unit tests (I'm a software developer). I'm just going to roll with it and see how it goes.

Design

design v2.jpg


I'm doing something which I haven't seen in a CMVS before, which is to use a "horizontal" board (cartridge parallel to board) but build the whole thing as a "tower" so the cartridge slots in the top. It will be built around a plywood "midframe" with the board screwed to one side and everything else in the other. Think a PlayStation 2 with a cartridge slot in the top. The non-board side will be fully enclosed with all ports and switches on the front and back. The board side will be partially or fully enclosed. A strip in an accent color will hide the ugliness of the midframe piece where the two sides join.

I don't have access to a 3D printer or laser cutter, not that I'm any good with CAD anyway, so the case construction will be somewhat old-school.

I was originally looking at an MV1FZ motherboard, but decided to go with the smaller MV1B instead. It will be modified with a replaceable battery, Unibios (via NeoBiosMasta), and stereo sound output. Most signals will come off the JAMMA edge, with stereo audio on an additional connector. Video output from the console itself will be RGB, probably through a SCART socket. Power will be external, probably from a 5V brick.

Things I Still Haven't Figured Out

I'm planning to hack up a (clone) SNES pad as a temporary controller, but I don't think it'll be good enough for the final product. I'm still not sure which controller I'm going to build, buy, or modify for this. I might build a pair of modified SNES pads as a permanent temporary solution.
I've bought a USB SNES pad and a USB Saturn controller and am playing around with them. These are the front-runners; I'll play around with them to see which one is better.

I've modded a set of cheap third-party SNES controllers. I'm not 100% happy with them, but they were cheap and they work well enough.

I'm not sure if my Startech scaler can handle 15khz RGB. I think it does, but I've never tested it. I've got some cables on their way and I'll pull my Genesis out of storage to test it. If not, I'll have to figure something else out. Before anyone suggests them, the best solutions like Framemeister and OSSC are way, way out of my budget.
It doesn't work, but it's okay because I have a different scaler now. It's cheap and not great, but good enough for now.

I'm still trying to sort out how to buffer the video output from the MVS board. The consensus is that it's too hot to feed straight into a video sink, but opinions vary on whether you need a proper video amp/buffer or just a gaggle of resistors. The video amp definitely seems like the better option, but then I'd have to build the circuit.
It's worse than that. As far as I can tell, the MVS connects the DAC straight to the JAMMA edge with no buffering at all. A video amp/buffer is 100% the correct way to do it, but a resistor network is way cheaper and less work so I'm still very tempted to see if I can get away with it.
I've bought the parts and drawn out the circuit for a fully buffered setup.


I really want a legit Metal Slug cartridge, but this is proving difficult to find. I'm patient enough to wait, but I need something to test with, and I'm hesitant to spend money on a junk game. I might pick up something else that sounds decent.
Bought a Puzzle Bobble cartridge for not too much money. It has a dinosaur so it's got that going for it.
I have three more MVS games on order now. My favourites- Metal Slug, mostly- aren't dirt cheap but they're not exorbitantly expensive either.


Does anyone know where to get those black plastic-shrouded DB15 connectors for the controller ports? I've seen them on some custom builds but I have no idea what the part number of manufacturer is.
Found them, or something that will work, on Digi-Key. Assmann WSW A-DSF 15LPIII/FP or Digi-Key part number HHMP15H-ND.

MVS cartridges can be inserted backwards. That's a problem for a home console. I'm pondering this problem right now.
It turns out this is not possible, at least on my MV1B board. The cartridge very definitely only goes in one way. I'm not sure where this confusion stemmed from; maybe this isn't the case for all boards?

Current Status

It's done! Check out the release post with lots of pictures here.
 
Last edited:
Joined
Feb 28, 2020
Messages
3
Likes
1
Location
Canada
I'm getting ready to start consolizing an MVS too. It will be my first consolized board, but I've been using a supergun with various boards for a few years.

If you get a good supergun it will ensure that all signals are in spec for modern gear, have controller ports, and make it easier to power the board. I'm planning to build a Minigun into my console. That's an open source design that gives proper protection and should be cheap to build.

The cheap SCART to HDMI upscalers do surprisingly well with the Neo Geo. If you get one with a button to change resolutions instead of a switch, it probably supports more than the 720p and 1080p printed on it. The GBS8220 modded to use gbscontrol is supposed to be pretty good too (if you're ok with VGA) but I haven't tried it.

Puzzle Bobble is a classic game, and the cartridges are usually pretty cheap (I think mine was about $20).
 

XCVG

.
Joined
Jan 2, 2020
Messages
20
Likes
16
Portables
1
Behold, the Controller Tester 5000000!


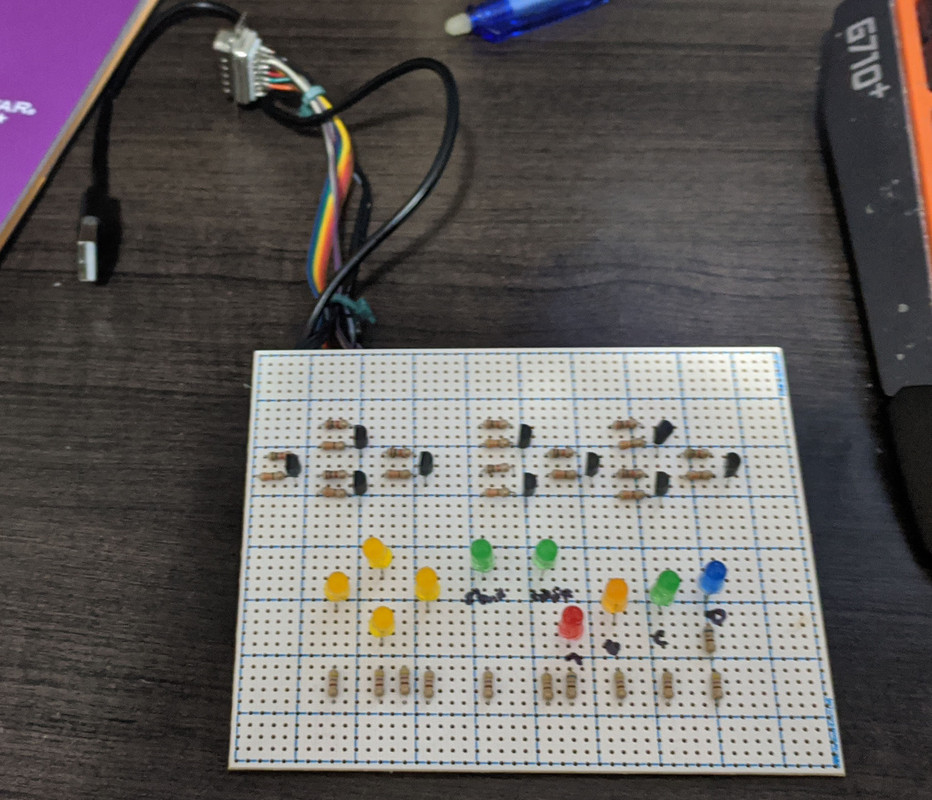
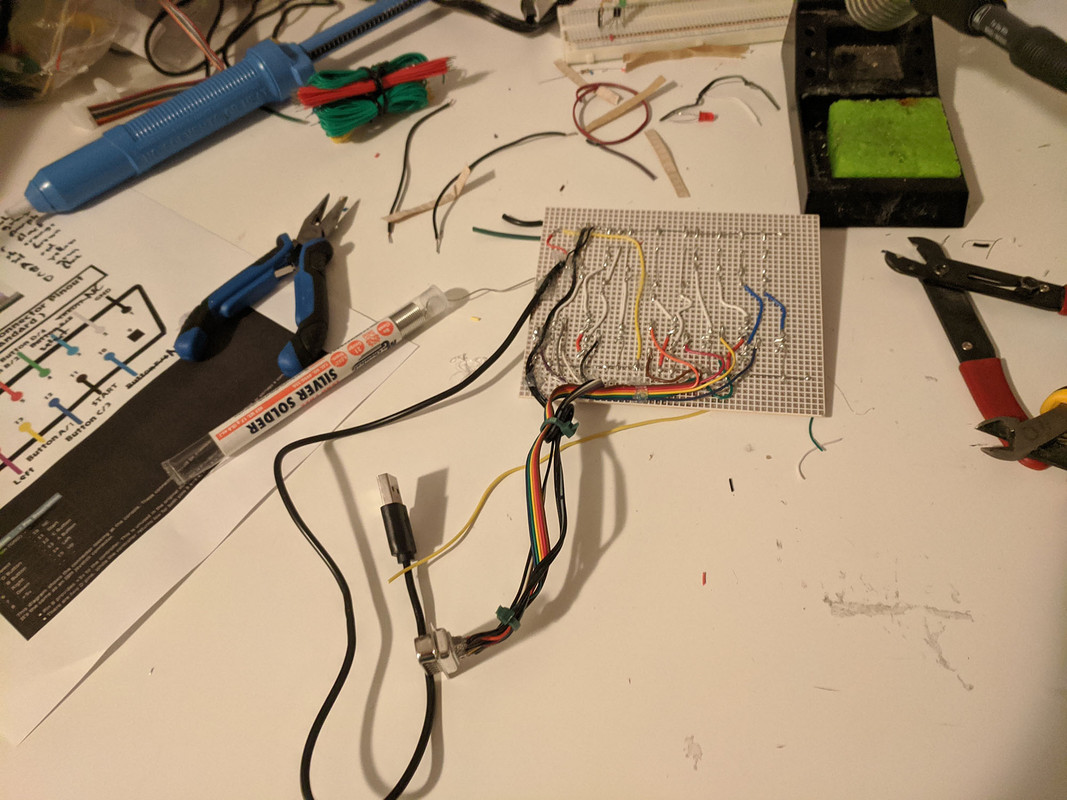
It's USB powered and has a port for Neo Geo sticks. It's meant to roughly mimic the Neo's input circuitry, with a 1K pull-up resistor. Everything seems to work testing with alligator clips and wire, though I don't really have a way to fully test the connector until I have a controller put together. I built this so I could make sure the controllers work before I start testing them with the Neo Geo board and associated wiring.


No printed circuit boards here, just dirty old perfboard, and I'm out of practice. Okay, that's an excuse, I was never really great with perfboard. But it does the job. And I am almost out of LEDs.

I finally ordered the actual MVS board. Man, I hate the AliExpress website. The first credit card I tried didn't work, that's always a good sign. But hopefully it will be here sometime next month.

I do plan on ordering one of those sketchy 161-in-1 cartridges but haven't pulled the trigger yet.

I also did find some suitable joystick connectors when browsing Digi-Key. For the controllers themselves I'll cut up some knockoff extension cables.

I'm getting ready to start consolizing an MVS too. It will be my first consolized board, but I've been using a supergun with various boards for a few years.

If you get a good supergun it will ensure that all signals are in spec for modern gear, have controller ports, and make it easier to power the board. I'm planning to build a Minigun into my console. That's an open source design that gives proper protection and should be cheap to build.
Thanks for bringing up the Minigun, I wasn't aware of that one. For what I'm trying to build, I can't really use a supergun straight out of the box- it'll be in a weird spot, and none of the ports will be where I need them- but I'll probably copy the video circuitry from their schematic if it's known to be good.

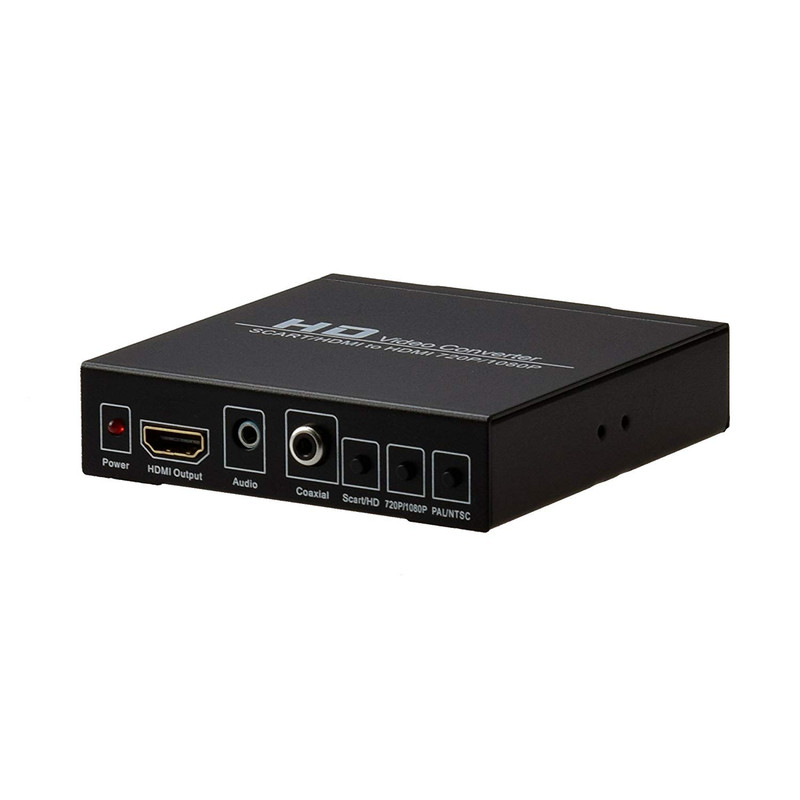
The cheap SCART to HDMI upscalers do surprisingly well with the Neo Geo. If you get one with a button to change resolutions instead of a switch, it probably supports more than the 720p and 1080p printed on it. The GBS8220 modded to use gbscontrol is supposed to be pretty good too (if you're ok with VGA) but I haven't tried it.
Is this the unit you're talking about?


I'll keep those options in mind if my Startech scaler doesn't work.

Puzzle Bobble is a classic game, and the cartridges are usually pretty cheap (I think mine was about $20).
I ended up ordering a Puzzle Bobble cart, just for testing. No idea if the game is any good, but it's cheap and has a cute little dinosaur, so it'll do. It was more like $50, though; where do you get your MVS games?
 
Joined
Feb 28, 2020
Messages
3
Likes
1
Location
Canada
The scaler I was talking about doesn't have the coax, scart/HD button, or pal/ntsc button, but I probably just have an older version (I've had mine for about 4 years).

I got my games off ebay. I've also had my Puzzle Bobble for about 4 years, so I'm not surprised that the price has gone up. I have a darksoft multi MVS cart now, but I didn't want to suggest a 435.00€ cart.

I'm glad you posted that connector. I'm going to need a couple of those for my project.
 

XCVG

.
Joined
Jan 2, 2020
Messages
20
Likes
16
Portables
1
I made some progress on the design side today. My SNES controller is at the post office but I don't think I'll pick it up because it is pissing rain.

sketches.jpg


A rough sketch of the concept. I probably won't go with the exact port layout shown here but something along those lines. I'm now looking at using a USB-C breakout for a power jack, and omitting the USB aux out. All the circuitry will be in the non-MVS side.

blockdiagram 1.jpg

Block diagram, showing boards and connectors. I still need to order more connectors. The idea is to build something well organized and modular rather than a big mess of wires (which is what I used to do). This isn't as complex as I'd feared- three boards I have to build, plus some breakouts and connectors. The circuits will be built on perfboard and I'm probably going to use Dupont connectors because they're cheap.

video 1.jpg


The video buffer circuitry will be based on the Minibox and CMVS-RGB (this and this). The latest version on OSH Park uses a different input stage than the schematic on Github. I feel kind of bad about reverse-engineering it instead of buying a board, but I'm not confident that I could solder those tiny SMT parts. I'm nervous even about soldering the THS7374 to an adapter board.

I'm still wondering if I can avoid building the video buffer/amp. It would save me quite a bit of work and money to omit it. But while resistors have worked for some people, it's quite clear from the schematics that it's absolutely not the correct way of doing it.

For audio, I'll be using the audio amp designed by MKL. I'm currently trying to figure out if I can substitute 2N4401 or 2N3904 transistors for the less common 2SC1815- at least one person has used BC546 transistors instead so it might work.

The scaler I was talking about doesn't have the coax, scart/HD button, or pal/ntsc button, but I probably just have an older version (I've had mine for about 4 years).

I got my games off ebay. I've also had my Puzzle Bobble for about 4 years, so I'm not surprised that the price has gone up. I have a darksoft multi MVS cart now, but I didn't want to suggest a 435.00€ cart.

I'm glad you posted that connector. I'm going to need a couple of those for my project.
I'm okay with paying a little more for games- it is what it is- but I'm having trouble finding a legit Metal Slug cartridge on eBay which is why I was wondering about other sources.
 

XCVG

.
Joined
Jan 2, 2020
Messages
20
Likes
16
Portables
1
I got my SNES controller today.

mvs controller 1.jpg


It's okay. Definitely not as good as the real thing, but not the worst controller I've used. It feels cheap, but not awful. It was $12 CAD, so I guess I can't complain too much. To be honest I'm not sure about using SNES controllers but I'll get into that at the end of the post.

mvs controller 2.jpg

I tore it apart and hacked through all the traces to the glop-top with a utility knife. It's a very good made-in-Japan Olfa, and my craft knife is buried in a toolbox somewhere. It made short work of the traces and several layers of the board. It's a very thin, cheap board and I was worried about it snapping, but fortunately, that didn't happen. I did hack through the ground trace by accident and had to reconnect it with a wire.

I know some people leave the circuit intact but I've heard of it causing problems, so that's why I did this hacking and cutting. I also cleaned up the holes that went the shoulder buttons but not where the cable came in for some reason.

mvs controller 3.jpg

Soldering the wires to the board. I tried to put them in places that wouldn't interfere with the membranes but that was easier said than done. It worked out okay in the end but isn't optimal. I discovered halfway through that the top of the knife blade worked better than the sharp bit for scraping away solder mask. All the wire you see here is from the cable the controller was attached to. It was 5 wires and I needed 11. The cable- really just a bunch of wires- ended up very short.

mvs controller 4.jpg


Once everything was soldered to the controller board, I started doing the connector. I'm decent with a soldering iron but cable assembly was always my Achilles heel. This one turned out- once again- okay but not great. This wire sucked to strip, requiring three or four tries. All of the wires ended up different lengths because of that.

You can see the pinout printout and wire color notes on the edge of this picture. The part in sharpie is for the controller tester, it's the notes in pen that apply to this controller.

mvs controller 5.jpg


Testing it with the controller tester before reassembly. Either it's all working fine or both units are wired wrong. Hopefully the former.

mvs controller 6.jpg


The final product. As you can see, the cable is comically short. It's good enough for testing but completely worthless for any sort of practical use. The ugly wiring is hidden inside the controller and the connector shroud.

Note also the button layout, which matches the Neo Geo CD controller and is similar to the Xbox controller which is the one I'm the most used to. The buttons are all interchangeable, so if I can get one with multicolored buttons I can rearrange them to match the Neo Geo layout!


I mentioned earlier that I'm not sure about using modified SNES pads for this project. I thought it would be a natural fit because of the button layout, and they're cheap and common. But they're not a popular choice among Neo Geo fans, with the poor d-pad cited as the main concern (and this goes double for these knockoffs). I'm considering a few different options at this moment:

  • SNES controller. My first thought, and I've already gone over the advantages and disadvantages of this.
  • Neo Geo CD controller. I like the look of these, and I've heard they're very nice controllers, but they're expensive and prone to breakage. I thought I had a line on one locally which I was going to pick up anyway, but that has unfortunately fallen through.
  • Neo Geo Mini controller. The biggest things these have going for them is the Neo Geo logo and the look. I don't like how the button layout has been changed from the Neo Geo CD, and I'm not sure if I want to hack these up. I've heard mixed things over whether they're any good or not.
  • Sega Saturn controller. These seem to be popular in the MVS community, which baffled me considering it's a 6-button controller with no select button. However, it apparently has an excellent d-pad. I don't think I've ever even held one, and I'm not sure if the new-build pads stack up to the original. My main concern, of all things, is that players might get confused by the extra buttons.
  • Sega Genesis controller. Similar ups and downs to the Saturn controller, though maybe not as good and probably easier to get.
  • Gravis PC Gamepad. An odd choice but I think with the screw-in stick it would be a neat mini-arcade experience, and I already have one of these. On the other hand, they don't have a start or select button, and aren't all that great compared to most console controllers. I'm not willing to hack up this vintage hardware, but I think a fairly simple converter could be built and that would incorporate the start and select buttons as well.

By far the most popular option is to build true arcade sticks out of Sanwa, Seimitsu, or less commonly Happ parts, but that's not an option for me because I want something far smaller and more portable.

For the time being, I've ordered a SNES-style USB controller and will be testing it with an emulator to see if it provides a decent experience. Other than that, I'm pretty much waiting on parts at this point. Hopefully my RGB stuff will arrive within the next few weeks so I can test my Startech scaler and maybe play Sonic The Hedgehog in glorious RGB.
 

cheese

the tallest memer in town
Staff member
.
.
.
Joined
Mar 2, 2016
Messages
2,770
Likes
2,491
Location
Florida

Doom

Dankest Memer
Staff member
.
.
.
Estmemed Member
Doom
Joined
Feb 17, 2016
Messages
662
Likes
1,510
Portables
Always 1/2
The later revisions of the 2nd version of the Saturn Controllers have the best D-Pad, ever. Not sure how to tell between them other than feel, though. I lucked into a Gray Japanese Saturn controller and it's amazing, so maybe it would be easier to get the correct D-Pad that way since they had more console color revisions.

Don't bother with the first version of the American Controller though, as explained by this drake meme I made about it for some reason.


All of this applies to Genesis controllers as well. It's the 6 button Genesis 3 pad that you want.

NeoGeo Controllers are also great, with their clicky D-Pads best used for fighters. No need to hack one of these up though, as it's just old mouse tacts and can be easily re-created.
 

XCVG

.
Joined
Jan 2, 2020
Messages
20
Likes
16
Portables
1
This looks pretty neat, I did something similar as a project for my brother's birthday present, but I built out whole boxes with sticks for controllers, and put a jamma harness on it. Also,

That's kinda the point of the site lmao, we build stuff because we want to understand it, or just because we can :P
Very neat! The joysticks in particular look awesome. Honestly if this was a system for home I would be very tempted to build my own- I've used Seimitsu parts before and they're very nice.

I actually have the parts to build an AD725-based video encoder somewhere... but what I don't have is a display that takes composite or s-video :XD: . I think HDMI is the most common connection now so that's what I need if I'm going to take this thing to parties and events and such.

The later revisions of the 2nd version of the Saturn Controllers have the best D-Pad, ever. Not sure how to tell between them other than feel, though. I lucked into a Gray Japanese Saturn controller and it's amazing, so maybe it would be easier to get the correct D-Pad that way since they had more console color revisions.
Do you know how the Retro-Bit licensed recreations compare? Supposedly, they are as good as the originals, and far easier to get. I'm considering picking up a USB version to test.

EDIT: Ordered one. We'll try it and see.
 
Last edited:

XCVG

.
Joined
Jan 2, 2020
Messages
20
Likes
16
Portables
1
My test controllers arrived and I gave them a shot.

usb controller 1.jpg


I bought a RETROFLAG SNES-style USB controller along with a Retro-Bit Sega-licensed Saturn USB controller. I tried playing some Neo Geo games in an emulator and quickly realized that I suck a basically every game except Metal Slug. Oh, well.

usb controller 2.jpg


The RETROFLAG controller cost about twice as much as the really cheap, generic SNES style controllers. To be honest it was definitely worth the extra money. It's been a while since I've held a real one, but this one seems pretty close. It's solid, and much better than the cheap one I hacked up as a test controller. For the most part, it played well, but I had some trouble hitting diagonals.

usb controller 3.jpg


The Retro-Bit Sega Saturn controller, officially licensed by Sega, is definitely the nicer controller. My first impressions upon taking it out of the box were mixed. It looks gorgeous, with the clear shell, colored buttons, and grey cable that reminds me of old PC hardware. On the other hand, it feels kind of cheap, and both the buttons and d-pad were a bit shallow, soft, and unsatisfying. I don't know if the original controllers were like that. Once I actually tried playing with it, though, that melted away. It's absolutely solid and responsive when you're mashing away in-game.

With that being said, I think I'm going to go with modified SNES controllers. I know I said the Saturn controller is better, and it definitely is, but not enough to outweigh the downsides.
  • The button layout isn't as intuitive. It's not worse, just not as intuitive. I mapped ABXY to ABCD, Z to coin, start to start and left C and the shoulders unbound, which was great for playing, but it's something that needs to be explained and takes some getting used to. With the SNES pad, only the shoulder buttons are out of place, and I can redo the label and rearrange the colored buttons which makes it very obvious which button is which.
  • They're more expensive. About 1.5 times the price of a "premium" SNES controller clone, almost 3 times the price of the cheap ones
  • While this isn't original hardware, it's not really generic either, and I'd feel a little bad hacking up these nice Saturn pads while I flat out wouldn't care about the dime-a-dozen knockoff SNES controllers.
The first consideration is the most important by far. Which brings me to another usability issue I recently discovered.

MVS Cartridges can be inserted backwards

I don't have a system in hand to test this, but from what I've read, there's nothing to keep you from inserting an MVS cartridge the wrong way around. It seems to be safe in the sense that it won't break anything, it just won't work. This was acceptable for its original purpose (although bad design IMO), but a bit of a problem for a home console.

I need to do some thinking on this one. I'm thinking maybe something that clamps onto the cartridge and is blocked by the shape of the console case or cartridge slot. Whatever it is, it would have to be fully reversible and ideally be quickly detachable.
 

XCVG

.
Joined
Jan 2, 2020
Messages
20
Likes
16
Portables
1
I hacked up both of the "final" controllers over the past few days.

mvs controller2 1.jpg


The victim await its fate. Interestingly, the X/Y buttons are concave like a North American SNES controller. These are not as good as the premium one I bought for testing, but the difference isn't that great and they were a lot cheaper. I chose these particular ones mostly for their black color, to be honest.

mvs controller2 2.jpg


Snipping away the shoulder buttons. These are flushcutters made in Japan, that I bought in Japan, that are too nice to actually use. I only broke them out because the spring came flying out of my usual diagonal cutters. I can't see any way to get said spring back in, so it looks like I'll have to buy a new pair.

mvs controller2 3.jpg


After removing unnecessary components. The last controller I did was not a USB controller, and had fewer components to remove. There's solder braid there, but I only really used it to clean up some of the pads. I used the blob and swipe method to remove the surface-mount resistors, and simply tore the crystal off along with its pads. The glop-top, unfortunately, can't be (easily) desoldered.

mvs controller2 4.jpg


After hacking through the traces, halfway through scraping away solder mask to solder to. I'm still using that knife instead of my x-acto. These controllers are almost a standard common ground arrangement, but there's something weird going on with the d-pad, maybe to save a pin. I had to cut through a trace (visible on the lower left) and bridge another (not in this picture). Technically, this is the second controller, not the first. I'm mixing images because for some reason, I only took pictures of some of the steps with one or the other.

mvs controller2 5.jpg


The actual controller cable is a third-party, kinda junky but usable, Neo Geo controller extension cable. I used a multimeter to map out the pins, and did it for both of the cables individually because the second one had a few different colored wires while the first one repeated a few colors (or maybe I just couldn't tell them apart). All colors that were in both had the same function. On the controller, I generally didn't solder to the provided pads because I felt they were too close to the button contacts and the wires might interfere with them.

mvs controller2 6.jpg


Board fitted back into the controller, just before hot snot. I don't have any pictures of the "after", but that's probably a good thing. I made quite a mess even though I didn't glue all that much. Just attached the cable to the board as a poor man's strain relief- I couldn't bend it around the original posts because it's much thicker than the original- and glued the shoulder buttons in place. I wasn't sure about that, because they still look like something that should be pressable, but in the end I said fuck it and did it anyway. Once again this is the second controller- the first controller isn't as clean here but fit together better for some reason.

In general, the second controller didn't go as well as the first. I failed to get good solder joints and lifted a few traces when wiring it, and the X button (now the D button) doesn't feel the same as the others- though I don't think that was my doing. I'll leave it for now but I may come back to this later.

mvs controller2 both.jpg


Both finished controllers. I've swapped the A and B buttons to match the colors of the Neo Geo CD controller, and the actual wired layout is the same as well. I still need to figure out how to make a replacement overlay with the correct labels. The iNNEXT logo will be covered up with a Neo Geo sticker of some description. Unfortunately the "start" and "select" labels are embossed, but I think the AES had a select button so it should be okay. The console itself will have clearly labeled physical coin buttons anyway, for confused people.

I feel a bit silly having built the "test" controller and then building the "final" controllers so soon after. The controller tester, on the other hand, was absolutely worth it; I used it several times and was able to catch a mistake with the wiring. I hadn't planned it this way; I was expecting to build the console first. Unfortunately those parts are still in transit, delayed, which is unfortunate but not unexpected given what's happening in the world.

I think I will be able to test my RGB setup soon enough though.
 

XCVG

.
Joined
Jan 2, 2020
Messages
20
Likes
16
Portables
1
So it's been a busy week, but despite that I managed to make some progress on this.

I started by testing some RGB stuff. I tried my Genesis with my Startech scaler, which didn't work at all. I'm not sure if it just won't accept 15khz RGB, if it won't accept csync, or if I miswired my SCART-to-VGAish adapter. In any case, it doesn't matter all that much because my generic SCART to HDMI adapter showed up. It's far from perfect but it works with RGB and produces an acceptable image for my needs.

rgb setup a.jpg


This isn't my workspace- I did all the RGB tomfoolery at a friend's house. He wanted to test his Extron DVS 510 with RGB as well, and I was after his hot air station, which I used to attach the THS7374 RGB amps to breakout boards.

rgb amp.jpg


The one I did by hand is on the far left. Hot air is definitely the way to go if you have access to it.

I also received my MV-1B board! Still no idea where my BIOS or games are, though.

neo geo mvs.jpg


With the board in hand, the next step was to test it. To do that, I build what is probably the world's shittiest supergun.

supergun from hell.jpg


It is a used JAMMA connector with the Molex half of a Molex-to-SATA adapter, a salvaged SCART connector, and a speaker from a dead clock radio. I ended up with the used JAMMA connector because I thought it was the only one in my country- as it turned out, it shipped from China anyway. I've attenuated the csync line with a 470 ohm resistor and put a 220 ohm resistor and 220uF capacitor in line with the RGB lines. For the time being, I haven't bothered with any sort of controller connection.

mvs test 1.jpg


As far as I can tell, this is what it's supposed to look like with no cartridge, so I think my board works! I have some mods to do to the board itself but I think I'll test it with a game first once that arrives. Maybe I'll wire up a controller port and try to play something.
 

XCVG

.
Joined
Jan 2, 2020
Messages
20
Likes
16
Portables
1
It's alive! Well, actually, it's been alive for about a week now, but I've been too busy to post. A few things have happened on this project over the past week or so.

puzzlebobble 1.jpg


My Puzzle Bobble cartridge finally showed up! This was a bit of a surprise since it had disappeared completely from the postal tracking system. The label is photocopied but the cartridge itself seems to be legit.

puzzlebobble 2.jpg


It works! The color is really off in this picture; I'm not sure if it was a loose wire, the converter, the TV, or just my phone camera.

I added a controller port to the ghetto supergun setup (so I could test things) and reinforced it with cardboard and hotglue.

supergun.jpg


It looks horrendous but it works. I've played Puzzle Bobble with this, and also Metal Slug 3 off my 161-in-1 cart that arrived a few days ago. That speaker is actually pretty loud and not as terrible as you might think connected to the amplifier on the MVS board. The tact switch on perfboard is for inserting coins.

I've also started doing the board-level mods to the MV1B itself. I wish I'd bought a spare; I've had some scary close calls and if everything went fine I have almost enough extra parts to build a second CMVS. But hindsight is 20/20.

I started with soldering up the NeoBiosMasta. This is an adapter that allows you to plug in a custom BIOS without desoldering the original and wiring up 20 lines. Mine is a clone from eBay. I wanted the NeoBiosMasta VMC with the built in virtual memory card, but it's been out of stock every time I've checked.

mvs neobiosmasta.jpg


It went okay. The first few pins sucked, especially since my soldering iron tip oxidizes badly in the salt air here, but once I got started it went smoothly. The secret is lots of flux; I'm using some new lead-free no-clean stuff that evaporates very quickly. It's weird stuff- it has no rosin, smells different, leaves clear white residue- but works well enough as long as you use lots.

I still have to disable the existing BIOS by lifting a few pins. I'm planning to add a little breakout board for that so one can just drop in some jumpers and switch back to the original BIOS.

I also swapped the battery. That sucked. Desoldering the charging circuit components was mildly terrifying. I originally wanted to keep the original components, but ended up desoldering with the blob and swipe method and losing them. I used Chip Quik to remove a transistor and that was a mistake- it made a huge mess.

None of that was as bad as desoldering the battery itself. Two of the pins came out with some difficulty and but came out cleanly once they were out. The third was a nightmare. It wasn't that much harder to desolder, but it took me half an hour with braid and a solder sucker to get the hole clear. It was on a ground plane so it soaked the heat right up. I ended up poking it through with the tip of my soldering iron- the only thing that seemed to work- and eventually got enough out to shove the pins of the battery replacement board in. I was very worried that I had overheated the board and killed the backup RAM at that point.

I had a hell of a time assembling the battery replacement board and its pins, too. I realized after the fact that it's probably supposed to be assembled in place. And then I couldn't find my CR2032 batteries (I later realized I'd already used them) and had to "borrow" one from a PC.

mvs board partly modded.jpg


Fortunately, the board did not die. This is the only picture I have, and it's not great because my nerves were pretty much fried at that point. But it still boots, plays games, and seems to save data.

I still have to complete the NeoBiosMasta install and the stereo mod, and then it'll be time to move on to building the power, audio, and video boards, designing the case, and wiring it all up.

Yes, I'm still waiting on my BIOS.

I also ordered a few more games. My favourites- basically Metal Slug- aren't too expensive in MVS format. Not cheap, exactly, but not insanely expensive either. The original plan was to leave the 161-in-1 at home and bring a few cartridges with me when I take it places, because they're awesome giant things, but I'm pretty lazy so we'll see.
 

XCVG

.
Joined
Jan 2, 2020
Messages
20
Likes
16
Portables
1
It's late but I'm not dead.

It's been a month since the last update and weeks since the last time I worked on this project. I spent most of April doing game jams (this one and this one if you're curious) and I think I managed to do the stereo mod and a little bit of cardboard prototyping for this in that time. I have been thinking about the Neo Geo project and today my dad and I started cutting out pieces that will eventually form the case.

neo geo t-wood.jpg


This T-shaped piece forms the center of the unit, and just about everything screws to it. The pieces are just sitting there- it's not screwed together yet. The MV1B goes on one side, circuitry on the other. That's 3/4" plywood. Even my dad, who overbuilds just about everything, admitted we probably didn't have to use 3/4" plywood. But we didn't have any 1/2", at least not a wide enough piece. The giant notch in the back is for the SCART connector, which is too wide to fit entirely on the circuitry side with all its cabling. That will also allow some ventilation for the power circuitry because the exhaust fan (yes, it will have a fan) will be on the Neo side.

I still don't have the UniBIOS chip. And my games seem to be stuck in some sort of postal limbo. But hey, my RetroTINK 2X-SCART showed up!
 

XCVG

.
Joined
Jan 2, 2020
Messages
20
Likes
16
Portables
1
So I've been too lazy busy to post, but I've actually made a lot of progress over the past week or so! I received and installed my Unibios, built the power, audio, and video boards, and assembled a few key parts of the case.

neardone nbm.jpg


The first time I installed the Unibios, it didn't work, either giving me error messages or failing to boot at all. I reflowed the joints on my NeoBiosMasta, nearly destroying it in the process, and cleaned the pins on the NBM and the 68000 on the MVS board. After that, it worked. Unfortunately I didn't get a picture of it running, it was a moment of elation for me though.

The ugly board in the middle breaks out the lifted pins and pads for the BIOS mods. With two jumpers on the headers, I can run the original BIOS, and in fact did do this for weeks. Or I can move the jumper (I built it into the cable here) and run wires out to the NeoBiosMasta to use a replacement BIOS. Also visible here is the breakout for the stereo audio.

The audio board I built weeks ago but I don't think I've posted a picture yet.

neardone audio.jpg


It works. I think. I substituted 2N3904 for 2SC1815 and that seems to be okay. The capacitors are the cheapest shit going. I may rebuild this board at some point; one advantage of the modular design is that it's easy to swap out.

The power board is more recent. It takes 19V from a laptop adapter, runs it through a bridge rectifier in case some idiot uses the wrong polarity, then steps it down to 5V and 12V for the rest of the system. It has connections for the power switch, power light, and outputs to power all the devices.

neardone power.jpg


The regulators are attached to the board with fixed wires, and there are some wires coming off this board to connect to other things. If I were to do it again, I would put everything on connectors, and probably solder the regulators to the board properly. I did it the way I did because I was concerned about space, but it turns out there would have been plenty.

The regulators themselves are just cheap generic units. The big one is for 5V and is rated for 5A, the little one is for 12V and is rated for I think 1A or 2A. I'd feel safe putting no more than half that current through them, which is still plenty for the MVS.

The video board is ugly as shit but it worked once I reflowed the solder on the THS7374. I used one of the ones I did with hot air, and while it looked beautiful most of the pins weren't connected at all.

neardone video.jpg


This isn't entirely based on any one existing design. I forget exactly what the input stage is based on- it might be a commercially available mod board or a post on neo-geo.com, I drew it out months ago. The output stage is copied from the Minigun mentioned earlier in this thread. I'll post schematics if anyone is interested.

I attached the SCART socket to a circuit board. Kinda. I think if I had a 0.157 spaced padboard this would have worked. The other end of this cable goes into the video board.

neardone scart.jpg


I used a cut-up VGA cable for video signals. This particular one is well-shielded and includes 4 rather than 3 shielded wires, which is great because we need one for sync. What's not so great is how shitty this cable is to work with- the insulation melts and breaks, wires snap, and it's flat-out not possible to solder to the outer shielding. I had to get creative with wrapped wire and/or crimp connectors.

Also, my soldering station is burning through tips at an alarming rate.

I also cut holes in the front and back panels for the power, AV, and controller connections, and screwed it into the midframe. The back was easy to attach since the middle strip won't overlap it and it won't show. The front I had to get a bit creative with. Screws pass through the controller ports into blocks glued to the midframe. It'll hold. I hope. Of course both also get one screw into the corner block at the top and one into the base at the bottom.

neardone layout.jpg


My father was very skeptical about my proposed solution to securing the SCART connector- a wooden block with screws going from the back panel through the SCART connector into the block. It worked fine, and because of where the SCART socket sits and how it is shaped, only needed a small cutout for the cable, and is the most solid SCART connector I've ever used (I've only ever used three though).

I decided to omit the test and service switches, coin buttons, and a few things. This meant fewer things to wire, fewer holes to cut or drill, and crucially meant I could put everything on the front and back panels, leaving the top panel clean.

Today I was able to finally screw and wire a bunch of it together for a dry fit and test run. Without controller ports wired I can't really do much but I was able to power on the system and see the title screen. Well, once I fixed the video board that is.

neardone all.jpg


I think I might actually have this playable- far from done, but playable- tomorrow.
 

Stitches

2 and a Half Dollarydoos
Staff member
.
.
Joined
Feb 5, 2017
Messages
4,160
Likes
3,255
Location
Banana Bender Land, Australia
Portables
6
Damn son that's some good progress. I'm very keen to see the first functional shots.


I'd feel safe putting no more than half that current through them
Tbh even half is a lot to expect from those regs. I hope they work acceptably for you.
 

XCVG

.
Joined
Jan 2, 2020
Messages
20
Likes
16
Portables
1
Damn son that's some good progress. I'm very keen to see the first functional shots.
I was able to get the controllers wired and test the unit today, but I still need to at least mount the MVS board for it to be considered usable. I'm still waiting on a few miscellaneous odds and ends like the cooling fan and the screws to mount the USB port.

Tbh even half is a lot to expect from those regs. I hope they work acceptably for you.
It seems to work well enough to power the MVS itself. The 12V line especially has next to no load on it. I'll have to do more testing with the scaler connected to the onboard USB port and for an extended session. If necessary I can move the USB port to its own regulator, which should be enough to keep things from melting (about 1A from each regulator by my calculations).
 

XCVG

.
Joined
Jan 2, 2020
Messages
20
Likes
16
Portables
1
It's done.

mvs finished 0.jpg


mvs finished 1.jpg


mvs finished 2.jpg


It would have been done earlier, but I had the machine 90% assembled and then the NeoBiosMasta popped off. Cue some cursing and tearing down half the machine. Murphy's Law in action, I suppose...

Many more pics and a full postmortem tomorrow!

EDIT: "Project Complete" post with lots of pictures and a video is here.
 
Last edited:

XCVG

.
Joined
Jan 2, 2020
Messages
20
Likes
16
Portables
1
So I was going to do the postmortem but before I do that I think I'll rewind a bit, with a quick recap of the progress made between the last progress update and the project complete post. At that point I almost had it playable, and I think I did have it wired up enough and fired up for testing a day or two after.

postmortem build1.jpg


I did end up having to trim and re-terminate the video cable from the JAMMA edge to the video board. It was just way too long and I couldn't put the cable anywhere, especially since it was so damn inflexible. Using shielded cable was probably not worth it, but I'll get to that later. Soldering all the connections for the controllers, on the other hand, was less irritating than I thought it would be. Believe it or not, that controller plug is fully inserted, but I'll get to that later as well.

postmortem build2.jpg


I rearranged things, moving the power regulators away from the video board in a futile attempt to reduce video interference. I was able to clean up the wiring a bit as well. You can see the still overly long video cable and the newly added controller ribbon cables in this picture. I think the only change to the wiring I did after this point- other than shortening the video cable- was to add a resistor in series with the LED because it was far too bright. Oh, and adding the USB port. Okay, so a few changes after this.

postmortem build3.jpg


The board is mounted on a chunk of crappy mousepad. The staples are borked because my father loaded the wrong ones into the stapler.

postmortem build4.jpg


Like most of the things in this machine, the MV1B board is held on with #4x1/2" round head wood/metal screws. This time we used some washers. We had all kinds of ideas to put blocks and brackets and things in to hold it in but none of it was necessary- this here is very secure. Those are my father's arms and his cheap wristwatch in the picture.

postmortem build5.jpg


Staring down into the circuitry. It's just narrow enough to be annoying- capacitor clearance is an issue, and I had to use all right-angle connectors. The midframe design is rock-solid and makes attaching things easy but it did mean less room for some things.

postmortem build6.jpg


Test-painting a strip of moulding (?). This was going to be the strip down the center, but we abandoned this idea because we couldn't figure out how to attach it and nothing was flat enough to fit properly.

postmortem build7.jpg


The front and back were painted in place, because I'm an idiot and semi-permanently attached them before painting them. Some things could be removed for painting but others had to stay in place. The top and side on this half of the unit were taken off to paint, and almost every piece on the other side.

By this point the unit was literally half done but almost fully functional (only missing a fan which wouldn't really be needed here). It was at about this point where my allergies started acting up and I stepped away from casework.

postmortem build8.jpg


The top piece on the board side has a cutout so you can reach in and grab the cartridges. At this point we were still working under the assumption that the ends would be closed rather than open. The cutout is as deep as it can be, since there's a piece running across to hide the JAMMA connector and wiring. That piece is glued and stapled to the top with a little block in between, and both pieces come out as a unit. You can see some of the blocking that holds it on here- it looks like it's going to snap off but it's actually pretty sturdy. Like most of the outer panels, this is made of 1/8" hardboard, which is slightly better than cardboard in terms of strength. The end is made from 1/2" plywood to give some of the panels on this side something to screw into.

postmortem build9.jpg


This fancy shaped piece is made of 1/4" plywood for strength and was a nightmare to cut out. Once we had this piece in, we decided to go with the stepped sides because it looked pretty good together. It looks kinda wonky here, but I think my dad sanded it down a bit after, and once the paint was on it kind of all just blends together.

postmortem build10.jpg


There's a bit of a fan shroud made of cardboard. It later got a splash of paint. The idea was to force it to pull air through the holes in the midframe and through the MVS board itself, but I have no idea how effective this is.

postmortem build11.jpg


The little cover over the dipswitches is made of a piece of an old binder, I think. Originally we were going to use aluminum but I found the plastic and it was much easier to cut. It ended up one of the ugliest pieces here, and the case screws holding it on are awful. Perhaps not coincidentally, this was one of the last parts I did.

postmortem build12.jpg


Final electronics fit- well, almost. I think I had to go in and flip the audio output connector around to swap channels after this. You can see I've tried to tidy the cables a bit here, and you can also see the extra resistor on the power LED and the USB port. The lump in the green heatshrink is a polyfuse for the USB port, but I think it's rated far too high to actually be useful.

Stay tuned for the postmortem, where I'll be going over what worked, what didn't, what I liked and what I really wish I'd done differently.
 

XCVG

.
Joined
Jan 2, 2020
Messages
20
Likes
16
Portables
1
Alright, enough putting this off...

Building this was a lot of fun. It was strange to get back into console modding after years of software and vintage PCs, but I was reminded of why I liked doing it so much back in the day. I was also reminded of some of the less than fun parts- there were times where things were not working and I struggled. Amazingly, though, I managed to not brick anything this time. I'm pretty proud of that. Neo Geo MVS hardware isn't exactly rare but it's still technically irreplaceable.

I'm excited to play on this machine, although I have horrible record when it comes to past project that tend to just sit around and gather dust. I'm approaching it a bit differently this time, though, as a piece of hardware I'll take out for special occasions and share with others rather than something that's meant to be used all the time at all. Unfortunately the current situation in the world has kind of put a screwdriver through any of those plans. On the other hand, it might get more use at home now.

It's also really big and heavy. I think we did the best we could given the design and the size of hardware, but I wish it was more portable. I'm not sure if I would have gone with a different design were I to do it again. I like this configuration a lot, but I think I could have built a much smaller unit using an MV1C with a vertical cartridge slot. That being said, the games aren't exactly small, so I'll probably need a suitcase to transport this anyway.

I did mention a few flaws in the previous post.

The controllers I built are... okay. They work and they don't look terrible, but they just feel kind of inadequate. I want playing this machine to feel like something special, and the controllers are a weak link in the experience. They feel like cheap controllers, because they are. It's hard to describe in concrete terms but they just don't feel like something oldschool and different like the rest of the thing. So I do want to replace these, but I'm still trying to figure out an option that won't cost me a fortune. I'd love to get some Neo Geo CD pads but at over $100 CAD a piece they're just out of my price range.

The controller ports, on the other hand, were a bad choice. I wanted black plastic connectors to match the originals, but I didn't realize how deep they were. My off-brand extension cable ends only go in about halfway. It looks terrible and I'm always worried about breaking something, especially since these plastic connectors are weaker than metal ones. I'm not sure if sourcing deeper jacks would have been possible, but I'd have more confidence in standard metal ones than the plastic ones I went with.

The biggest issue is the video noise. Unfortunately I don't have a picture of it because my RetroTINK and my Avermedia Live Gamer don't play nice, but there's noticable noise in the video signal. It's not constant, and it's not horrendous, so I'm going to leave it for the time being, but if I ever have the time or if I decide to build another CMVS it's an issue I'd like to address. It could be an issue with noisy power- both the power supply I'm using and the voltage regulator modules are generic and cheap- or there could be a flaw in the video buffer board.

The case turned out well, though it looks a bit plain. I have some stickers on their way, though, that should rectify it nicely. As an aside, I settled on black because my parents had an almost-full can of black paint in their garage. Insert joke about the Model T here...

All in all, this was a fun project. I don't think I'm going to make hardware modding a regular thing, but I'm still not entirely done with this one and who knows what the future will hold.
 
Top