Worklog Wii-Pi

JMCD

.
Joined
Feb 18, 2024
Messages
45
Likes
33
Location
UK
Hello everyone

I thought I'd start the ball rolling on my worklog, I have been lurking for a while reading and pestering @LCandell via PM occasionally :)

I came here by chance when I found the old family Wii in a cupboard (was jailbroken waaaaay back using an exploit on a certain gamedisc when it was discovered). I wanted to resurrect it and having lost the SD card I was searching for the latest info.

Then my eyes were opened to Wii portables, I was blown away! There are some very talented people here, I'm in awe.

I'm late to the party I know, but in preparation for the Wii portable I hope to build I decided to repurpose an old Pi 3b (found in the same cupboard lol).

So the Wii-Pi began. I opted to use a broken Wii U gamepad found on a well known auction site, I wanted a rapid build platform, and I quite like them to be honest.

I'm walking in the footprints of giants as there are quite a few guides and builds out there so no real credit to claim but thought I'd share my experience.

I will edit this post as I get time to update.

Sorry for the long winded intro :)

Case and controls:
Wii U Gamepad
Arduino pro micro as USB gamepad

Display:
6.5" AT065TN14 with RTD2660 based driver board
(IPS was out of my budget unfortunately maybe for the Wii)

Connectivity:
1x USB A (host)
1x micro USB (charging)
3.5mm Switched audio jack socket
Pi built in Bluetooth and WiFi

Sound:
Cheap USB DAC
PAM8403
10k Dual taper wheel potentiometer
Gamepad built in speakers and mic

Power:
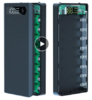
5000mah Single cell Lipo (cheap powerbank)

Battery monitoring (safe shutdown hopefully) using the arduino's spare A2D - over I2C to the Pi, possibly using mintypi software (still researching this)
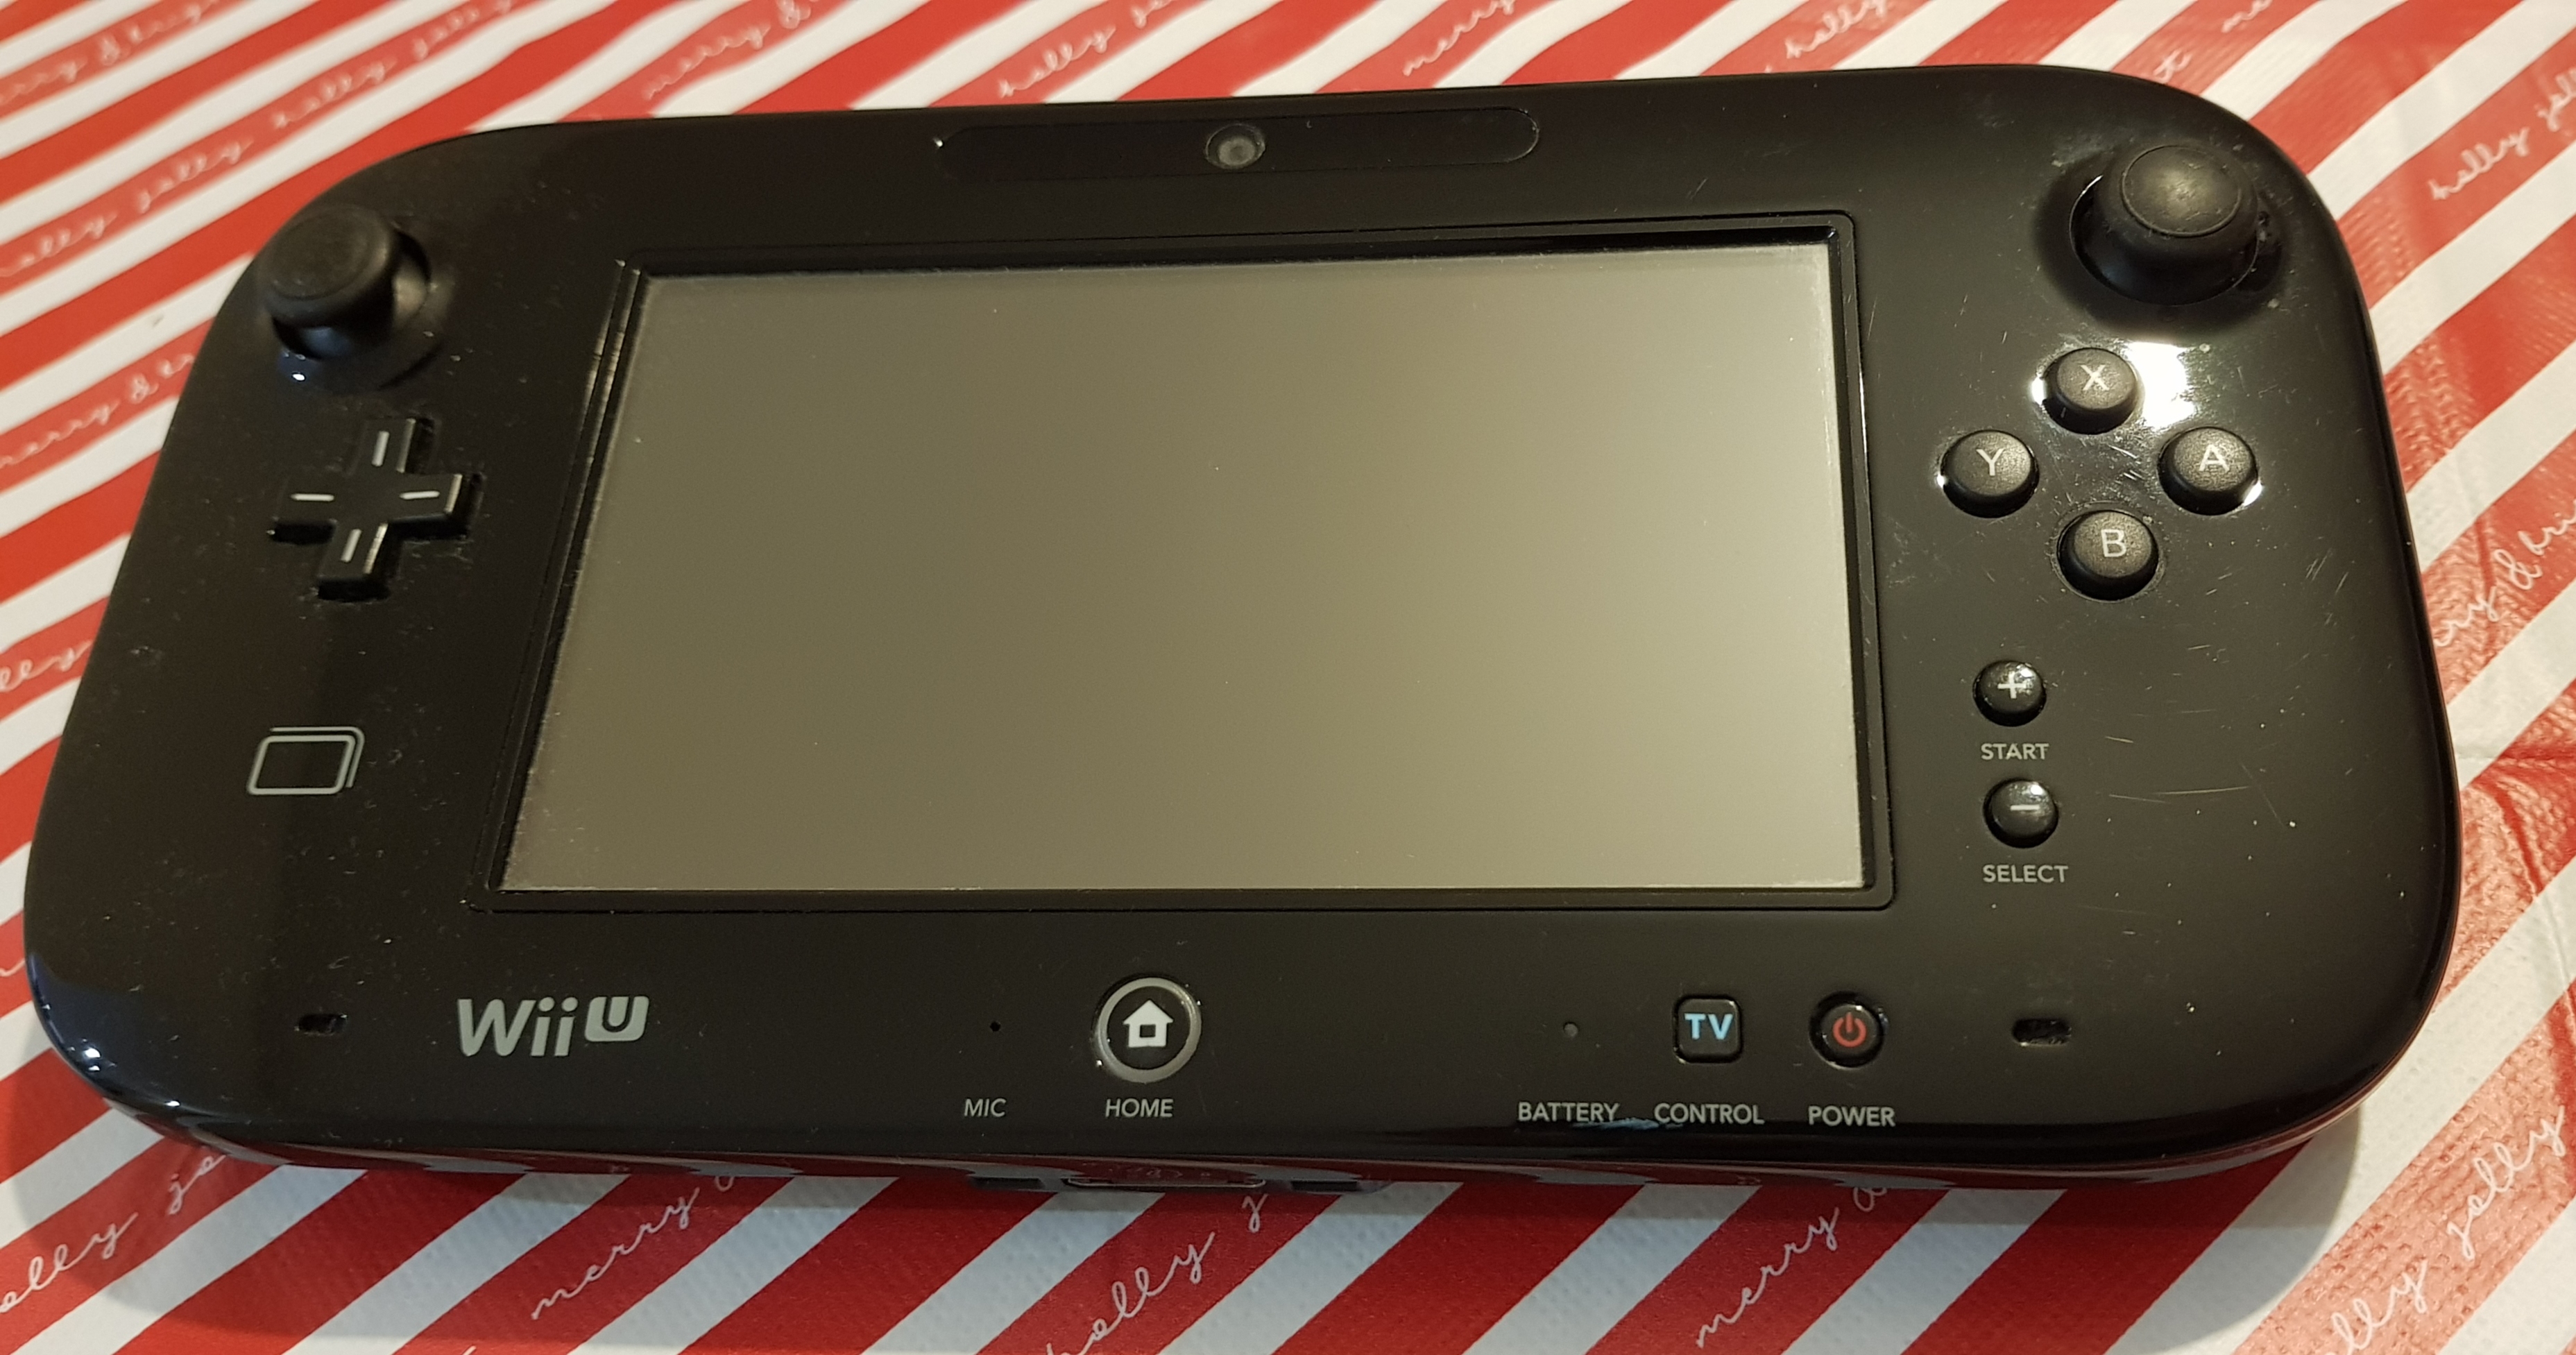
The "victim"
20240406_212954.jpg


(Excuse the repurposed Holidays table cover that features throughout :XD:)

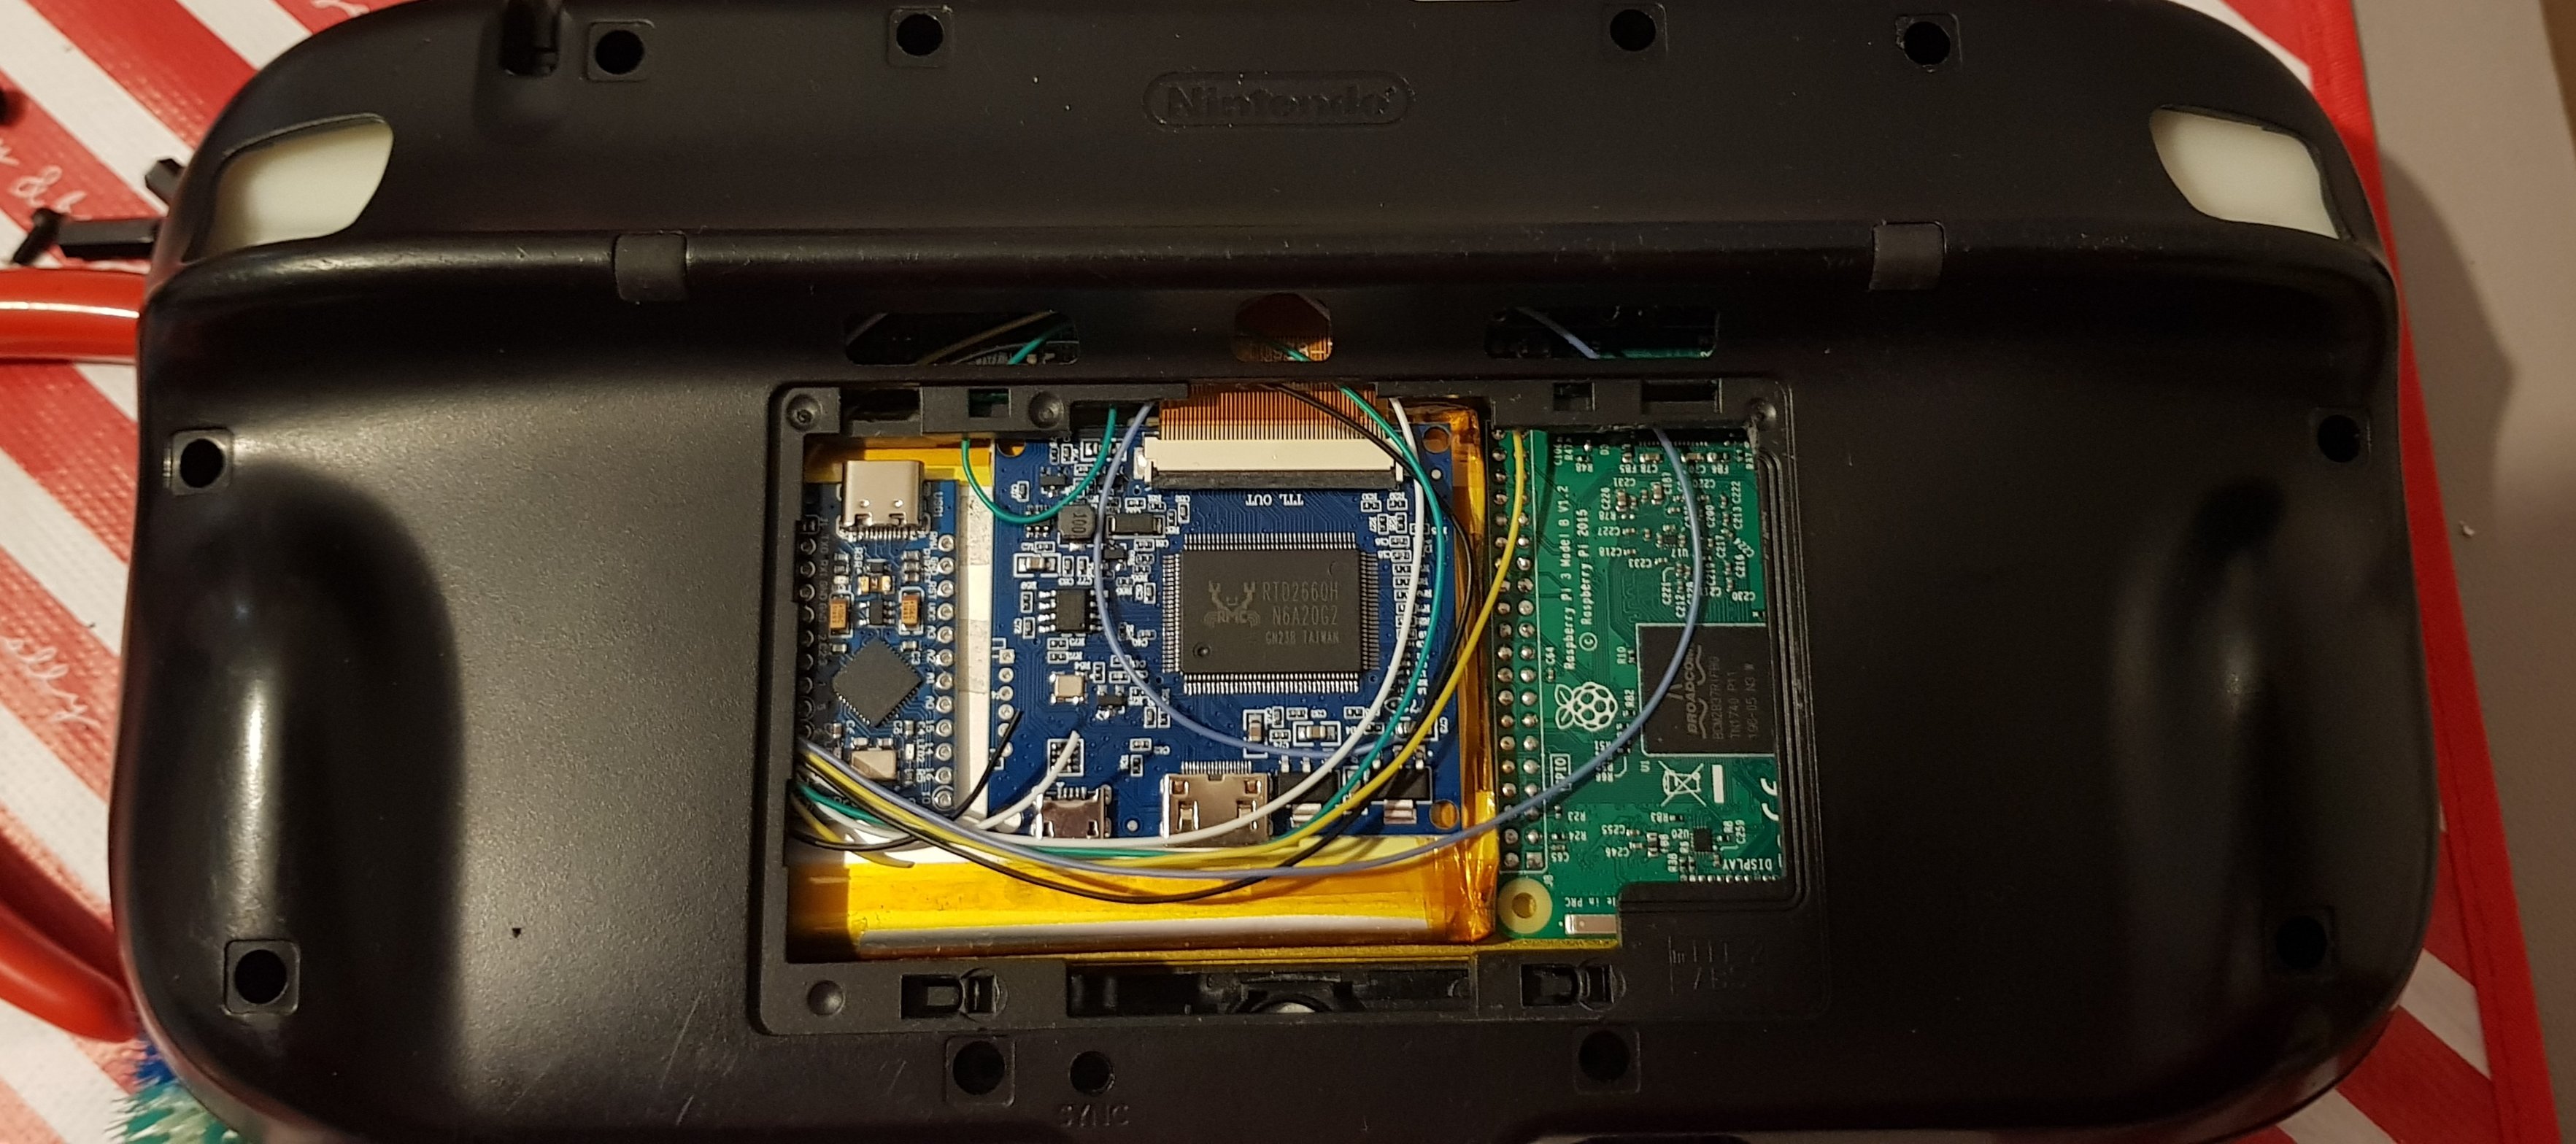
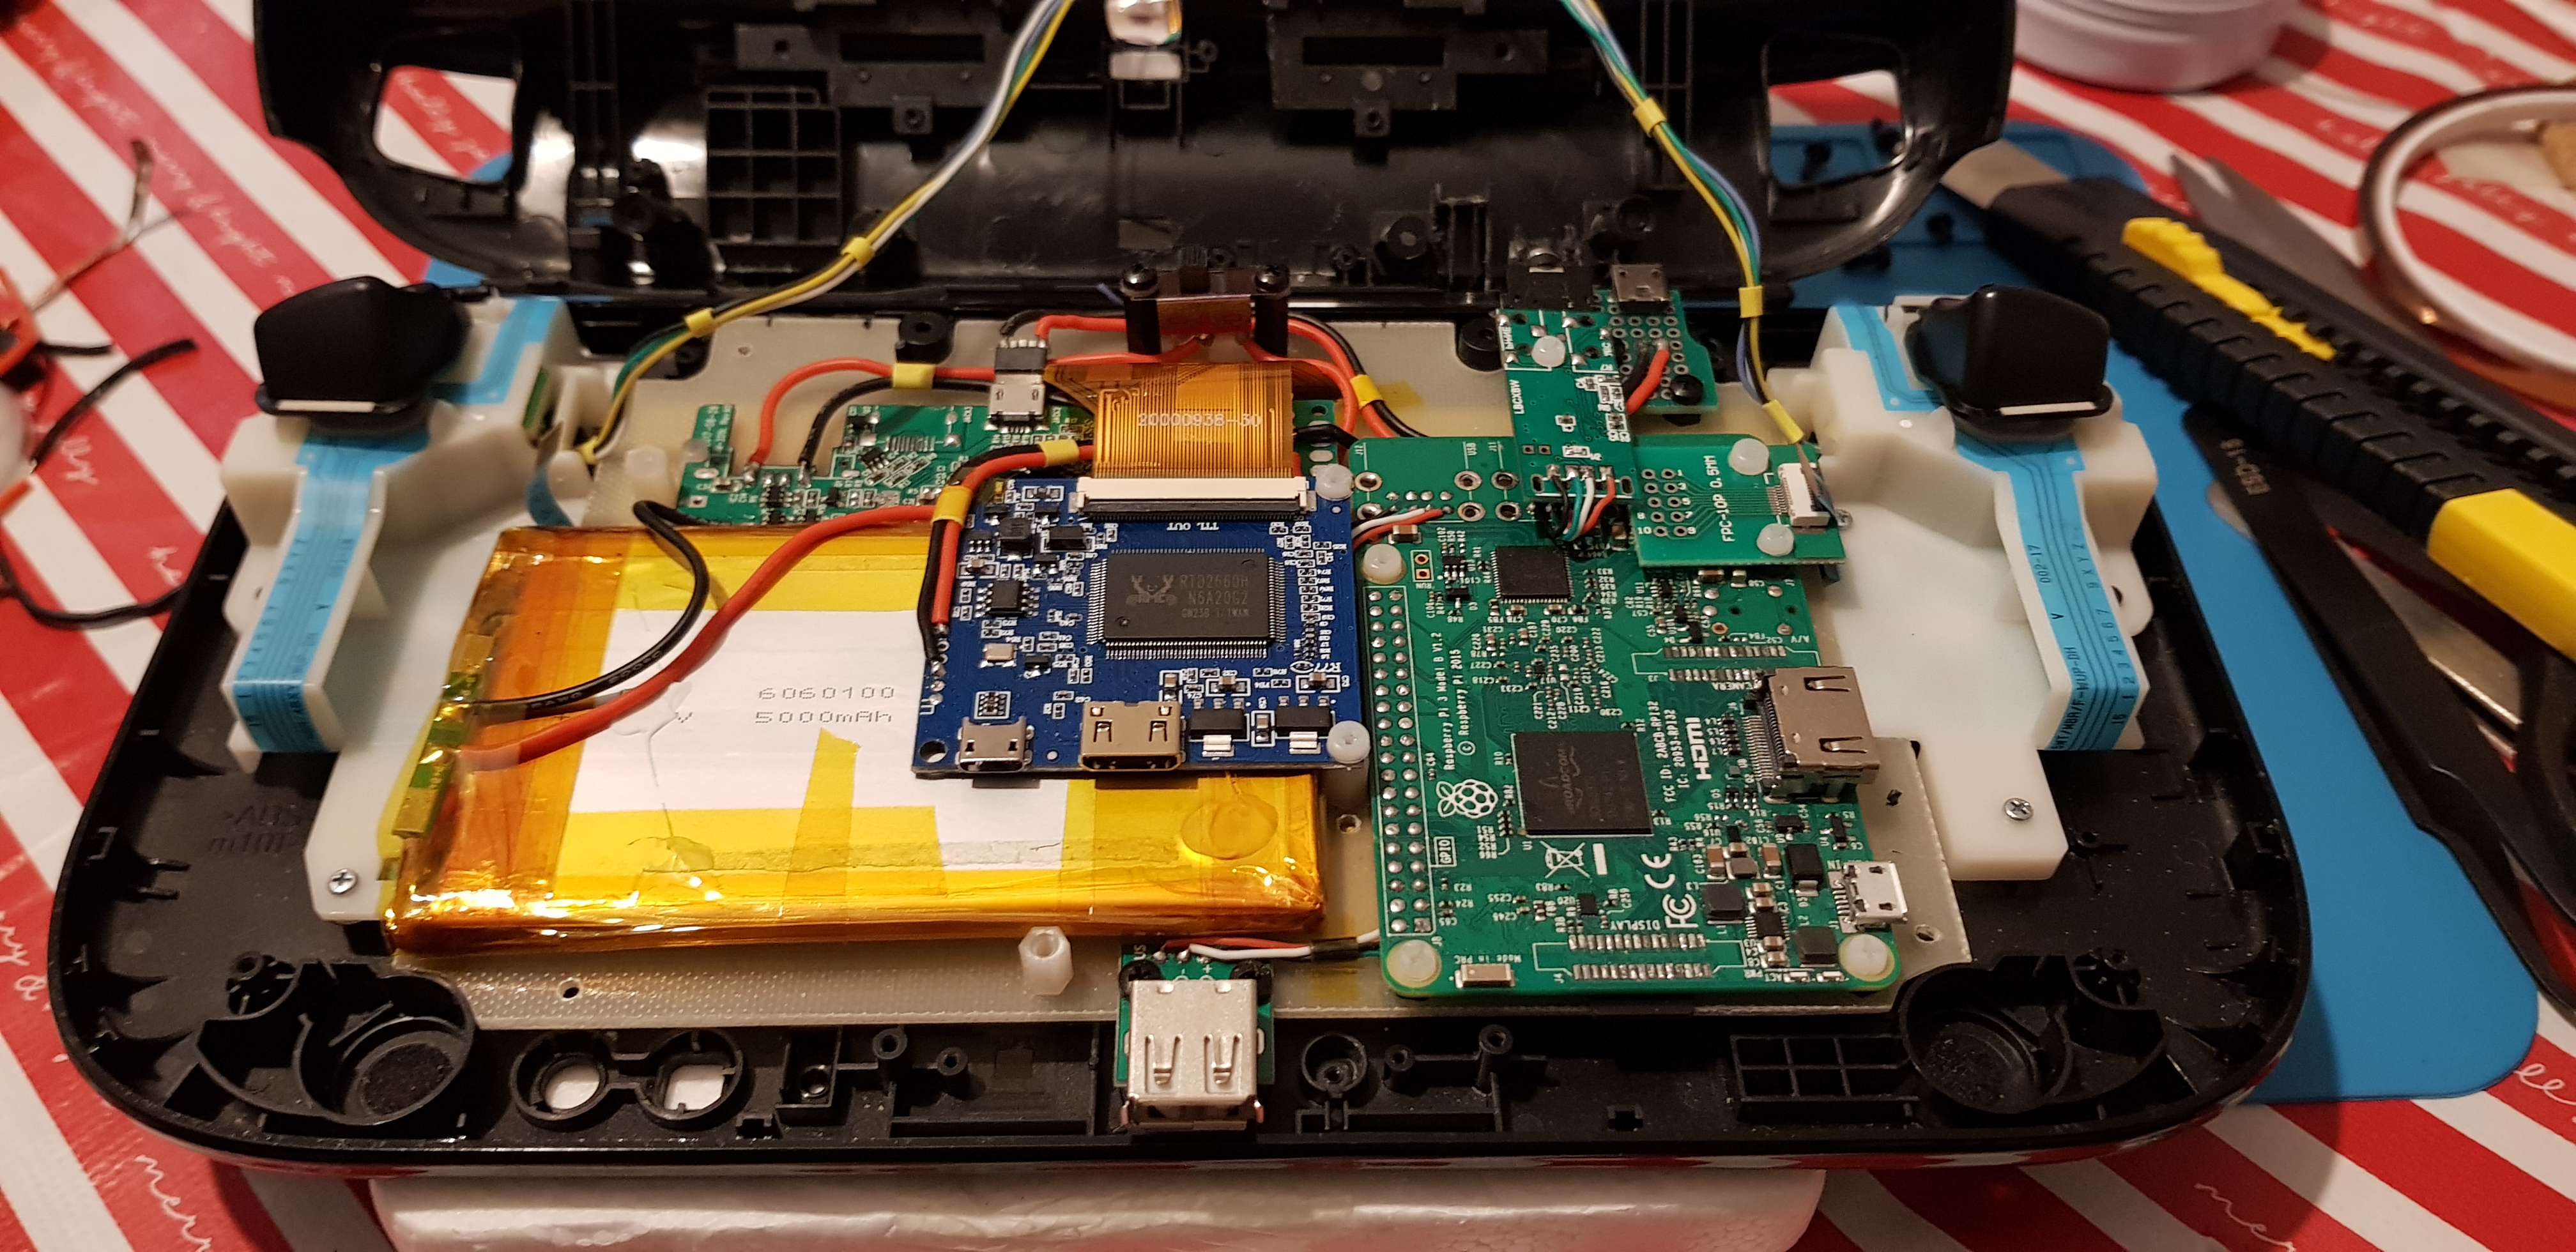
Trial fit up, tight but should be workable

20240320_211008.jpg


Goodbye joystick connectors, hello flying leads (glad I did it but not glad I did it so early on, they were cause of many unrepeatable words throughout)

20240318_160028.jpg

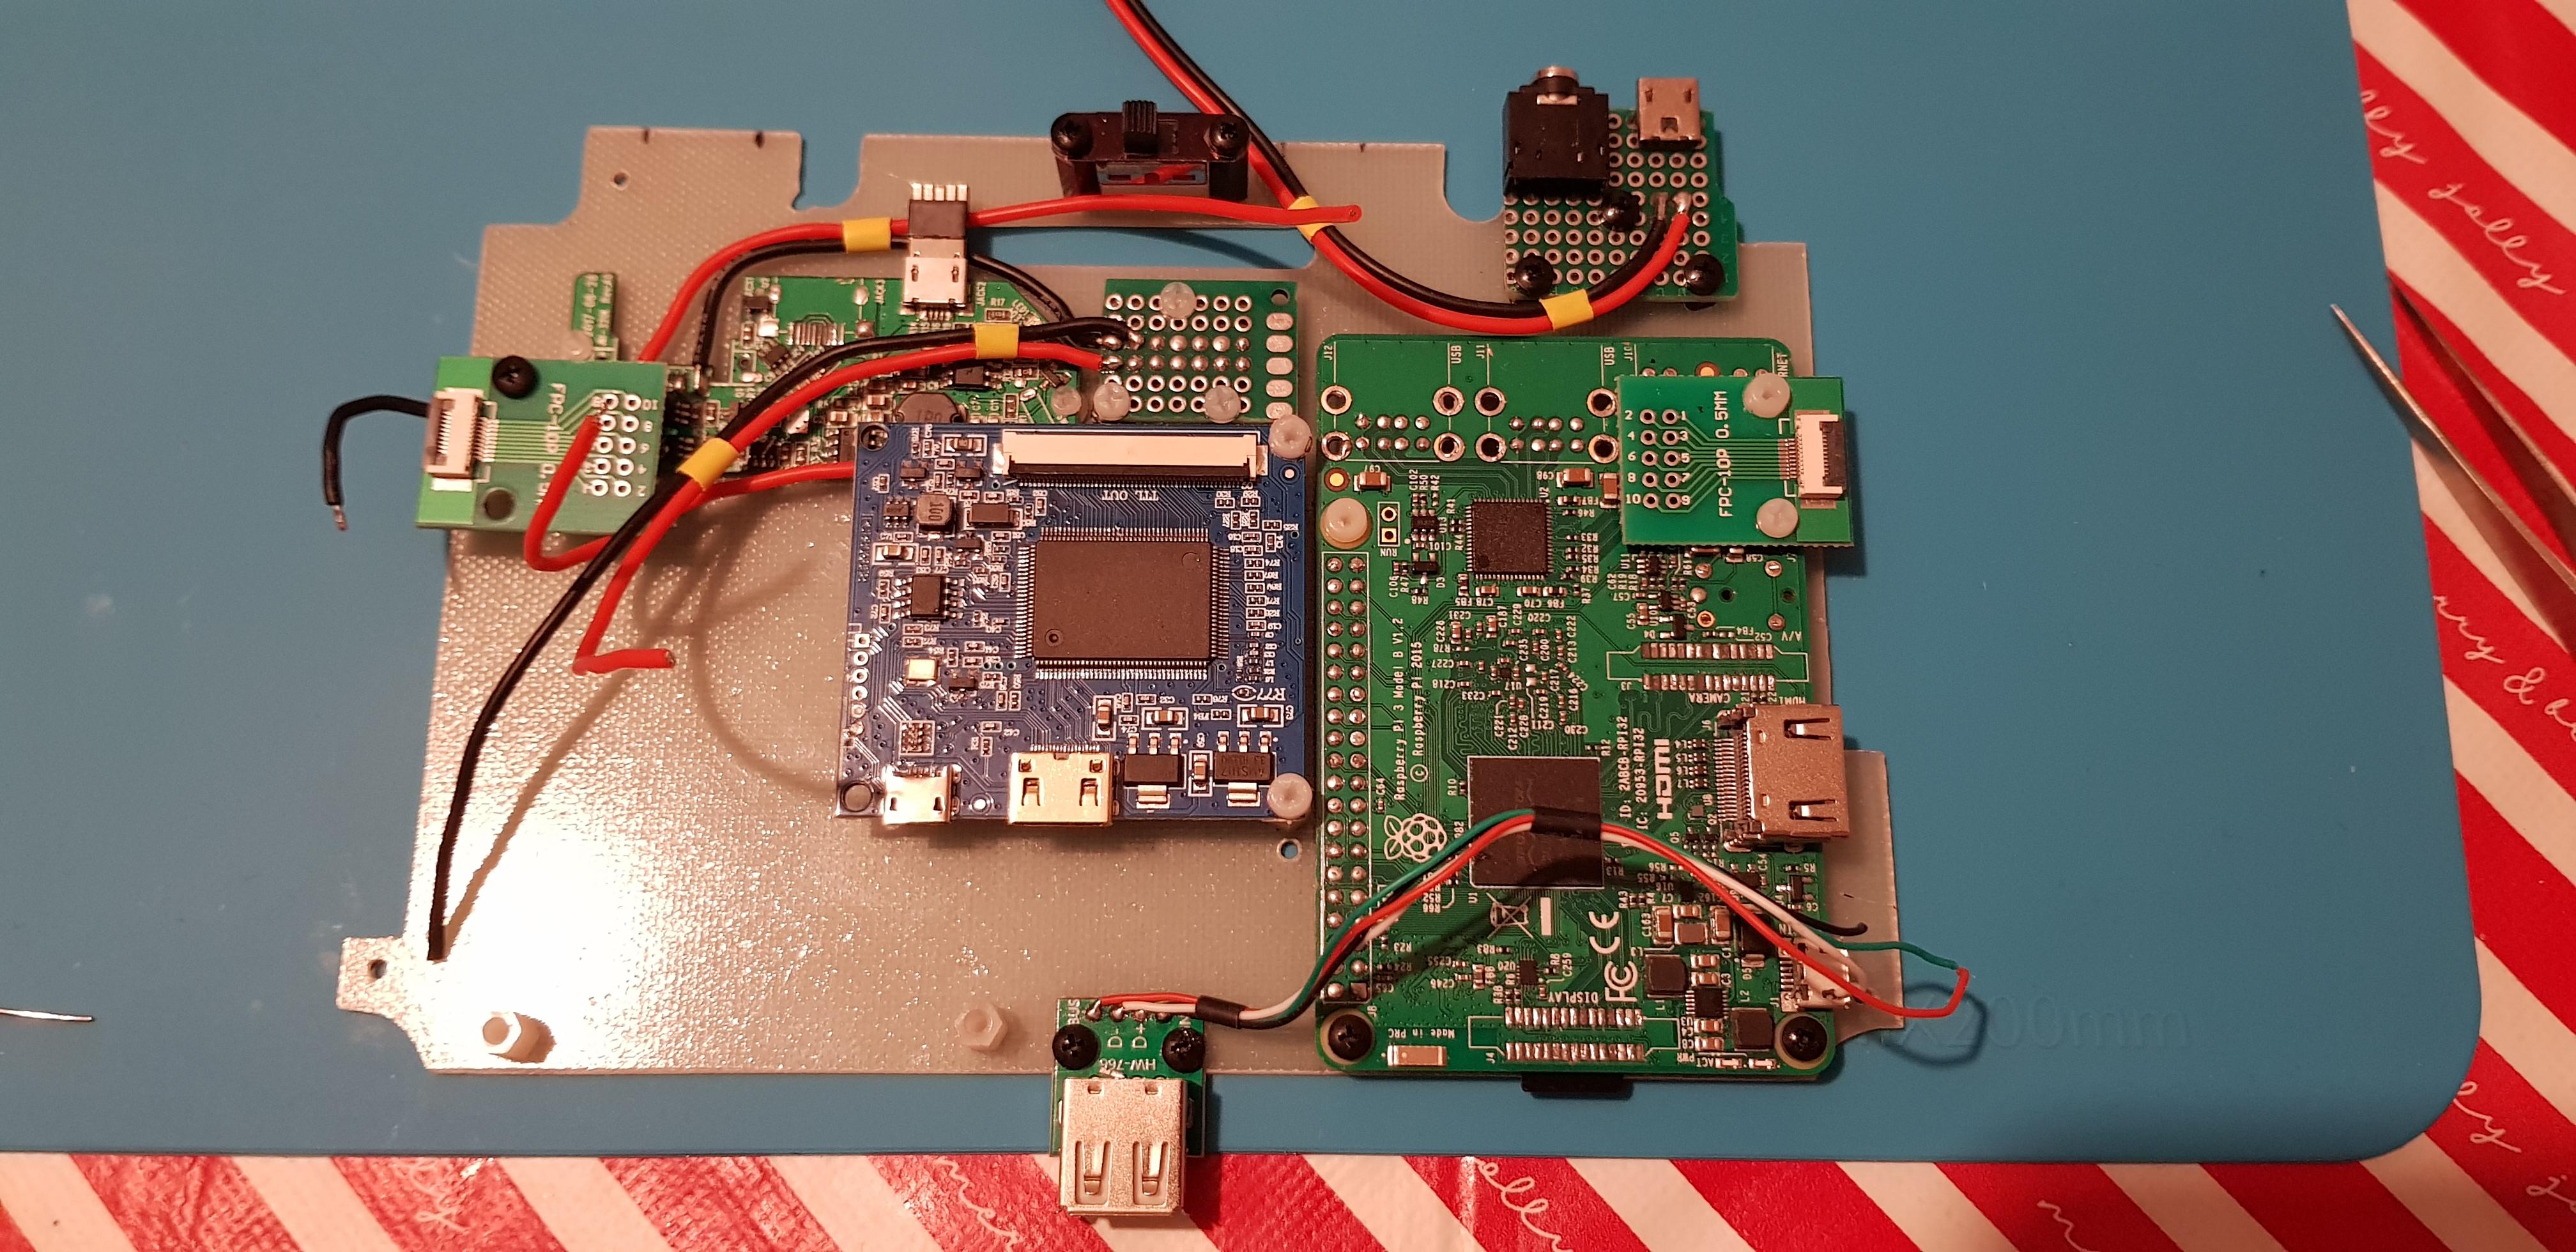
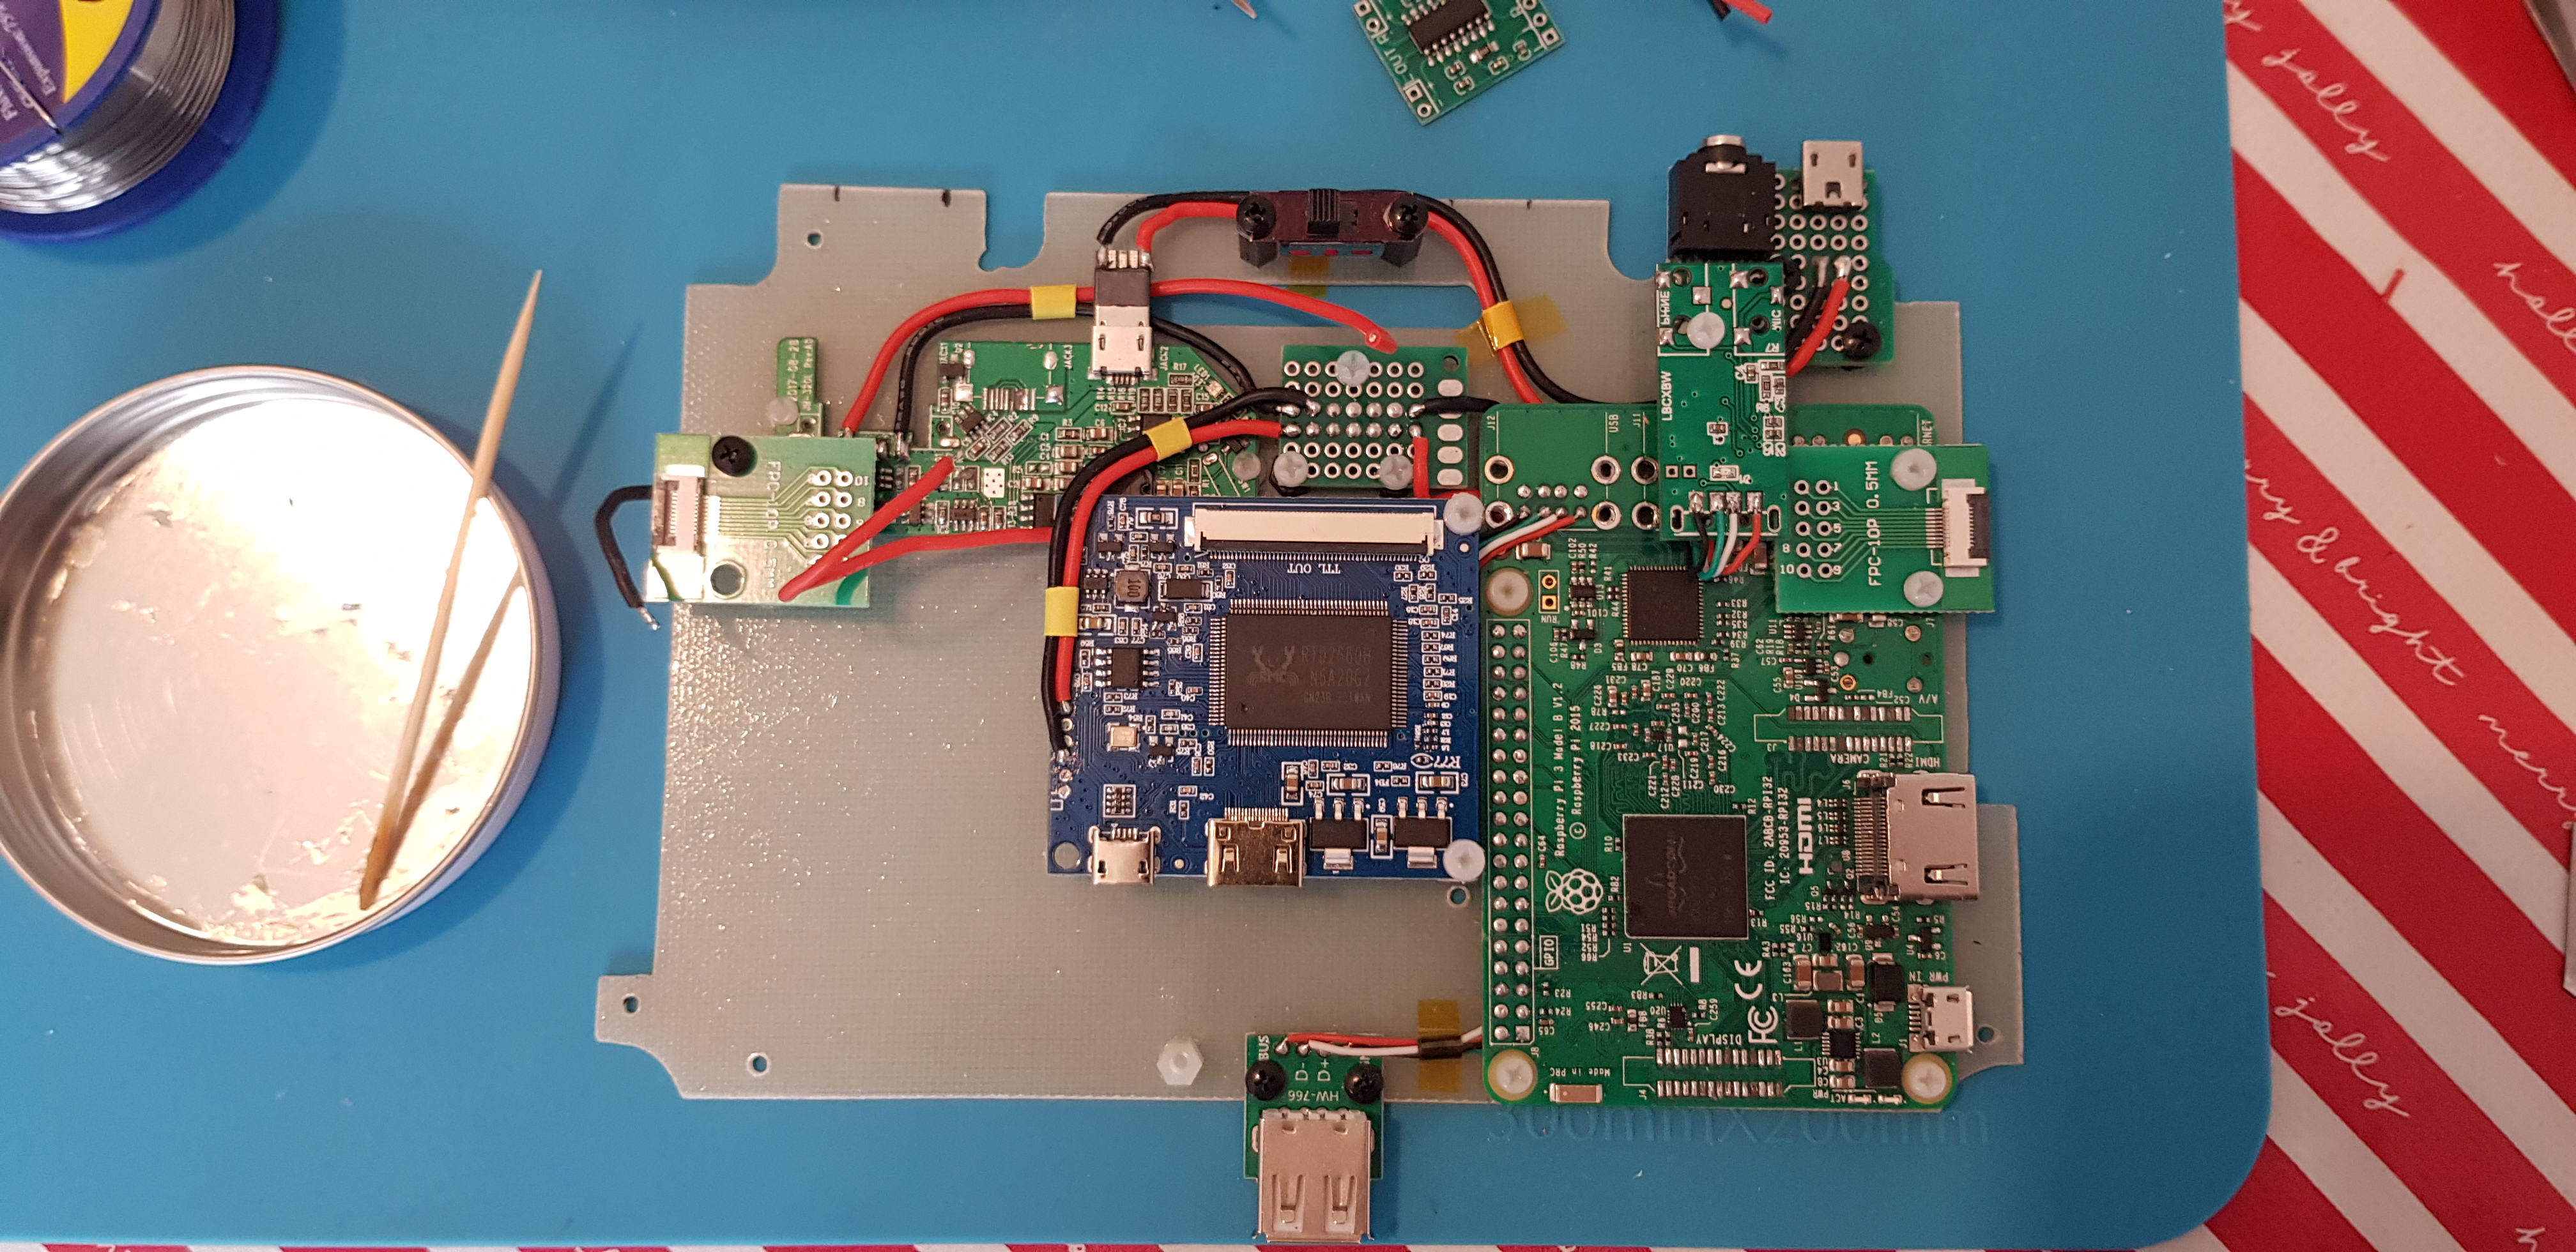
I ditched the LCD frame and made up a backplate to secure it and mount stuff to.

20240405_222905.jpg

20240406_054353.jpg

20240406_155336.jpg
20240406_212259.jpg


Slowly getting there, but lots left to do, resisting the urge to play it.... and waiting on a few bits to arrive.

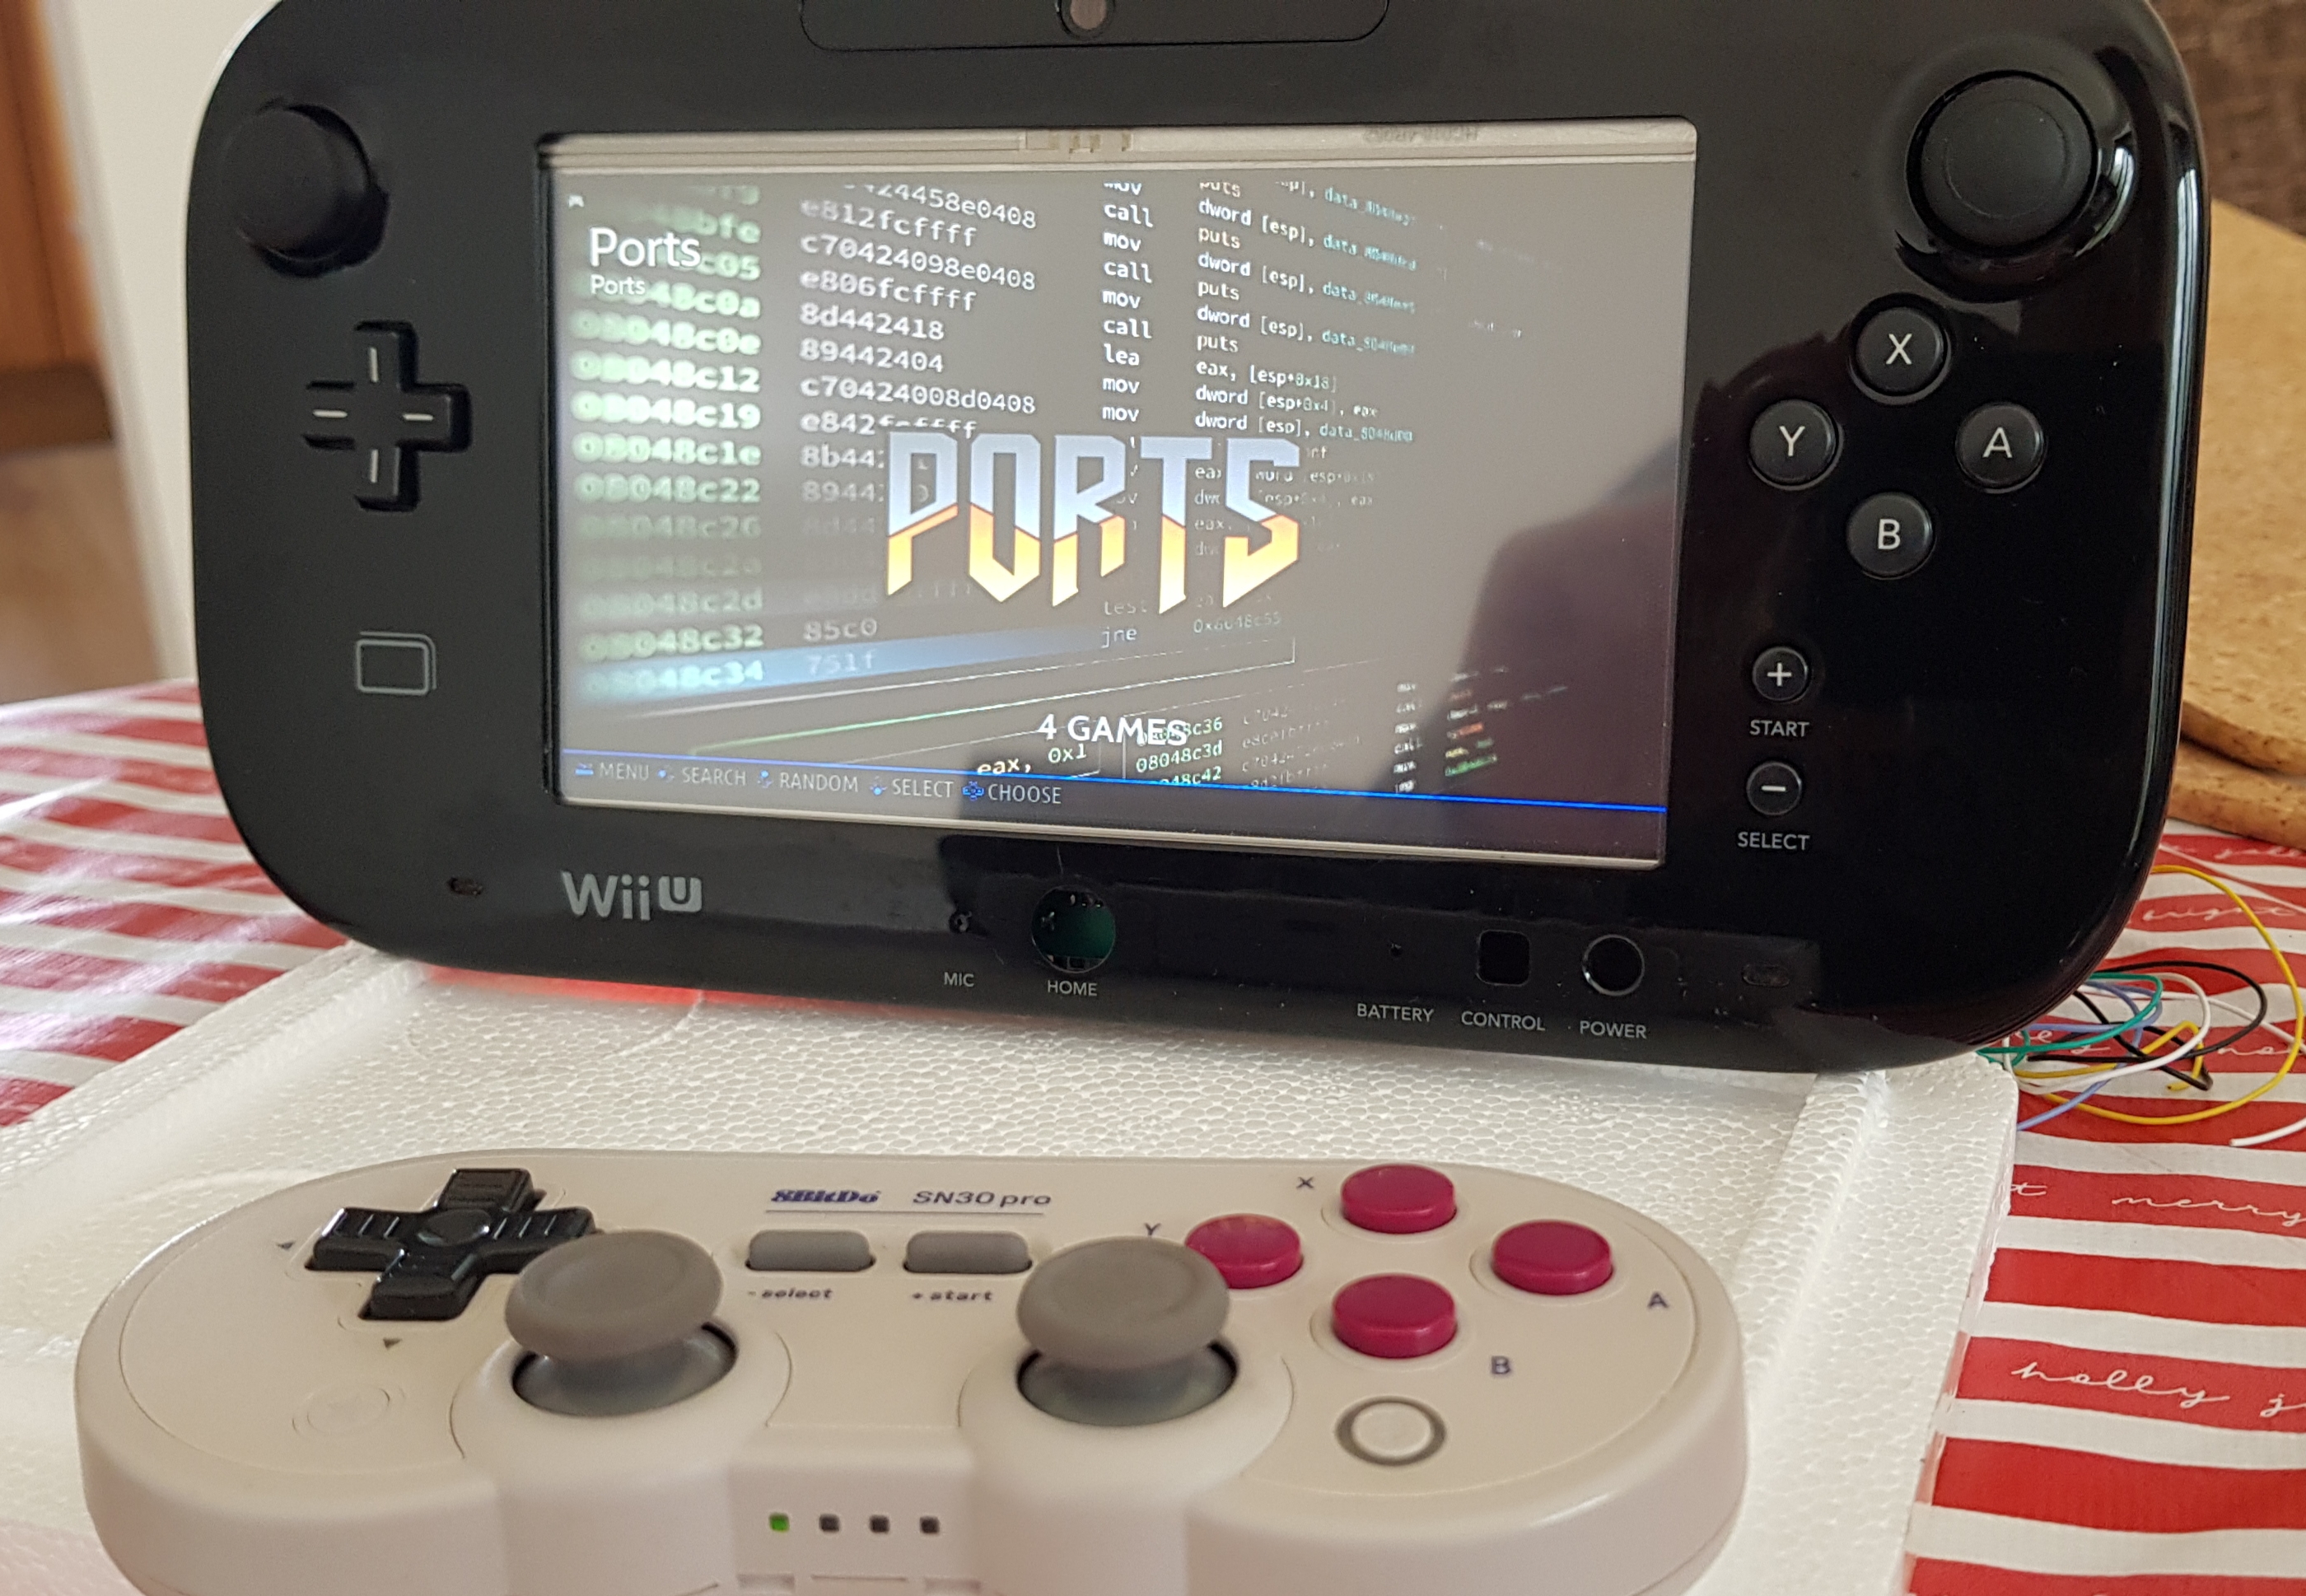
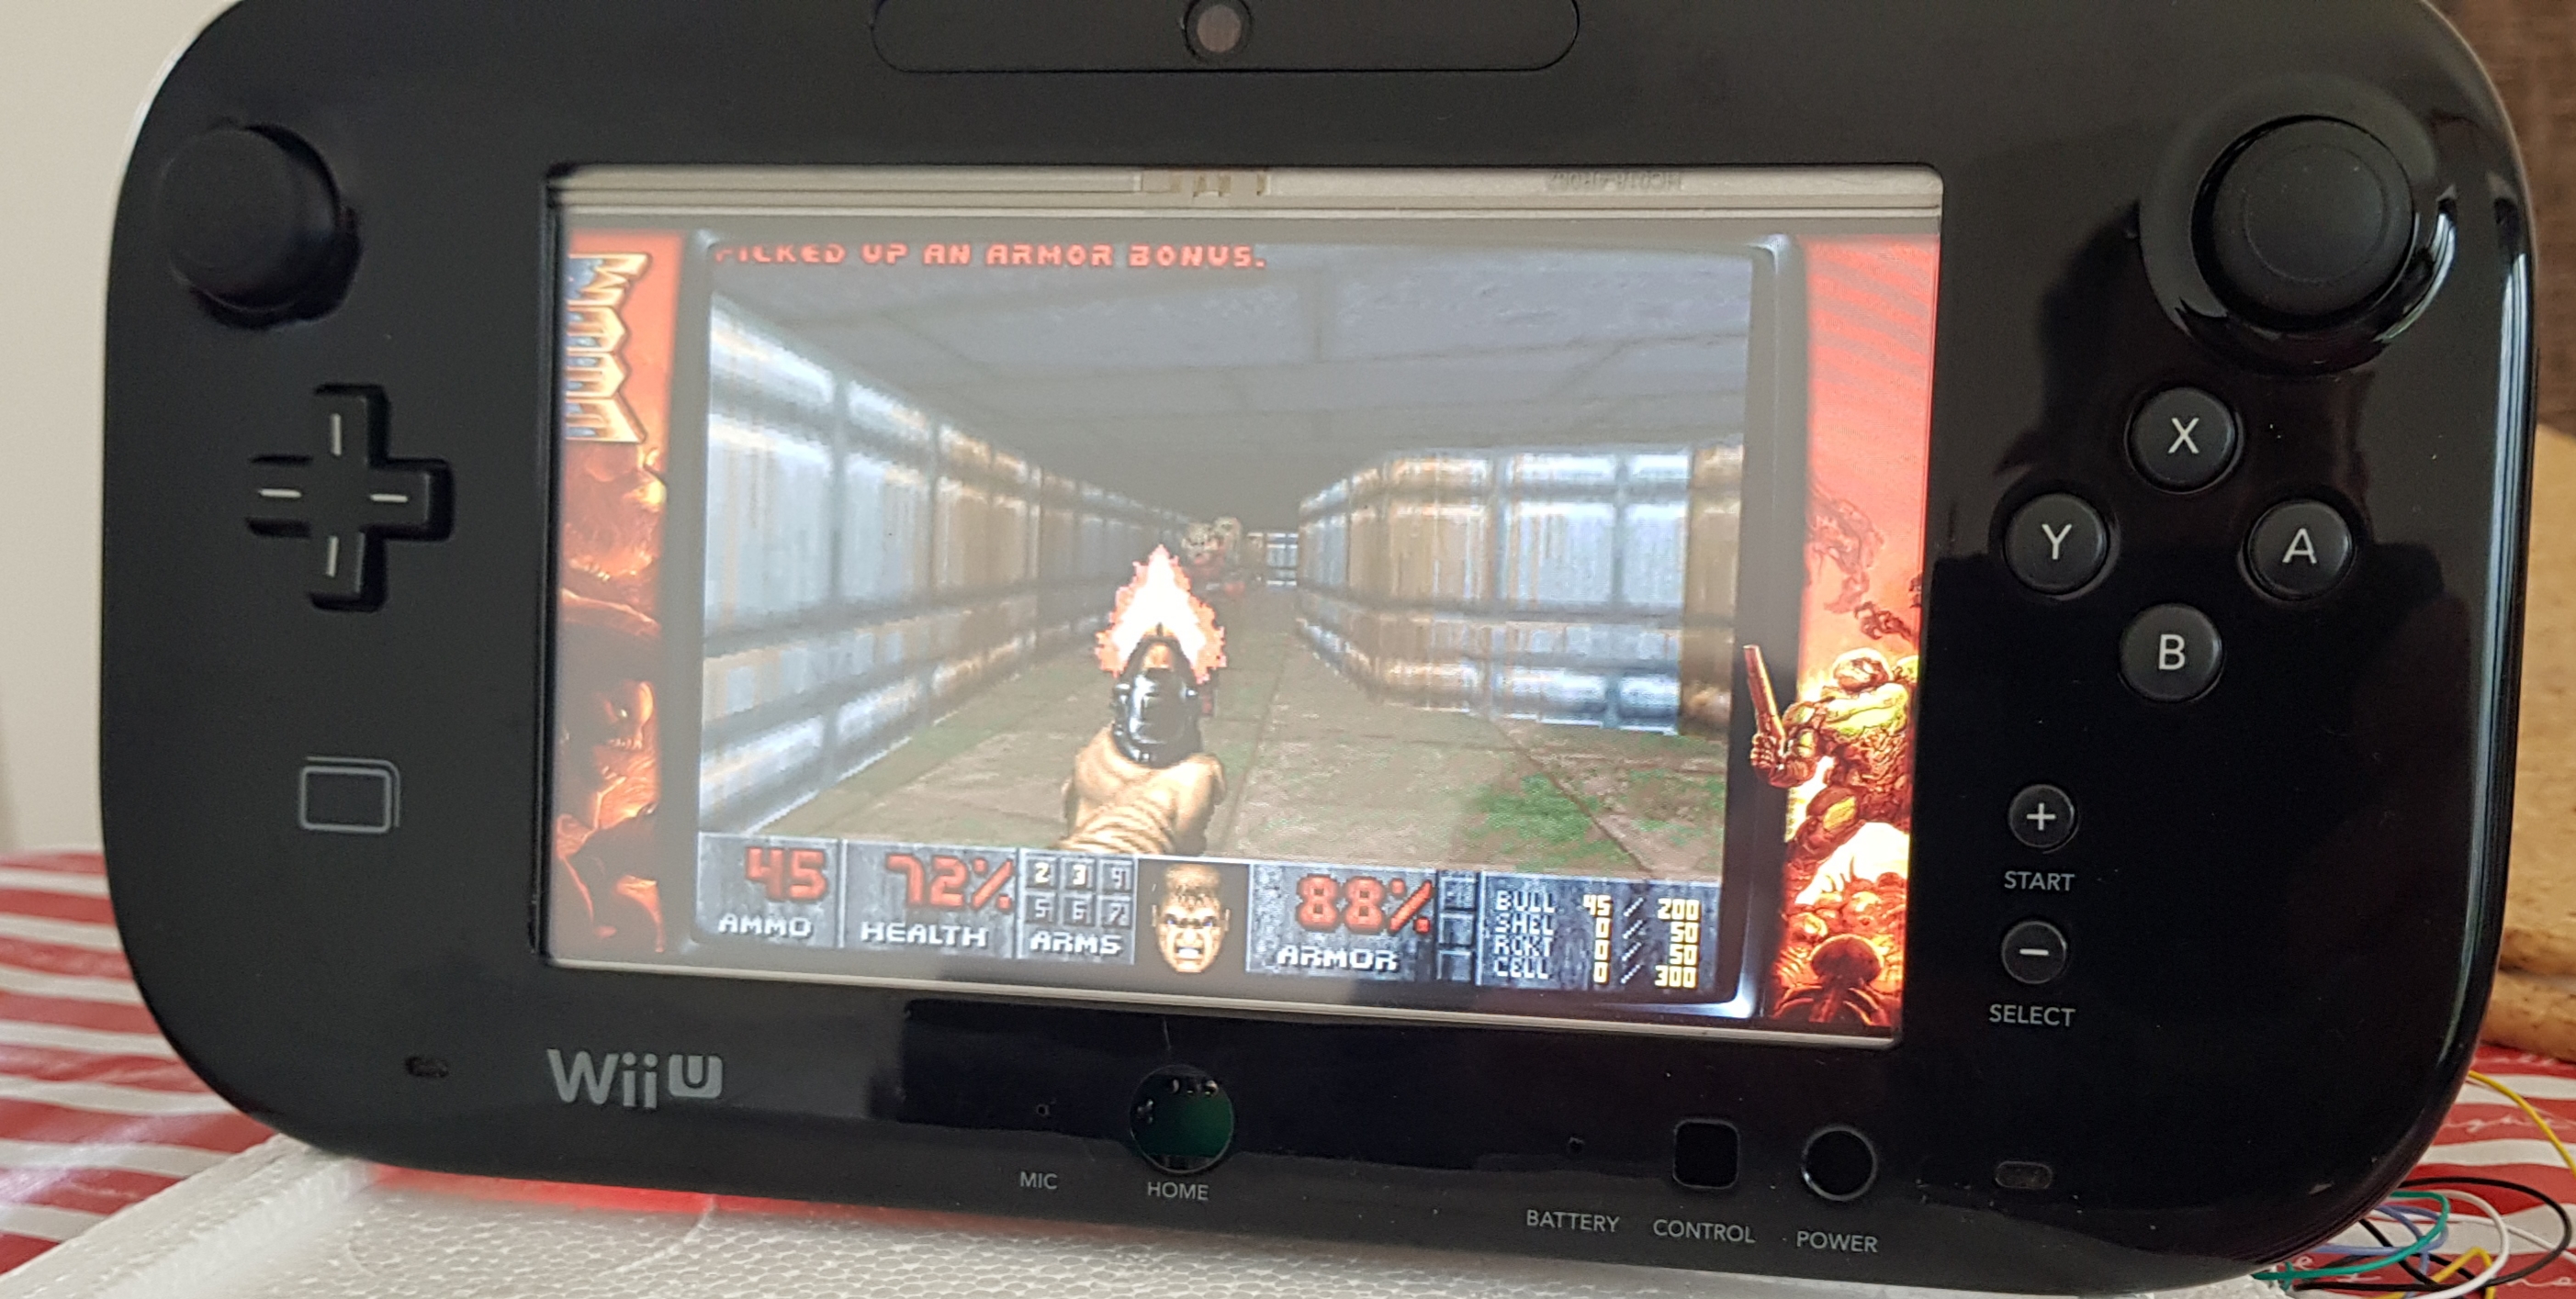
Ok the urge overcame me and I thought I'd better check everything was still alive and things worked (well that was my reasoning anyway, and a thorough test would need to run a rom... right?) :XD:

20240407_111754.jpg
20240407_111737.jpg
20240407_112317.jpg


Thank you for getting this far.

To be continued...
 
Last edited:

JMCD

.
Joined
Feb 18, 2024
Messages
45
Likes
33
Location
UK
Thought I'd post a quick update.

So far everything is running nicely, there are things to do still, and the list is not exhaustive by any means...

1) I notice the LCD driver has two AMS1117 regulators, one supplying 1v8 and the other 3v3.

I hope to remove the regulators and inject these voltages from the Pi in an attempt to claw back some wasted energy maybe?
20240408_204357.jpg

2) Tweak code and wire up Arduino for controls, explore fuel gauge and safe shutdown methods further. Test I2C between arduino and Pi, new ground for me.

DPDT switch arrived so I can wire one side from the battery protection to an Analogue input through a voltage divider, at least that's how I'm imagining it working, but definitely a noob to this so welcome feedback.

Hoping to have soft power on and shutdown but also want a hard off, I know the soft power circuits only draw tiny currents in standby but I like knowing the battery is "physically" disconnected from the circuit. Just me I guess.

3) Sort audio path, I read somewhere that the PAM8403 is not good at being in circuit when driving common ground headphones. This kind of scuppered my plans to have stereo headphone jack socket switching speaker out of audio path.

Any thoughts on this anyone, would welcome feedback.

4) Possibly attempt to wire HDMI point to point and remove the fpc cable. Depending how much of a sadist I am.
 
Last edited:

JMCD

.
Joined
Feb 18, 2024
Messages
45
Likes
33
Location
UK
Minor update....

AMS1117 be gone!

20240412_212045.jpg


Pi is feeding the 1v8 and 3v3 to the driver board now. Unfortunately the 5v supply is still needed for the backlight boost circuit.

20240412_211805.jpg


And it survived my butchery! :D

20240412_210518.jpg


I didn't do any readings before or after unfortunately, will be interesting to see if makes much difference to run time.

Have also prototyped the audio circuit and it's not bad as is, seems my fears were unfounded.

I have it so that the headphones are driven directly from the DAC, then the switched signal feeds the amp which drives the speakers.

New goals:

1) Try and come up with some software controlled PWM brightness control... no real ideas how to go about this just yet, welcome any input.

2) I have come across a piece of software that will allow me to read and write to the display drivers eeprom... so I may attempt a few alterations to the driver firmware, to remove osd of source etc.

3) I've decided to go with software volume control, instead of a pot. This will hopefully be controlled by ye olde three position navigation switch - think mini disc Walkman jog dial, would be nice to use this jog switch to do a few different duties.
 
Last edited:
Joined
Oct 27, 2020
Messages
109
Likes
120
Portables
KiWii Portable (In progress)
I have always loved modifying the Wii U Gamepad to do what I think the Wii U should have been all about. Always awesome to see people do it more and more and getting better every time. Love the 3D printed bracket that screws everything into place!
 

JMCD

.
Joined
Feb 18, 2024
Messages
45
Likes
33
Location
UK
I have always loved modifying the Wii U Gamepad to do what I think the Wii U should have been all about. Always awesome to see people do it more and more and getting better every time. Love the 3D printed bracket that screws everything into place!
Yep I couldn't agree more, I think the gamepad is a brilliant platform to build on. Ok it's not the most svelte but I've thoroughly enjoyed using it so far.

I have a second dead gamepad that will be the host for my wii trim once this is done, fingers crossed it goes smoothly!

Thank you for the kind words!

The backplate is actually a sheet of old school pcb substrate (sans copper) that we use for a certain job, this offcut was in the bin.
 
Last edited:

JMCD

.
Joined
Feb 18, 2024
Messages
45
Likes
33
Location
UK
Quick update.

Added another level to the plate, more room to mount the arduino and amp.

I'm hoping another layer of separation for the amp will also be beneficial signal wise...

20240414_142405.jpg


Things are getting kind of busy in there now. With a bit of luck I'll be able to finish routing wires, whilst terminating the audio and most of the controls.

Still need to decide if I'm going to modify the original home button board or make a new one.

With the arduino at 5v logic and the pi at 3v3 I'm not entirely sure how I'm going to approach the battery monitoring. I'd ideally like to handle it on the arduino as the inputs can handle the full/charging levels from the battery without shifting.

However I'm thinking life may be easier if I add an ads1015 to the pi with a voltage divider to drop the battery voltage to acceptable logic levels.

Anyone have any input?
 
Joined
Apr 17, 2024
Messages
6
Likes
3
Hi - congrats on the build. Looks great. New to the forum, but been spending countless hours trying to make the perfect pi handheld - so many prototypes! Got no 3d printer, so it's a very manual learning process with so much trial fit and error getting things into the box - taught myself soldering and also wire-wrapping which has really helped prototyping the electronics.

Re. Audio options for pi - I initially went down the same route as you with PAM8403, but ended up using MAX98357 - it's only mono, but that wasn't a big problem for me. Also didn't really want headphone output so it was a decent option and the Pi has 3.5mm audio out anyway if that becomes a thing that I need.

Current build is Pi3B+ with a 7" HDMI that has built-in audio, mounted in an old router case with DIY left and right controllers glued either side (analog and 5 buttons each side connected to arduino pro micro, plugged in to pi via usb) It's a mess to look at but it's working and almost there...

I hope that helps!
 

JMCD

.
Joined
Feb 18, 2024
Messages
45
Likes
33
Location
UK
Hi - congrats on the build. Looks great. New to the forum, but been spending countless hours trying to make the perfect pi handheld - so many prototypes! Got no 3d printer, so it's a very manual learning process with so much trial fit and error getting things into the box - taught myself soldering and also wire-wrapping which has really helped prototyping the electronics.

Re. Audio options for pi - I initially went down the same route as you with PAM8403, but ended up using MAX98357 - it's only mono, but that wasn't a big problem for me. Also didn't really want headphone output so it was a decent option and the Pi has 3.5mm audio out anyway if that becomes a thing that I need.

Current build is Pi3B+ with a 7" HDMI that has built-in audio, mounted in an old router case with DIY left and right controllers glued either side (analog and 5 buttons each side connected to arduino pro micro, plugged in to pi via usb) It's a mess to look at but it's working and almost there...

I hope that helps!
Thank you, there's a long way to go yet... and it will never compare to the retro lite cm4. That thing is beautiful!


Thank you for the input re audio, can I ask why you moved away from the PAM?

You should post up your build, would be nice to see some more examples on here.
 
Joined
Apr 17, 2024
Messages
6
Likes
3
Hi. I moved from PAM8403 to MAX98357 because I wanted to have audio without an additional DAC - mostly space and power reason. With arduino usb taking care of the controls and hdmi for the video, the gpio is pretty much free. The MAX works straight off the rpi GPIO via i2s so no DAC required. I'm no expert by any stretch, but I couldnt work out how to get PAM to work with i2s.
My build is a mess - but I appreciate the encouragement!
(Current build has built-in audio and speakers on the 7" HDMI display so PAM / MAX not required at all, but previous build had HDMI without audio hence the MAX98357)
 

JMCD

.
Joined
Feb 18, 2024
Messages
45
Likes
33
Location
UK
Ahh I see, mine is much less integrated and uses a usb dac which is probably giving me a larger than necessary overhead with power draw.

I'll take a look at max ic, thanks for the heads up.

Well, if you do decide to publish then I for one, would love to see it.
 
Joined
Apr 17, 2024
Messages
6
Likes
3
Yeah, I found a big cheat with the integrated audio / hdmi - I'm sure the power demands are still there in reality; but right now I'm running off a usb powerbank, so not had to cross that bridge yet. I think that's the biggest hurdle for me and possibly many others - making a safe, decent capacity, rechargeable power supply / battery. There are so many posts but as a layperson with zero electronics/electrical experience it feels like there isn't an optimum solution / guide, so safe power is a major factor for me. I'm sticking with usb / powerbank until I work that out. It's portable-ish.
 

JMCD

.
Joined
Feb 18, 2024
Messages
45
Likes
33
Location
UK
Yeah, I found a big cheat with the integrated audio / hdmi - I'm sure the power demands are still there in reality; but right now I'm running off a usb powerbank, so not had to cross that bridge yet. I think that's the biggest hurdle for me and possibly many others - making a safe, decent capacity, rechargeable power supply / battery. There are so many posts but as a layperson with zero electronics/electrical experience it feels like there isn't an optimum solution / guide, so safe power is a major factor for me. I'm sticking with usb / powerbank until I work that out. It's portable-ish.
Yes the power side is a major consideration. To design one from the ground up wasn't viable for me as I'm definitely not an EE!

It's a juggling act of decent capacity, size, keeping up with the current draw and not taking an eternity to recharge, play and charge is also a "nice to have"

At present I've used a gutted powerbank but I hope to revisit this method on my next build.
 

JMCD

.
Joined
Feb 18, 2024
Messages
45
Likes
33
Location
UK
Minor update

Speakers are in place, FFC for hdmi has been connected (for the last time, unless I break them out and wire in pairs down the road), audio and controller wiring has begun so many connections... so few colours lol... maybe going to fix that with ghetto cable ID rings (heat shrink and a fine tip marker).

I've also ditched the ADS1015 standalone ADC in favour of a MAX17048 fuel cell monitor. Just waiting for it to arrive so I can play :)
 
Joined
Apr 17, 2024
Messages
6
Likes
3
Hi again. I don't know whether this (or something similar) might be helpful if the MAX17048 doesn't work out - I bought an 8-cell powerbank case from Ali, I've harvested some 18650 cells from old HP laptop batteries - the laptop can't charge the batteries, but the 18650 cells inside are all good. The good thing about this one is that it has an LED display. It might be possible to hack that display out from the powerbank case so that it could be visible somewhere on the wii controller? That way you'd have battery monitoring of sorts, just independant from the pi? There's probably a better option, especially for Pi3 upwards power requirements - some of these powerbank cases supposedly provide 2.4A output. This one doesn't, and I get low voltage warning when I boot my pi3b+, but it works fine in batocera with no warnings (it's overkill with 8 cells and too heavy really to be built into a handheld, but it was also extremely cheap, so ideal for prototyping)
 

Attachments

JMCD

.
Joined
Feb 18, 2024
Messages
45
Likes
33
Location
UK
Hi again. I don't know whether this (or something similar) might be helpful if the MAX17048 doesn't work out - I bought an 8-cell powerbank case from Ali, I've harvested some 18650 cells from old HP laptop batteries - the laptop can't charge the batteries, but the 18650 cells inside are all good. The good thing about this one is that it has an LED display. It might be possible to hack that display out from the powerbank case so that it could be visible somewhere on the wii controller? That way you'd have battery monitoring of sorts, just independant from the pi? There's probably a better option, especially for Pi3 upwards power requirements - some of these powerbank cases supposedly provide 2.4A output. This one doesn't, and I get low voltage warning when I boot my pi3b+, but it works fine in batocera with no warnings (it's overkill with 8 cells and too heavy really to be built into a handheld, but it was also extremely cheap, so ideal for prototyping)
Hi again, again :)

Thank you for the suggestion, I did actually consider relying on the digital display from a powerbank at the beginning.

However I am really looking for both a logic output as well as a HUD in software. (I'm sure such a "signal" could be plucked from the powerbank controller PCB).

The MAX17048 has calibration features, avoids some messy math to estimate the non-linear battery's charge state (always a good thing) and gives some nice data over I2C.

I'm not sure who will be monitoring the battery yet, Arduino or Pi.... but with a script running on the pi, and/or code on the arduino the system can monitor the state of charge and gracefully shutdown.

That's the plan anyhow... let's see how smoothly it goes haha.
 

JMCD

.
Joined
Feb 18, 2024
Messages
45
Likes
33
Location
UK
Quick update...

Finally got the Arduino wired up to controls, just need to finish tying the common grounds together and go over the code/test.

20240421_000622.jpg


I could do with more input pins, I'm considering a shift register or maybe trying the home menu board to the pi's gpio.
 

Stitches

2 and a Half Dollarydoos
Staff member
.
.
Joined
Feb 5, 2017
Messages
3,848
Likes
3,026
Location
Banana Bender Land, Australia
Portables
6
I'm sure it took a heap of time, but the security of those looms will keep that rig running smoothly through any and all bumps and tumbles
 

JMCD

.
Joined
Feb 18, 2024
Messages
45
Likes
33
Location
UK
I actually found it quite therapeutic...

Don't get me wrong, there were times when the special words were spoken but I've actually really enjoyed it so far.

Looking forward to getting this one buttoned up so this can happen....

20240421_083037.jpg


<evil_laugh></evil_laugh>
:XD:
 
Last edited:
Top