Worklog The AtarWii Liinx

fibbef

Wizardry V Completer
.
Joined
Nov 10, 2016
Messages
606
Likes
1,625
Yes I basically copied Akira, I know. His GC Lynx was the portable that got me into this stupid black hole of time and money :P
Akira deserves all the respect he gets. Glad his stuff gets recognized.
 

Aurelio

ᕕ( ᐛ )ᕗ
Staff member
.
.
.
.
.
Joined
Mar 3, 2016
Messages
2,229
Likes
2,952
Portables
2
Lol dang it. I was kind of hoping nobody else would make one of these until I did, but I totally agree it's gonna be awesome :D I can't wait to see how it comes out! The gc lynx is what made me join the club as well haha
You should stop doing all the cool stuff. Leave something for the others :P
 

Stitches

2 and a Half Dollarydoos
Staff member
.
.
Joined
Feb 5, 2017
Messages
3,859
Likes
3,027
Location
Banana Bender Land, Australia
Portables
6
Italy is 7 hours ahead wrt Texas. I live in the future
I call bullshit! I'm 14-16 hours ahead and I'm still in last place. You can't fool me pizza wizard, get your filthy deep pan magic out of here.

EDIT: My lack of tetris skill has brought shame to my family. I can't get the stupid triggers and control stick to fit together, and I decided I value the stick feel over the trigger range. Sadly, I've already cut two big fuck off holes, so I'm looking into something else that'd fill the void while being notably flatter inside.
 
Last edited:

fibbef

Wizardry V Completer
.
Joined
Nov 10, 2016
Messages
606
Likes
1,625
I'm looking into something else that'd fill the void while being notably flatter inside.
Acrylic sheets cut to size and epoxied/ABS cemented into the holes. I've only had to do this for 2 portables so far. :P
 

Stitches

2 and a Half Dollarydoos
Staff member
.
.
Joined
Feb 5, 2017
Messages
3,859
Likes
3,027
Location
Banana Bender Land, Australia
Portables
6
Acrylic sheets cut to size and epoxied/ABS cemented into the holes. I've only had to do this for 2 portables so far. :P
I'm thinking plastic off cuts and putty with 3rd party PS1 trigger buttons.
 

fibbef

Wizardry V Completer
.
Joined
Nov 10, 2016
Messages
606
Likes
1,625
Good idea. PS1 trigger buttons are pretty shallow.
 
Joined
Dec 10, 2016
Messages
578
Likes
663
Location
Constant Fear
Portables
sin^2(x) + cos^2(x) +e^(i*pi)
Cool Project, So I will be the first person to make Pwii out of a leap frog device, cool.

I plan to use this as a case
 

Stitches

2 and a Half Dollarydoos
Staff member
.
.
Joined
Feb 5, 2017
Messages
3,859
Likes
3,027
Location
Banana Bender Land, Australia
Portables
6
Cool Project, So I will be the first person to make Pwii out of a leap frog device, cool.

I plan to use this as a case
Good luck to you. I hope it's a good shape. Some of them can be really odd inside and finding enough space for decent battery life is a real challenge.

EDIT: Make sure you find the dimensions of the thing before you buy it, maybe make a paper box to match the dimensions. It's a lot easier to gauge whether something is big enough if you have a physical thing to hold in your hand and compare to the parts that'd go inside. Also, you can draw on it and plan the layout. Planning is important, as I've learned recently >.>
 
Last edited:

Pacal

.
Joined
Jul 30, 2016
Messages
159
Likes
341
Location
Seattle W.A
Portables
RDP 64
I really like the case from the lynx 2 ,I used one myself to make a 64 portable long time ago but I never finished the project,I was gonna use an everdrive with it but as I said before I never finished
IMG_0415.JPG
IMG_0414.JPG
 
Last edited:

Stitches

2 and a Half Dollarydoos
Staff member
.
.
Joined
Feb 5, 2017
Messages
3,859
Likes
3,027
Location
Banana Bender Land, Australia
Portables
6

Stitches

2 and a Half Dollarydoos
Staff member
.
.
Joined
Feb 5, 2017
Messages
3,859
Likes
3,027
Location
Banana Bender Land, Australia
Portables
6
Finally got a chair tall enough for me to be able to sit at the workbench, so I got a lot done today, without fucking up my feet :D

I'm feeling wordy today, so bare with the massive wall of text.

Pics are the end result of today's work. Mid progress pics are annoying, and my fingers were covered in half set epoxy putty for most of the day. anyway I rotated ABXY so the buttons are closer to the normal orientation. This was mainly for ergonomics. The B button was in a rather uncomfortable spot way below the A button, that required me to shift my bigass hands to press it without disjointing my thumb. I also moved the c-stick and dpad up about 6-7mm each, so they're closer to ABXY and the control stick. They were too low for my speakers to fit, and required a significant shift in my grip to get my thumbs down to them. Well worth the time spent.


I used the triggers from a shit 3rd party PS1 controller to replace the rather uncomfortable and ill fitting original GC triggers. They are SO much more comfortable to hold. The buttons don't protrude out nearly as far, so the grip feels more natural. I also sized and spaced it out so my fingers naturally sit right on LR, and Z is close enough that I don't have to adjust my grip at all to press it. I'm considering using the unused L1 button as Start, since it'd save me drilling another hole, but I also kind of want to frankencase in an original GC start button. Will have to deliberate that.


Notice how the seam of the trigger assembly matches the Lynx's. I did this so I could make each half of the case look as much like a single cast piece as possible. The two halves come apart near perfectly, and provide a free built in screw post on both the far left and right of the Lynx underside. Leaving me with 3 screw posts at 3 of the 4 corners of the Lynx, so I just need to do one myself, if at all.


I was careful this time to preserve as much of the Lynx's form factor as I could, I think I did okay. Some sanding and gap filler and it'll look almost OEM. I'm going to leave the bottom of the PS1 triggers protruding like that. Since this Lynx didn't come with the rubber pads, and I can't seem to source any spares, I'm going to use some adhesive rubber and cut and shape it to sit right under that bottom protrusion to prevent scratches/dents. I'm also planning to make a small wire/plastic frame that will click into two small holes in the sides to hold the Lynx up at a good angle for use in Wii mode. That way I can use it on a train or plane table and play near any Wii game that I'd normally be unable to.


The bottom left screw post is the only original one I decided to leave. The others were all in the way, but that one was cool. I'm going to sand off the atari logo and the fine print on the right there. Adhesive rubber will go in the remaining rubber pad trenches, then there will be two slightly more raised rubber pads at the end of the trenches for "stand mode".


And, as promised, it does in fact come apart into two clean bits. It was such a pain to get the positioning just so. Even a slight angle on one side meant it wouldn't separate without some twisty fuckery.


So far my plans for the Liinx are pretty cemented, but if anyone has any cool ideas, now's the time. Once it's painted I'm not changing shit.
 

E64

.
Joined
Nov 15, 2016
Messages
125
Likes
99
Portables
2
Finally got a chair tall enough for me to be able to sit at the workbench, so I got a lot done today, without fucking up my feet :D

I'm feeling wordy today, so bare with the massive wall of text.

Pics are the end result of today's work. Mid progress pics are annoying, and my fingers were covered in half set epoxy putty for most of the day. anyway I rotated ABXY so the buttons are closer to the normal orientation. This was mainly for ergonomics. The B button was in a rather uncomfortable spot way below the A button, that required me to shift my bigass hands to press it without disjointing my thumb. I also moved the c-stick and dpad up about 6-7mm each, so they're closer to ABXY and the control stick. They were too low for my speakers to fit, and required a significant shift in my grip to get my thumbs down to them. Well worth the time spent.


I used the triggers from a shit 3rd party PS1 controller to replace the rather uncomfortable and ill fitting original GC triggers. They are SO much more comfortable to hold. The buttons don't protrude out nearly as far, so the grip feels more natural. I also sized and spaced it out so my fingers naturally sit right on LR, and Z is close enough that I don't have to adjust my grip at all to press it. I'm considering using the unused L1 button as Start, since it'd save me drilling another hole, but I also kind of want to frankencase in an original GC start button. Will have to deliberate that.


Notice how the seam of the trigger assembly matches the Lynx's. I did this so I could make each half of the case look as much like a single cast piece as possible. The two halves come apart near perfectly, and provide a free built in screw post on both the far left and right of the Lynx underside. Leaving me with 3 screw posts at 3 of the 4 corners of the Lynx, so I just need to do one myself, if at all.


I was careful this time to preserve as much of the Lynx's form factor as I could, I think I did okay. Some sanding and gap filler and it'll look almost OEM. I'm going to leave the bottom of the PS1 triggers protruding like that. Since this Lynx didn't come with the rubber pads, and I can't seem to source any spares, I'm going to use some adhesive rubber and cut and shape it to sit right under that bottom protrusion to prevent scratches/dents. I'm also planning to make a small wire/plastic frame that will click into two small holes in the sides to hold the Lynx up at a good angle for use in Wii mode. That way I can use it on a train or plane table and play near any Wii game that I'd normally be unable to.


The bottom left screw post is the only original one I decided to leave. The others were all in the way, but that one was cool. I'm going to sand off the atari logo and the fine print on the right there. Adhesive rubber will go in the remaining rubber pad trenches, then there will be two slightly more raised rubber pads at the end of the trenches for "stand mode".


And, as promised, it does in fact come apart into two clean bits. It was such a pain to get the positioning just so. Even a slight angle on one side meant it wouldn't separate without some twisty fuckery.


So far my plans for the Liinx are pretty cemented, but if anyone has any cool ideas, now's the time. Once it's painted I'm not changing shit.
what kind of epoxy putty are you using ive been looking for that type
 

Stitches

2 and a Half Dollarydoos
Staff member
.
.
Joined
Feb 5, 2017
Messages
3,859
Likes
3,027
Location
Banana Bender Land, Australia
Portables
6
what kind of epoxy putty are you using ive been looking for that type
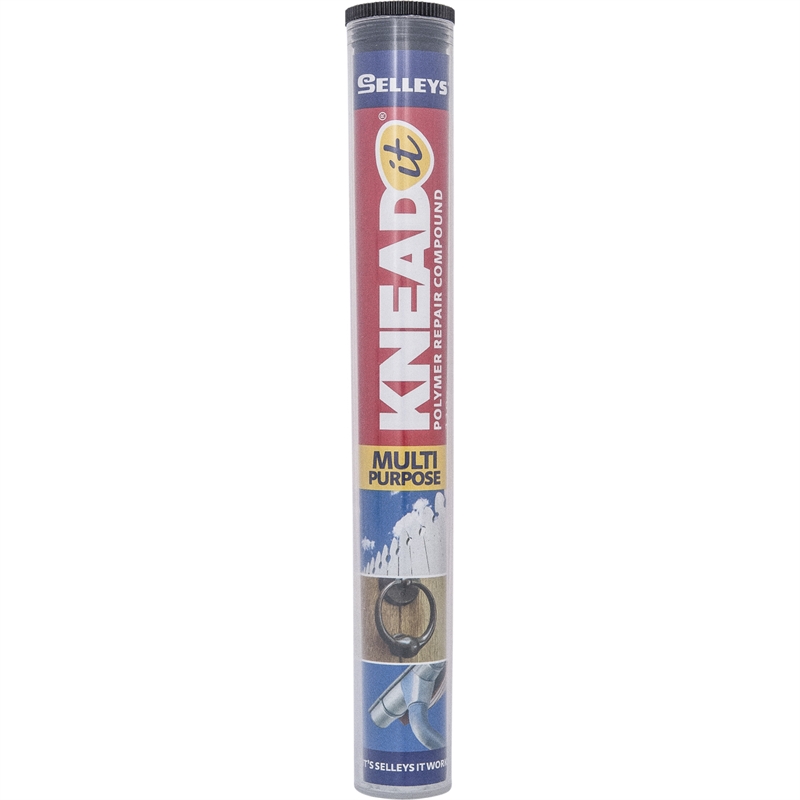
Selleys Knead-It Multi Purpose Polymer Repair Compound. It's good shit, but wear some rubber gloves while handling it unless you like leaving epoxy fingerprints on EVERYTHING you touch for the next day.

Pull out the tube, chop, peel off the plastic wrap, mix the fuck out of it, you now have playdoh for about 3 minutes. After 3 minutes it goes hard as a rock, and can be sanded after an hour. Don't get the steel one though, it's way harder to sand.

This Portable 0/10 for not using Tesla Batteries from your dad's model S
badically copying fiskers man get you're own ideas
Fuk off guys my dad works for Nnitendo and can ban your club pengiun acounts.
 
Top